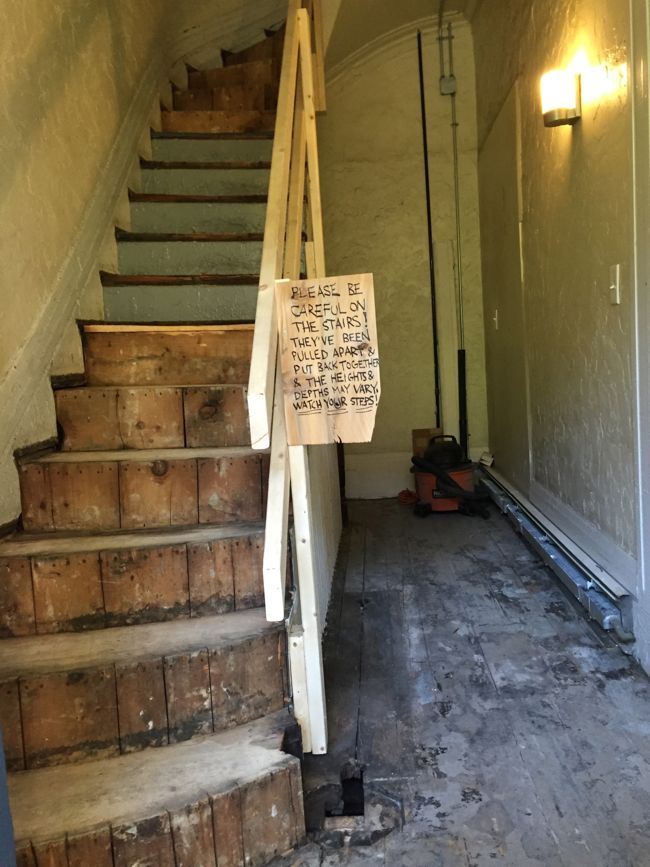
Over the past two weeks, the stairwell has been reduced to a grimy construction site. But somehow, each day that I came home this week and walked through the front door, I thought that the space looked better than I’ve ever seen it. The stairwell has been stripped back to its bare bones. The dingy vinyl flooring, the chipped and sagging stair treads, the balusters caked with dozens of layers of cracked paint – all of it’s gone. And there’s something satisfying about that; it feels like a sorely needed fresh start for this well-used, more-than-160-year-old space.
When we left off last time, I had just finished pulling up the vinyl flooring and plywood underlayment in the entryway. Once the plywood was up, I noticed some patches of old, gray paper stuck to the original pine floorboards, but I figured the flooring guys would have no problem sanding off the paper while refinishing the floors. It wasn’t until later that it occurred to me that this old paper could contain asbestos. And the more I looked into it, the more it seemed like the paper was the backing from an old linoleum floor that had since been removed. And the information I found online about asbestos content in old linoleum backing paper ranged from ‘almost certainly contains asbestos’ to ‘definitely contains asbestos.’
So much for sanding off the paper, I thought. But just to be sure, I mailed a sample of the paper to an asbestos testing lab, and a few days later I got the results back – no asbestos. So I guess even if everyone tells you that a certain building material contains asbestos, it’s worth actually having the material tested. Especially considering that the test only costs $20-30 and takes about a day plus shipping time.
While I was worrying about asbestos in the floors this week, our contractor, Gregg, got started rebuilding the stairs. At the beginning of the week, he installed a new stringer against the wall along the straight section of the stairs. The new stringer wasn’t installed for structural reasons, but instead will provide a surface for attaching the new treads, since the original stringer is buried in the wall. You can see the new stringer here on the left:
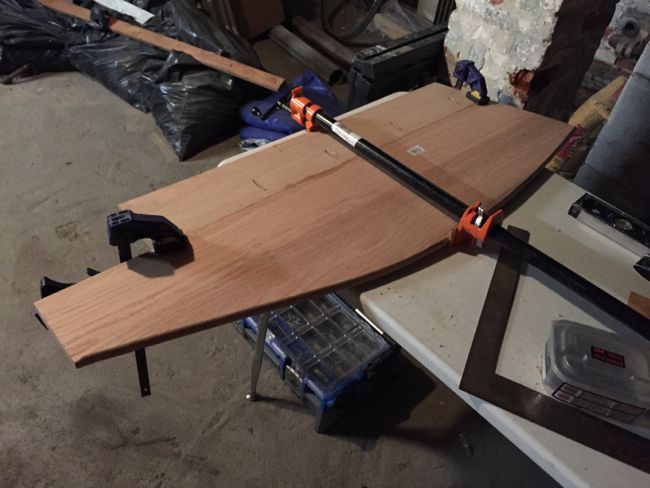
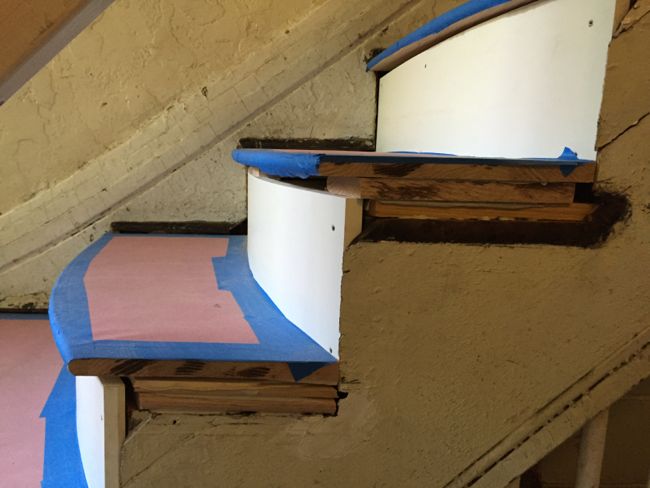
The first five steps are curved, and Gregg spent most of the week custom milling treads to fit the curvature of the original stairs. We’re replacing the old, pine stair treads with new, pre-made, red oak treads. But the new, pre-cut treads are rectangular. So to make each of the curved treads covering the first five steps, Gregg cut two of the pre-made treads into the correct shapes, used a router along the curved, front edge of the tread to recreate the rounded, bull-nosed front, and finally glued the front and back sections of the tread together. Here’s the tread for the first step clamped and glued and awaiting final installation:
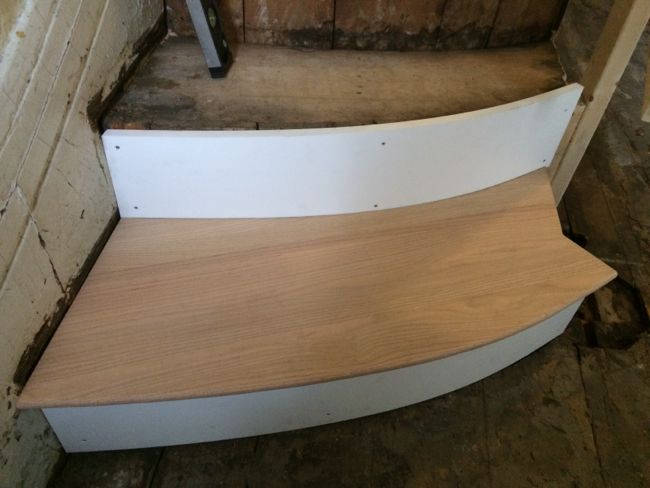
And here’s the first tread after it was installed, photo courtesy of Gregg.
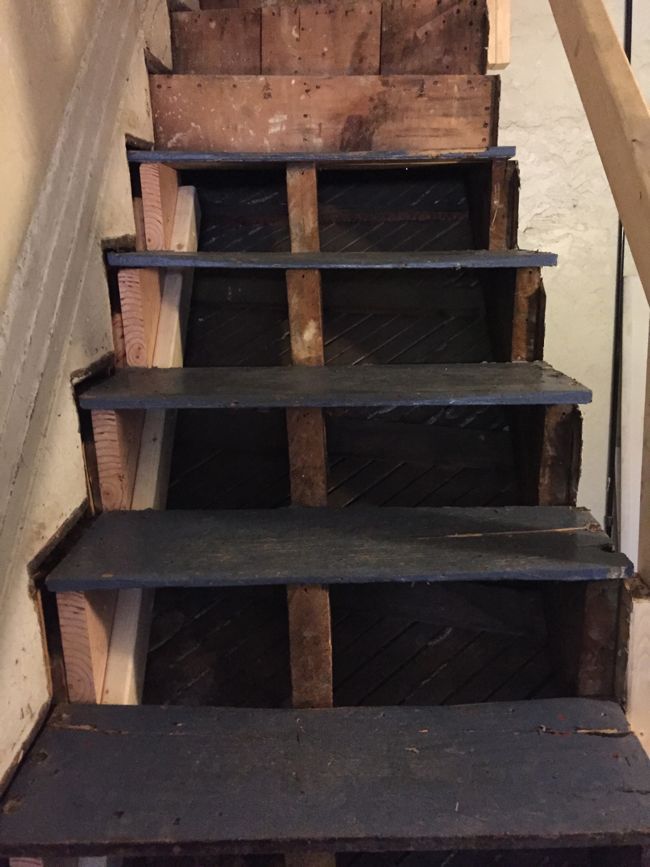
 Gregg used flexible vinyl boards for the curved risers. The vinyl easily conforms to the contours of the original, underlying, curved substructure. And once it’s patched and painted, it will be indistinguishable from the surrounding wood trim.
Gregg repeated the process of cutting, gluing, and installing curved treads for the next four steps. Each step is a slightly different shape, so it was a time-consuming process.

After installing each tread, Gregg covered it with rosin paper to protect it until I get around to staining and finishing the treads. The stairs are so out-of-level that the new treads are shimmed about an inch and a half on one side to make them level.
Now that most of the complicated, curved steps are out of the way, the re-treading process should move along more quickly – most of the remaining treads are more straightforward rectangle or triangle shapes.

You are such an interesting writer. I enjoyed your AT remodel and waited for each new installment. This is quite the project. Not having the resources to do this to my own old fixer-upper, I appreciate seeing the craftsmanship needed to do a proper restoration. You were very lucky when you found Greg. Keep us posted.
Thanks Kathleen, hopefully this project will be a little quicker than the kitchen!
I so enjoy living vicariously through your projects on a much older (by about 90 years) structure than I live in. Also, your neighbors/fellow owners are lucky to have you!
Gregg’s going to fix the ‘different heights’ issue?
I have a 1920s bungalow and the stairs to the old sleeping porch (now second bedroom) are definitely differing heights.
Yes, Gregg will make sure that the new treads are level and evenly spaced. The old stairs were way out of level, and, because of wear to the treads and careless repairs over the years, each step was a slightly different height, a definite tripping hazard! But we’ve gotten so used to the uneven stairs that we’ll probably be tripping over the new, level stairs until we get used to them!
I need a Gregg – I’ve fallen “up” stairs more than once due to the different heights. It’s something I’ll need to address before I sell the place, that’s for sure!
It’s looking really good. I can’t wait to see what the refurbished hand rail looks like! That thing is amazing.
Could you tell me your source for the flexible vinyl boards that you used for the curved risers?
The brand name of the vinyl boards is Azek. They’re available at Home Depot:
http://www.homedepot.com/p/AZEK-Trim-3-4-in-x-7-1-4-in-x-8-ft-S2STrim-PVC-Board-677401/202526979