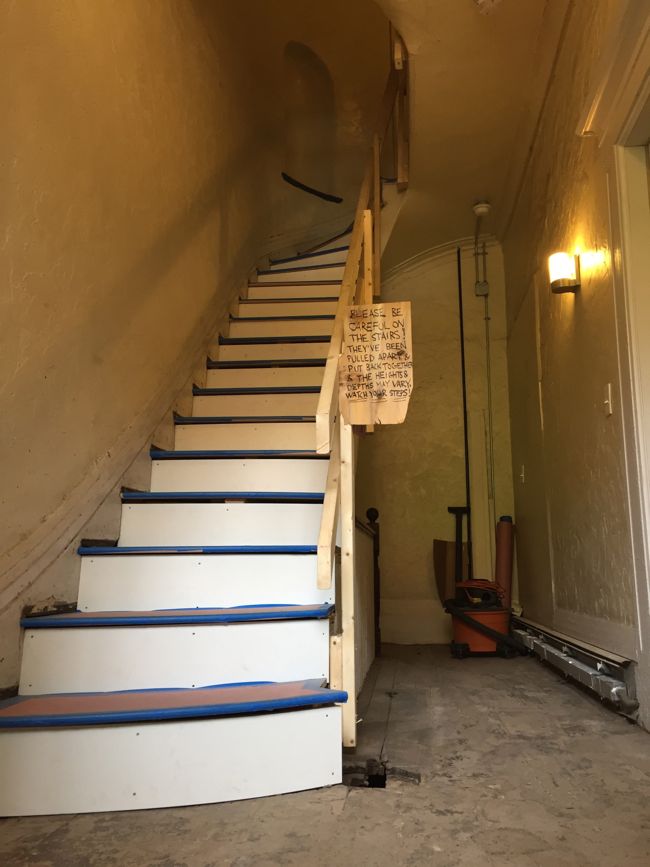
The finished staircase came into focus this week as our contractor, Gregg, finished installing new treads and risers on the first flight of stairs. Gregg spent most of last week custom milling curved treads for the first five steps. But things went more quickly this week as he moved on to a straight run of about eight steps with rectangular treads – instead of cutting the treads into weird, curved shapes and recreating the front, bull-nosed edge with a router, Gregg was able to simply cut the pre-made treads to size and install them.
As Gregg installed one tread after another over the course of the week, it became increasingly obvious just how crooked the old steps had been. As they climbed higher, each step became more crooked than the last, and with new, level treads providing a point of reference, the stairs started to look really wacky.
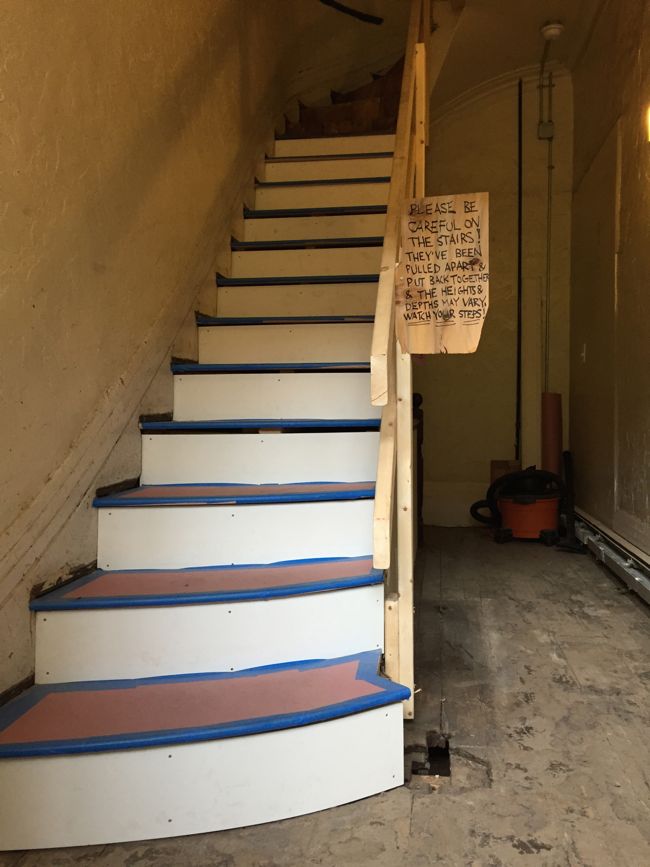
Gregg shimmed each tread, some as much as two inches on one side, and then glued and nailed them into place. The extreme shimming means we’ll have to figure out how to cover the newly-created gaps along the edge of the stairs. Trim will cover about an inch of the gap, but we might have to patch in the rest with some thin pieces of plywood.
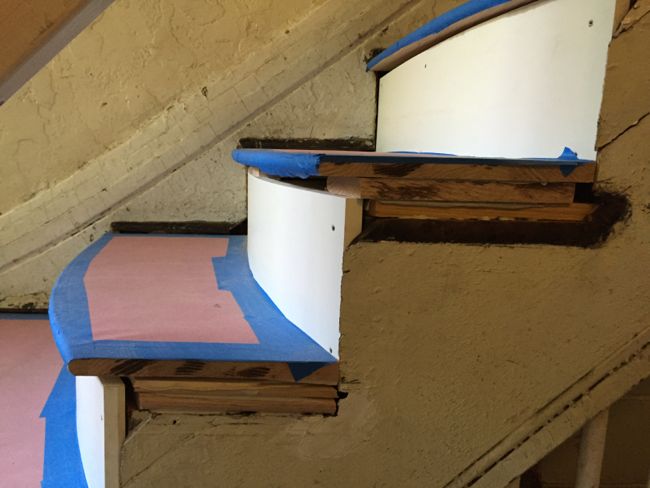
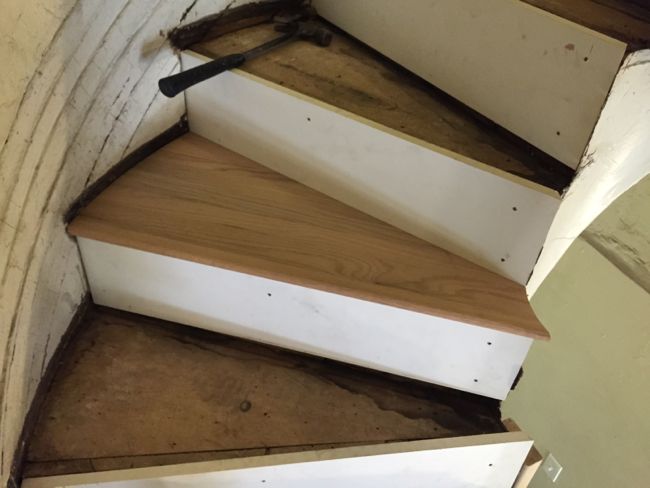
Things slowed down a bit again as Gregg reached the next section of curved stairs near the top of the first flight where the stairs turn the corner to the second floor landing.
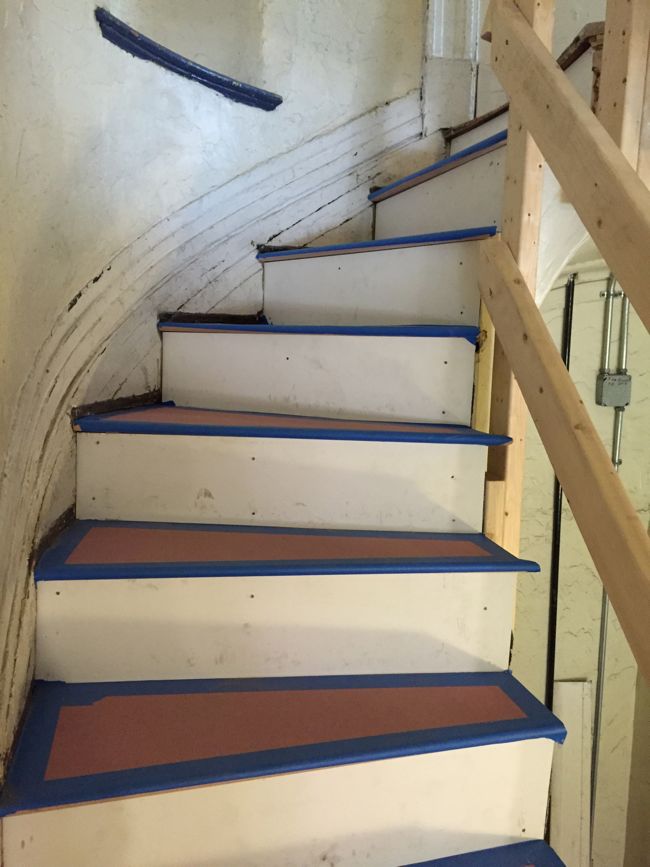
As the stairs curve around this corner, the inner and outer edges of each tread follows the circumference of a giant circle. Again, Gregg had to custom mill each of these treads. The inner edges of the treads in this corner of the stairwell follow a tight curve, so some of these treads are pretty weird shapes.
By the end of the week, all of the new treads and risers were in place on the first flight of stairs.

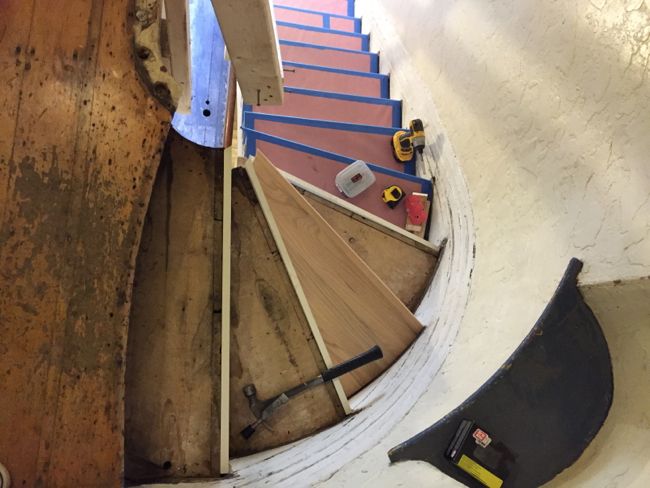
This past weekend I started pulling up the vinyl sheet flooring and plywood underlayment on the ground floor of the stairwell, in our communal laundry area. I used the same pry-bar-and-brute-force technique that I used to remove the plywood underlayment in the entryway. But since it was an unseasonable 80-something degrees last weekend, I only managed to pull up half of the old flooring before deciding it was just too damn hot to keep working. My downstairs neighbor pitched in later in the week (once it had cooled off) and pulled up the rest of the old flooring in an afternoon. With the plywood underlayment gone, we were left with this:

I’m aware that it looks like an awful mess, and you’ll just have to trust me that there are original pine floorboards under all of this. The splotchy gray stuff is the same paper underlayment (possibly linoleum backing paper) that we found under the plywood underlayment in the entryway. I sent a sample of this paper out for asbestos testing at the same time that I had the paper backing from the entryway tested. And like the paper in the entryway, this paper was asbestos free. So we’ll just let the flooring guys sand through it when they refinish the floors.
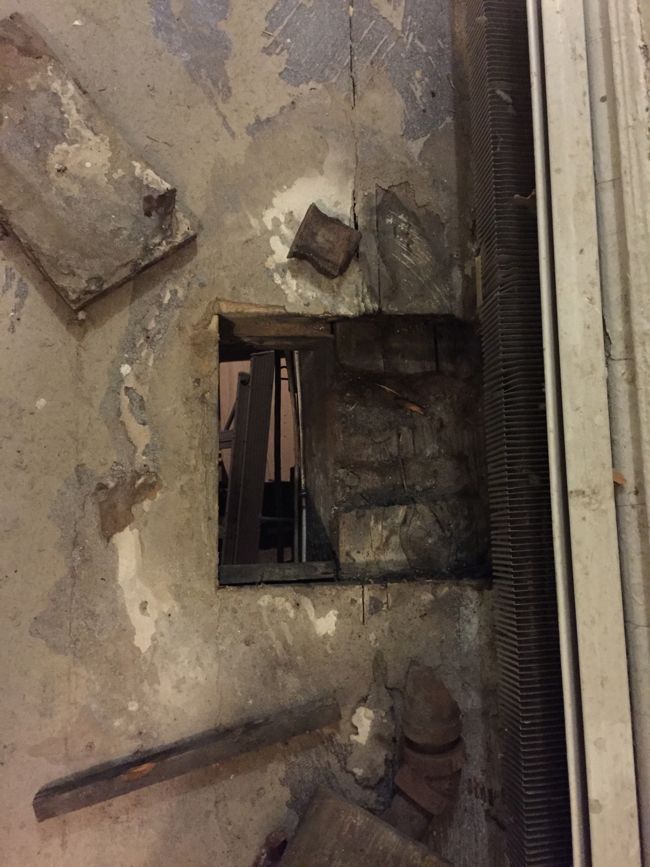
We also uncovered a fairly sizable hole that was cut clear through the original floorboards and subfloor along the edge of the hallway.
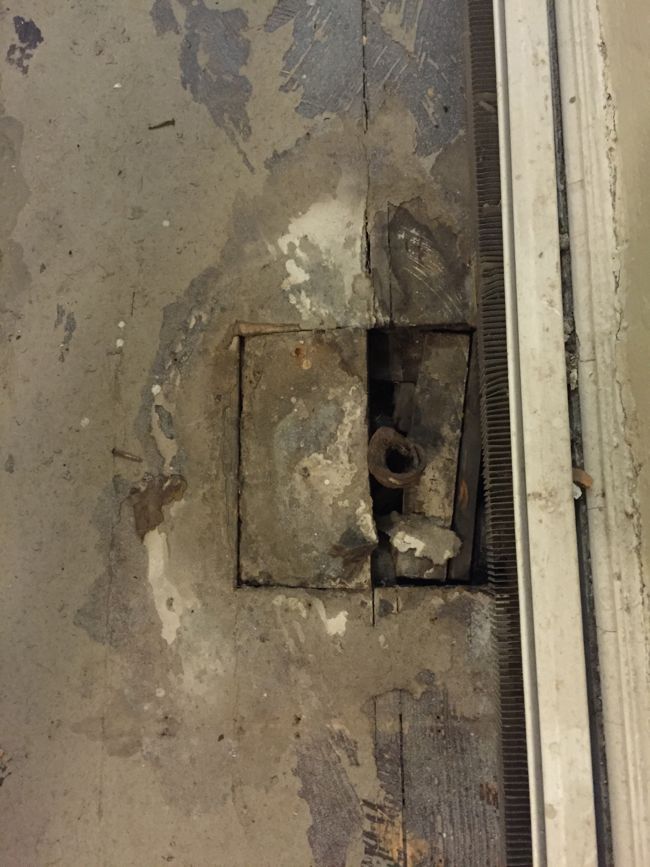
There was a length of cast iron pipe that was not connected to anything and was just sort of wedged into the hole. I’m guessing the pipe used to serve an old steam radiator. I’m not sure why someone decided to leave this piece of pipe dangling here, covered over with a plywood underlayment. Once I cleared out the pipe and a few chunks of unsecured wood, the hole was completely open to the cellar below.
I encountered a similar situation when I uncovered the original floors in the kitchen. I decided to shuffle floorboards around in the kitchen to patch the hole seamlessly. But since this is an entirely utilitarian space where no one spends much time, I’ll probably just patch the hole as it is.
Gregg will tackle the second flight of stairs next week, and I’m hoping to get started cleaning up the original handrail and newel post.
I’m so glad Gregg and you found each other. You both appreciate the details and respect the original craftsmanship. Thank you for not taking shortcuts or cutting corners.
Wow, those stairs have a tight radius! I’m in awe of you for getting furniture up it!
As far as the hole in the basement floor. Is there any way to patch in with matching flooring? Maybe salvage a length from under where the laundry equipment is? It’s in such an open space that it would bug me with every load – but that might just be me LOL.
Moving furniture upstairs was definitely a challenge! But I had years of experience after living in old, walk-up tenement buildings with even tighter stairwells.
My current plan for the laundry area floor is to use one of the treads or risers that Gregg removed from the stairs to patch the hole. It will still look like a patched hole, but the wood should be a pretty good match (the floorboards and the old treads/risers are both pine planks of a similar age), so hopefully it won’t stand out too much.
I’m Australian and just did the conversion on 80ºF… and giggled a bit! Anyway, it’s nice to see you still posting here and as always, the methodical way you and Gregg work is a pleasure to read about.
Haha, yes I imagine New Englanders and Australians have very different ideas about what constitutes hot weather. Although to be fair, we probably have different ideas about what cold weather is as well – I spent some time in Adelaide as a little kid, and I seem to remember Australians bundling up in thick sweaters/jumpers when the temperature dropped to 20C or below, which is still solidly in the t-shirt weather range here in New England. Thanks for following along!
I’m originally from Adelaide, and it’s true we have zero tolerance for chill at all! : )
Love the shapes of the treads. That photo from above almost makes me dizzy. Can’t wait to see the railing restored … how in the world did they design that back in the day?