 A few months ago, I sold my old sofa on Craigslist. When the buyer came over to pick it up, I buzzed her in, and as she walked inside she turned to her husband and exclaimed, “Oh! It’s all old inside!” She seemed genuinely shocked by the state of the front stairwell. Maybe she had unrealistically high expectations for the building’s interior after seeing the exterior (including the newly repaired and repainted front door). Or maybe her expectations were neutral and the stairwell just looked so crappy that she felt the need to say something. I was still upstairs at the time, so I don’t think she realized I heard her, but I wasn’t offended anyway. In fact, I remember having a similar reaction the first time I walked into the building when I was thinking about renting my now-condo, although I didn’t say anything out loud. In the two years since I first saw it, I’ve gotten used to the run-down state of the stairwell. But every now and then I pause and really look at it, and behind the dull paint, dim lighting, and chipped stair treads, it’s actually a really beautiful space. The original architecture is more or less intact, and like so much of the rest of the building it has a lot of Potential.
The stairwell is a common area in the building, so it falls under the purview of the condo association, which consists of me and the owners of the other three units in the building. We’ve neglected the stairwell for the past few years in favor of more pressing maintenance projects, but this winter we finally decided to invest some time and money in the space. Let’s take a look at the current state of the stairwell and some of the changes we have planned for it.
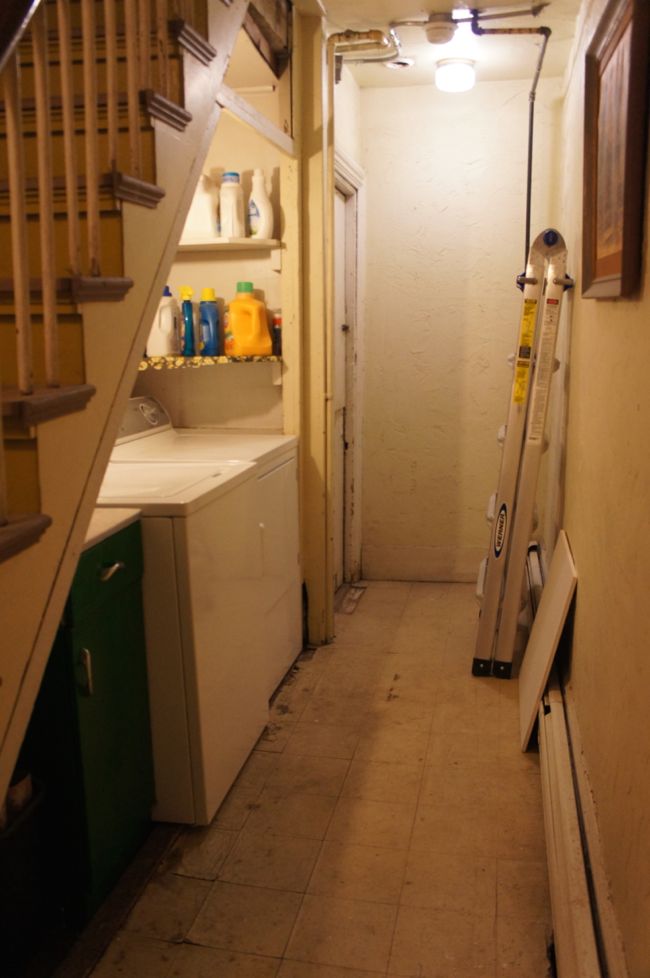
This is the ground floor of the stairwell, one floor down from the main entranceway. This narrow hallway serves mainly as our common laundry area. The washer and dryer are tucked underneath the stairs, which is an efficient use of space. The door on the left at the end of the hallway leads down to the cellar. The washer and dryer are only a few years old, but every other aspect of this little hallway is in rough shape. I’m pretty sure it hasn’t been updated, or even maintained, since the 60s, and it’s seen some heavy use over the years. The linoleum floor tiles, which are beginning to crack and peel, are stuck directly to the original pine floors. I’d love to pull up the linoleum tiles someday and refinish the original floors, provided the tiles aren’t full of asbestos. It’d be nice to spruce up the laundry area as well with some fresh paint and some new shelving.

Of all the problems in the hallway, the one that requires the most immediate attention is the ceiling. A big section of plaster in the center of the ceiling is detached from the underlying lath. The plaster has cracked under its own weight, and at its worst point, the ceiling is hanging down about three inches below the lath. It’s a pretty precarious situation, and there’s a very real risk that a big chunk of plaster could fall on someone’s head without warning. So needless to say, I’m planning to fix the ceiling asap. I’ll try to reattach the existing plaster to the lath, and if that doesn’t work, I’ll strip away the loose plaster and replace it with sheetrock.

Moving upstairs to the first floor, this is the view looking toward the building’s main entrance. The first thing you’ll notice is that this space is really dark. Since the stairwell is located in the center of the building, it doesn’t get much natural light, which means we keep the overhead lights on most of the time (we should really install a motion sensor light switch). It also means that this space doesn’t photograph well. But at this point, the dim lighting might be for the best. It helps disguise the fact that every wall in the stairwell has been slathered in a chunky textured plaster treatment. Combined with the dim lighting, the textured plaster walls gives the stairwell a cave-like appearance that is completely at odds with the space’s original architectural elements. Eventually I’d like to skim coat all of the stairwell walls to a smooth finish. It will be a big job, but it will make a huge difference. And luckily, the walls seem really solid – unlike most of the original plaster walls in the rest of the building – so there won’t be any extensive plaster repair needed.
A few other things I’d like to change on this level: The flooring consists of vinyl sheeting on top of a quarter-inch plywood underlayment. I’m almost positive that the original pine floors are hidden under the vinyl and plywood, and I’d eventually like to uncover and refinish them. Of course, there’s some risk involved in uncovering the original floors, since we won’t know what condition they’re in until we’ve torn out the current flooring, but I think it will be worth it. Also, the trim around the entrance way is inexplicably painted red, but that’s nothing that can’t be taken care of with some white paint and a lot of primer. And once I get around to painting the walls, I’ll also paint the exposed gas line and electrical conduit to match. I’d also like to replace the wall sconces with something brighter and more attractive.

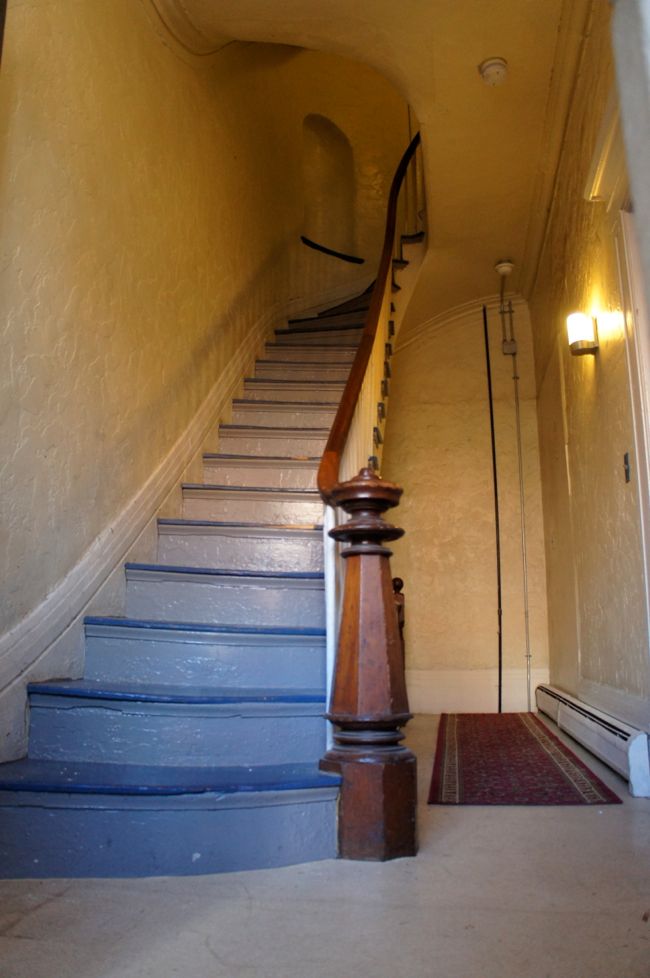
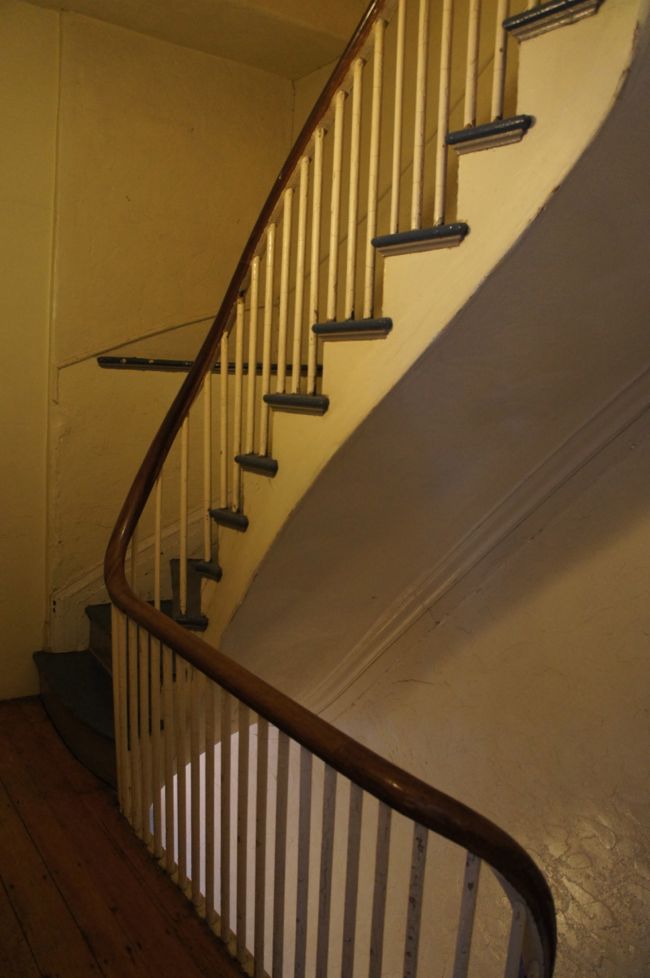
This is the view of the main staircase as you enter the building. There are a lot of impressive, original architectural details here – the newel post, the handrail, all of the curved trim and plasterwork – but there are also a lot of problems. I can’t count the number of times I’ve had friends over who have noted that the stairs are “kind of scary,” or asked “are these stairs safe?” Since I walk up and down these stairs a few times a day, I’ve gotten used to them. But the truth is, these stairs aren’t as safe as they could be. It’s not that the stairs are in danger of collapsing (trust me, we’ve had several contractors reassure us on this point), but the stairs simply don’t meet modern code. Since they’re so old, they’re not required to meet current code, but at the same time building code exists for a reason. The stairs are narrower than most modern stairs, the handrail is significantly lower, and the steps themselves are uneven, all of which adds up to a trip and fall hazard.
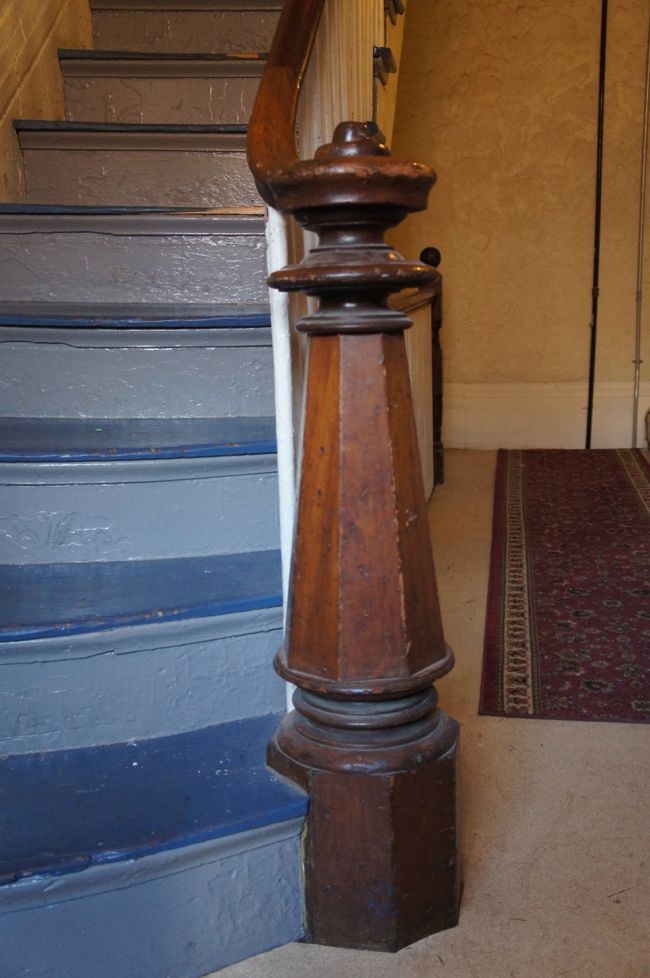
So we’re bringing my contractor, Gregg, in to address some of these problems. He’ll replace and level all of the stair treads, replace all of the balusters, and raise the existing handrail a few inches. In order to raise the handrail, he’ll also have to raise the newel post, probably by putting some sort of inconspicuous blocking under it.

The current stair treads are pine, which is a soft wood that wouldn’t be expected to last more than a few decades in this application. As you can see, many of the treads are chipped and cracked, and some of them have deep grooves worn into the center by decades of shuffling shoes. The current plan is for Gregg to replace the old treads with more-durable hardwood treads.
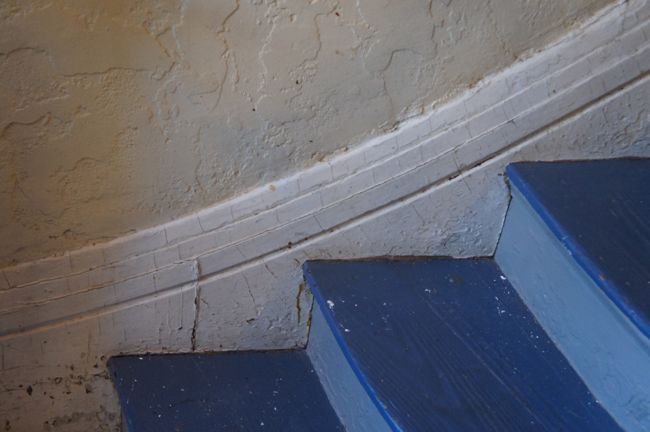
Here’s a closeup look at one of the textured walls. Besides looking crappy, all the nooks and crannies on the walls collect a ton of dust – I’m not used to having to dust vertical surfaces. Below the wall is a really cool baseboard that curves upward, following the pitch of the stairs. The baseboard and a lot of the other woodwork in the stairwell is in rough shape. It’s covered in countless layers of cracked and chipped paint. Ideally I’d like to strip off all of the old paint and start fresh. Since most of the old paint here likely contains lead, the safest way to strip it is using a wet chemical stripper. But stripping the paint with a chemical stripper sounds like a lot of work, so it remains to be seen if I actually end up doing it.
 On the way up to the second floor, there’s a rounded nook built into the curved corner of the stairwell. Apparently these nooks were pretty common in 19th century row house stairwells. They’re sometimes called coffin corners, a name that originates from the misconception that these nooks were built to provide extra room for pallbearers to maneuver a coffin down the stairs. In reality, these corner nooks were built as display shelves for decorative items like a vase or statue. Someday, I’d like to use this little nook as it was intended and put a large vase in it for fresh flowers.
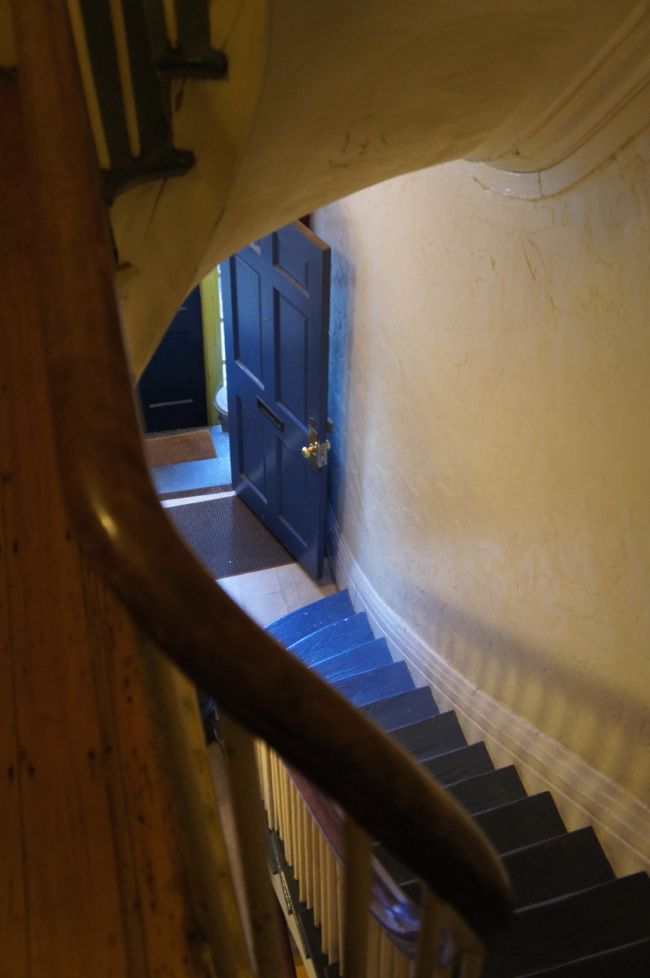
 Here’s the second floor landing, right outside my condo. It’s a narrow, dimly lit space. The original pine floors are intact and exposed here, but they desperately need to be refinished – the finish is worn down to bare wood in spots. The curved railing continues up to the third floor, so when Gregg raises it he’ll have to do it as a single piece. The stairs up to the third floor are more of the same – worn stair treads that need replacing, and lots of textured plaster.
Right now, the front stairwell isn’t pretty, but someday it’ll look great. Gregg is set to start working on it next week, so stay tuned for updates.
The curves of the stair walls and ceilings and the wood railings are so gorgeous. This stairwell deserves to be beautiful! Fortunately, it’s in good hands.
Wow, that is some “before.” The “after” should be amazing!
So looking forward to this renovation. It’ll be fun to watch.
You mentioned replacing all the bannisters, and I hope that doesn’t include the Newel Post. If it does, please say you’ll keep it in your condo as an architectural relic. It’s so freaking lovely.
Agreed, the newel post is probably my favorite part of the stairwell, so it will definitely stay if I have anything to say about it. When Gregg raises the handrail, the current plan is to raise the newel post along with it by putting some kind of blocking under it.
Glad you thought ahead to that. It would be a shame to lose it.
My thought on the first picture: “Oh, MY, that’s BEAUTIFUL”. You’re so right about there being a lot of potential in that stairwell!!!!
Not sure if you are following Daniel Kanter over on Manhattan Nest? ( manhattan-nest.com ) Really amazing info on crumbling plaster! Think plaster BUTTONS! Hope this helps 🙂
Yes, Manhattan Nest is great! I used construction adhesive to reattach loose plaster on my bedroom walls with good results. But since the stairwell ceiling is fighting gravity, I’ll probably go with plaster buttons.
Looking forward to watching your progress!
You have your work cut out for you. So much potential buried here. I look forward to seeing the results.
Your kitchen project was a huge inspiration to me and this project might give me the kick I need to tackle the horrible, textured laundry/entrance area to my rental suite.
Good luck!
Oh gosh, how pretty. I love the curved railing and baseboard. The chemical stripper for lead paint is slow, but effective and SO worth it. You get all the small, intricate details back that were covered by all the paint layers.
Hi Dan!
Great job working on your condo. I’ve been following the kitchen renovation on AT therapy is well. The hallway looks very interesting as it seems to exhibit transition from Greek Revival to Italianate. Too bad someone decided to slap texture on those walls.
I’m actually just a mile away, in Eagle Hill. I’m restoring Greek Revival house as well(slightly more modest than yours)
Vitaliy