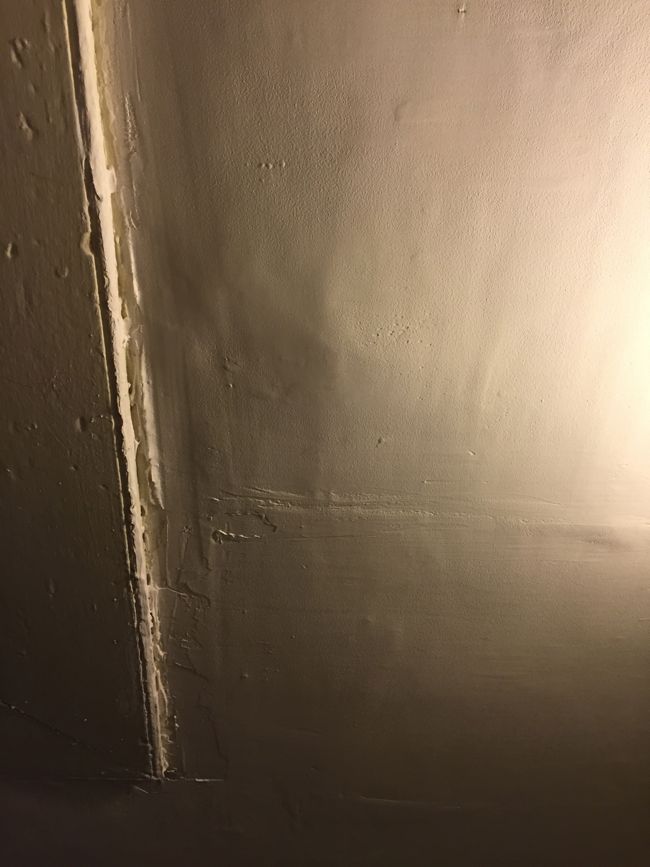
A week and a half ago, I had just started repairing the plaster ceiling in my building’s common laundry area on the ground floor of the stairwell, and things weren’t going well. After drilling a dozen holes in the ceiling, I hadn’t found a joist. Each new hole I drilled created a little cascade of plaster dust and loosened the surrounding plaster even more. I would later discover that the ceiling joists in this part of the stairwell not only run in the opposite direction from what I had expected, but are also spaced at irregular intervals.
Last year, I used construction adhesive to repair the loose plaster walls in the bedroom, which worked well and seems to be holding up all these months later. But since a large portion of the ceiling in the laundry area had completely detached from the lath, and was fighting a losing battle against the forces of gravity, I decided to use plaster buttons to reattach it to the lath.
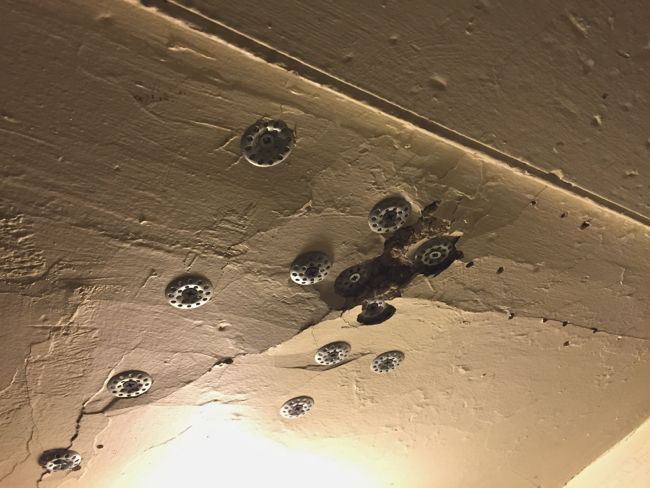
Plaster buttons are special washers that can be used with screws to secure plaster to the underlying lath. The idea is that the plaster button distributes the pressure from the screw and prevents the surrounding plaster from cracking. Then, once the plaster is secure, the plaster buttons can be hidden with a skim coat of plaster or joint compound.
I began working in a corner of the ceiling where a small section of plaster had come loose. To fully support the weight of the ceiling, it’s best to screw plaster buttons directly into a ceiling joist. But as we’ve already established, joists were hard to come by in this corner of the ceiling. So instead, I settled for screwing the plaster buttons into the lath. But as I tightened the screw on the first plaster button, the entire plaster button punched through the crumbly plaster. The plaster in this area was so soft that it seemed to be held together by the ceiling paint and little else. I did my best to gently secure the surrounding plaster with more plaster buttons, but in the end I was left with a mess.
I decided to leave the hole I had created in the ceiling for the time being and moved on to the ceiling’s main problem area – a roughly 3 foot by 4 foot section of cracked and buckled plaster that seemed ready to collapse at any moment.
When I tried pushing the loose plaster back into place, I discovered that a bunch of plaster chunks had gathered above the loose plaster, preventing it from sitting flush against the lath. The loose plaster also had the consistency of damp cardboard, so I decided to pull it all down and replace it with sheetrock. I used a utility knife to cut a line between the loose plaster and the stable plaster to prevent any damage to the stable parts of the ceiling, and to keep the area of missing plaster as square as possible so that it would be easy to fill in with sheetrock later. And then I set about peeling the old plaster away in big chunks.
Every time I remove old plaster, I think I’ll be able to contain the dust, but it never works out that way. I did my best to set up plastic drop cloths to seal off the floor and the washer and dryer. But as I pulled down the ceiling, I was showered in sandy plaster dust, which I expected, and a thick black grime of unknown origin, which I did not expect. It seemed to be the sort of black dust that tends to accumulate in cities. It must have settled in the space above the ceiling during the century-and-a-half since the ceiling was installed. Some of the dust that rained down on me probably originated in Industrial-Revolution-era coal fires. I could really feel the history. Fortunately, I was wearing a respirator, so I wasn’t breathing in the history.
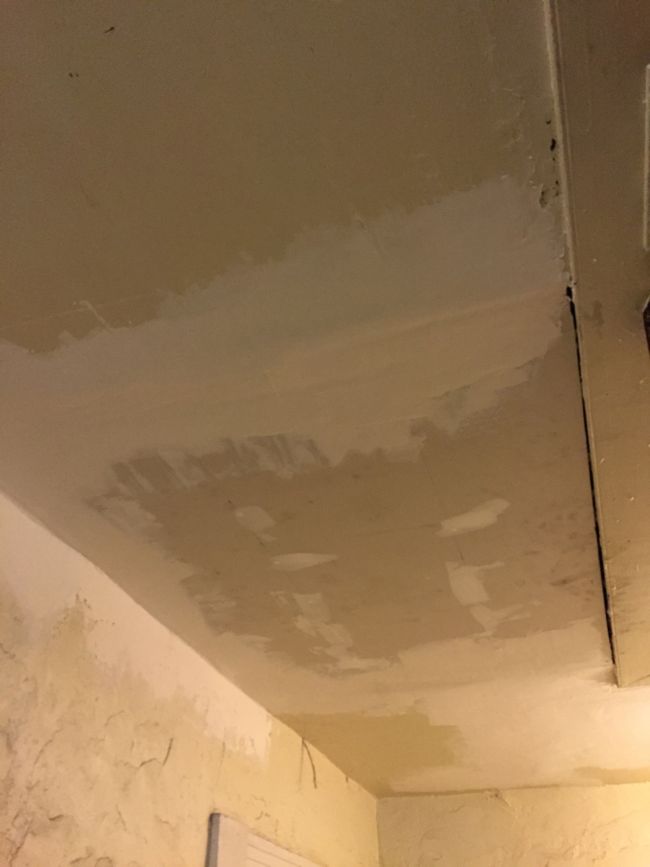
After a shower and some intensive shop vaccing, I went out and picked up a sheet of 3/8-inch sheetrock, which is about the same thickness as the existing plaster. I used a 3-foot by 4-foot panel of sheetrock to fill in the area of missing plaster. I screwed the sheetrock directly into the ceiling joists, which of course were now easy to find since I had completely exposed them.
Once the sheetrock patch was up, there was a half-inch gap between the existing ceiling and the new patch. I covered this gap with drywall tape and a 50:50 mixture of joint compound and plaster of paris, sometimes called hybrid plaster. The plaster of paris acts as a hardening agent, while the joint compound keeps the mixture smooth and workable. This hybrid plaster hardens in about 10 minutes, which meant I had to work quickly using small batches of plaster, but it also made it possible for me to apply two coats of plaster in one day. And unlike joint compound, the hybrid plaster doesn’t shrink as it dries. If you’re interested in mixing up some hybrid plaster yourself, this guy on youtube will show you how it’s done.
As for that disastrous section of the ceiling that I filled with holes and plaster buttons, I was able to pull away some of the loose plaster and re-plaster over the whole mess. Although it still needs touching up, this section of the ceiling now looks much better and feels reasonably solid.
The ceiling is now almost ready for paint. All that’s left is to touch up a few spots with another coat of joint compound and some light sanding to smooth everything out.
As you may have heard, we’ve gotten some snow here in Boston over the past few days. There’s over five feet of snow on the ground as of today, which means that sidewalks have been reduced to slippery, single-file trenches, and the time-honored Boston tradition of using overturned trash cans and folding chairs as parking space savers in the days after a snow storm is threatening to become a permanent practice. It also means that Gregg hasn’t been able to get started working on the front stairs. But assuming it ever stops snowing, I’ll share some more progress on the front stairs.


Wow, Dan, you are so brave. When I look up at my ceilings, I just cringe at the thought of trying to repair them and have put it off forever. I’m hoping that reading about your ceiling and front door projects will inspire me. Thanks!
Oh man, I hope that history felt good. 🙂 I’ll be tackling some plaster repair this spring (after replacing some windows) so I’m looking forward to reading all your tips and tricks.
Good call on saving what plaster you could and a nice patch job! Once you have it all sanded and primed, it should look fantastic!
(Crazy snow picture!!!)
Ask This Old House tackled this project today: http://video.pbs.org/video/2365425470/
Thanks for sharing this! It’s reassuring to see that my ceiling repair was pretty similar in approach to Tom Silva’s (although using strapping boards to temporarily support the ceiling while putting the plaster buttons in is a neat trick). And it’s also reassuring to see that the ceiling he was working on looked almost as crappy as mine before skim coating.
[…] finished repairing the ceiling on the ground floor of the stairwell. I’ve been working on this ceiling off and on for what seems like forever – adding more joint compound here and there, sanding, […]
It’s in fact very difficult in this busy life to listen news on Television,
so I only use the web for that reason, and take the most recent news.
So as the seller you do not need to make any repairs and fiund
to sell your house ass fast as most likely.
Fast home selling bbecomes necessary at schedules. Nearly Double Digit ROI
percent.
It sounds like it’s best to leave ceiling repairs to the pros. Pulling down all of the plaster and putting up the Sheetrock sounds like a ton of work! I just don’t trust myself to fix our ceilings in the basement.
Well, it depends how much tolerance you have for making a huge mess tearing down old plaster, and how much patience and experience you have with taping and mudding sheetrock ceilings. Pros will almost certainly get the job done faster, and it may not even be all that expensive depending on how big an area you need to repair. Good luck!
Thanks for your comment about how you should use plaster buttons in the joists. I didn’t know that you could also screw them into the lath. My husband wants to look into plasterboard ceiling repairs for our dining room, but since he lacks the expertise and tools, we are considering contractors.
Thanks for pointing out that hybrid plaster hardens in about 10 minutes. I have some cracks in my plaster ceiling, and I’m not sure I can work quickly enough in 10 minutes to apply small batches of plaster when doing repairs. Perhaps I’ll find a professional that specializes in plaster supplies to help me fix my ceiling.
You did a great job mate!
You are right about the hybrid plaster hardening in about 10 minutes. Hence, the work has to be attended with sheer smartness and patience. I can see you managed it very well.
Kudos!
I have restored both plaster walls and ceilings with a product that is DUSTLESS so made my life much easier! I have no financial interest in the product, I merely pass it along to make others’ lives easier.
It is called Master of Plaster and is made in Landrum, South Carolina. It is NOT cheap, but boy does it make plastering easy! And my walls looked so good my carpenter has started using it and said my walls were a level five, whatever that is!
Thank you for sharing this informative article