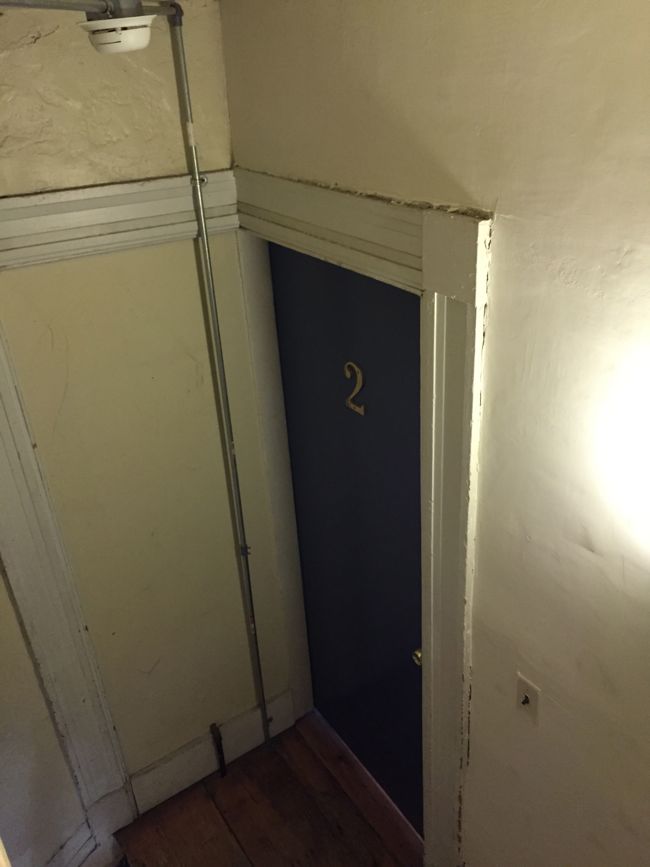
The original newel posts and handrail might be the most impressive part of the stairwell. They’re constructed from tightly-grained, solid walnut. The handrail twists and winds its way up a curved flight of stairs and across a landing before doubling back and climbing a second flight of tightly curved stairs, terminating at a small newel post on the third floor. Although it was fabricated in several sections, once assembled, the handrail looks like a single strip of undulating wood. Just how craftsmen wrought this sinuous, fluid form from solid wood over 150 years ago using only hand tools remains a mystery to me.
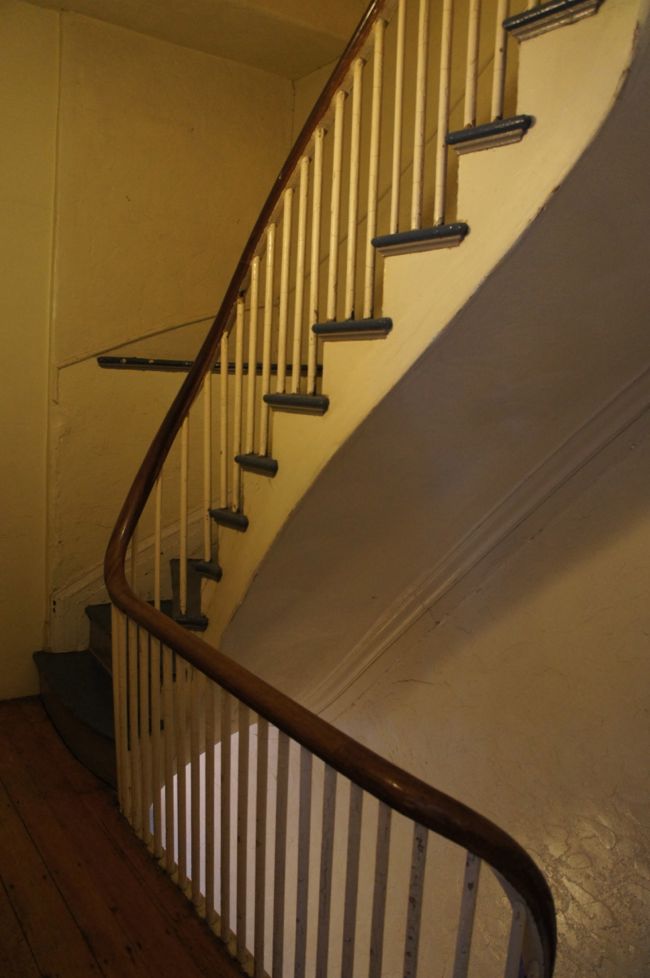
In any case, the handrail seems like an irreplaceable part of the stairs. Or, at least, it would be so expensive to replicate that it may as well be irreplaceable. Even so, it’s gotten pretty dirty and dinged up over the years, and I felt like I should do something with it while it’s disassembled. But I didn’t want to remove all of it’s character by, say, sanding it down to bare wood. Cleaning it seemed like a good place to start.
But after wiping down a short section of the handrail with soapy water, it was still coated in some sort of dark, gunky grime. “You’d be surprised at how much skin grease builds up on stuff that people touch” my brother, who works as an art conservator, explained when I asked him how best to proceed with the handrail. I was worried about messing up the original finish, which I assumed was an old varnish or laquer, if I used a harsher cleaning agent to remove the grease and oil that had accumulated over a century-and-a-half of people running their hands over the railing. My brother recommended low VOC mineral spirits, which should dissolve grease and wax without disturbing the original varnish. Here’s the handrail before I started cleaning it:
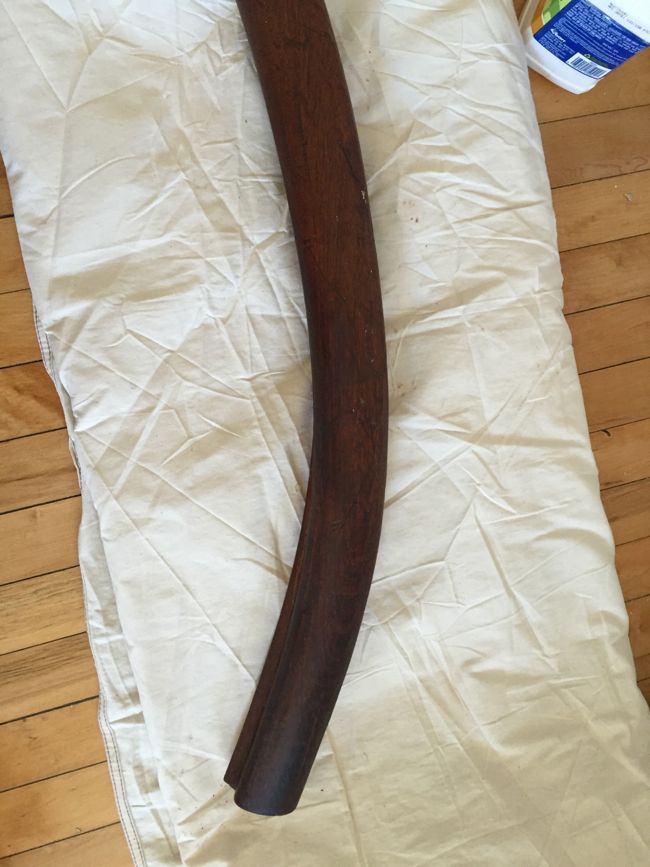
As I wiped down the same small section of handrail with a rag soaked in mineral spirits, the rag picked up a surprising amount of dark brown-black gunk. As the mineral spirits evaporated, I realized that there wasn’t any finish left on the handrail – I had cleaned it down to bare wood.
This might mean that the original finish was just paste wax that dissolved in the mineral spirits. Or, the original finish could have been lacquer, which was degraded by years of exposure to oil from peoples’ hands. Or maybe, the original finish has long since worn away and the current “finish” is just a layer of grime and skin oil.
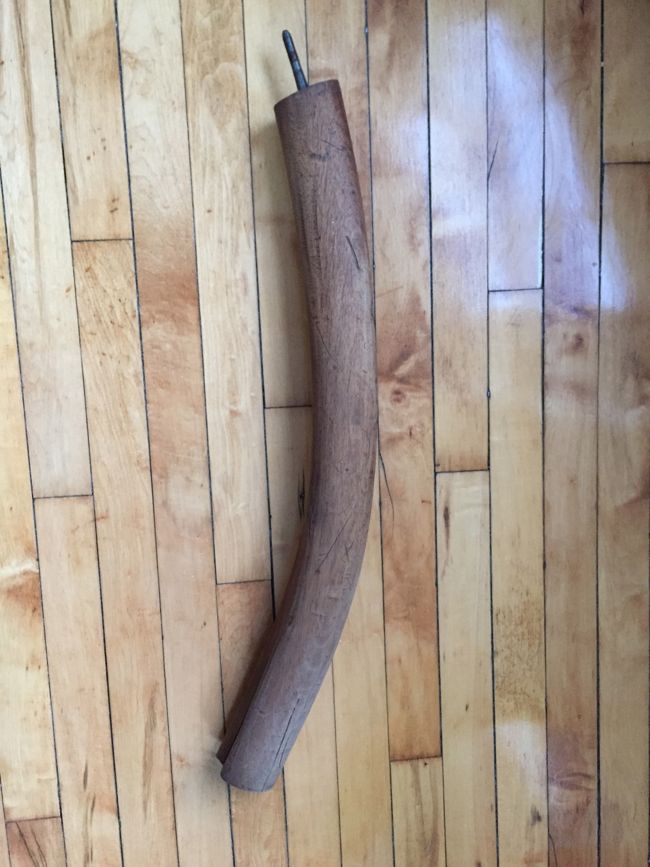
Either way, it seems like the thing to do is to refinish the entire handrail, first removing all of the dirt and grime and any remaining old finish with mineral spirits, and then applying a new finish. It’s looking like the refinished walnut will be lighter than the current finish/dirt, but the grain of the wood will be more visible as well. All in all, I think it will be an improvement, not least because the handrail will finally be clean, probably for the first time in over a century.
Later in the week, Mara and I began skim coating the stairwell walls. The walls are currently covered in a lumpy, chunky, textured plaster treatment that makes the stairwell look like a mine shaft. Here’s a close-up look:
Originally, the walls would have been smooth plaster, like they are elsewhere in the building. Skim coating all of the walls will be a big project, but I think it will make a huge difference in the overall appearance of the stairwell. I started with the wall directly outside the front door to my unit. This wall is one of the few flat walls in the stairwell – most of the walls and even the ceilings are made up of curved plaster work – so it seemed like a good place to start.
As I’ve renovated the condo over the past few years, I’ve done my fair share of skim coating (it kind of comes with the territory when you’re fixing up an old house), and I’ve come up with a skim coating technique that seems to work for me. I use premixed joint compound with a little bit of water mixed in to make it more manageable and to give me some more time before it begins to dry. I start by applying joint compound to a section of the wall with a drywall knife. I get things as smooth as possible with the drywall knife, but I don’t obsess over little marks and ridges. Then, while the joint compound is still wet, I go over it with a magic trowel (which is really just a big, heavy duty squeegee) to achieve a smooth finish. Once I’ve added the last coat, and the joint compound is completely dry, I lightly sand the whole wall before priming and painting. I’ve started to get faster at skim coating, but it’s still a time consuming process. We managed to get the first coat of joint compound on this weekend, but it looks like the stairwell walls will take at least two coats of joint compound to fully cover the lumpy, textured plaster. Here’s current state of the wall – the skim coated wall is to the right, and the wall on the left is still covered in the textured plaster.
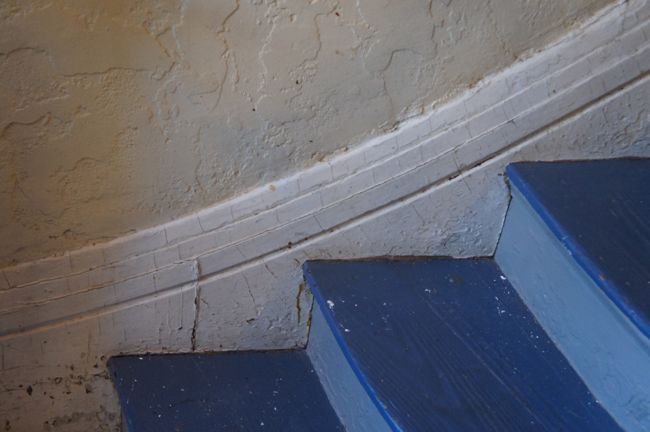
Meanwhile, Gregg continued replacing the treads on the second flight of stairs. By the end of the week, he only had one tread left to go. Here’s a progress shot of the second flight of stairs where you can see just how out-of-level the original treads had become.
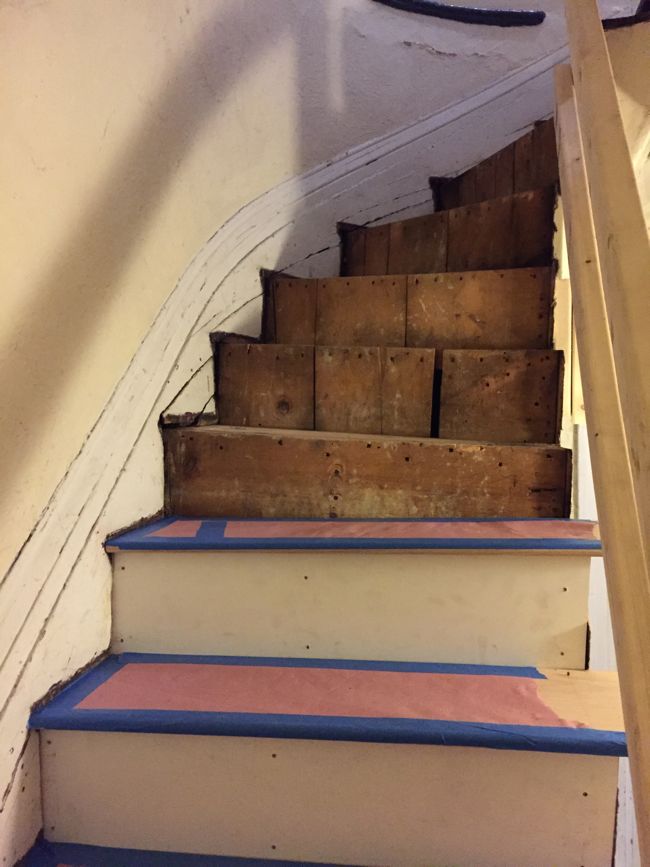

Gregg will finish putting together and installing the last tread at the beginning of next week and then move on to installing trim.
What a work of love. I am fascinated with the work it takes to bring an old house back to life, so many things i would not think about…i mean, electrical, plumbing, roof etc are kind of no brainers, but the work involved in the stairwell is so much more than i imagined. Thank you for sharing your experience!
Agreed, most of the work here involves fixing cosmetic issues. But since a lot of the original craftsmanship was so intricate, it always seems to take longer that I expect to get all of the cosmetic details right.
It is so fascinating to read about your stairwell renovation. I too am amazed that a lovely handrail like yours could be fabricated without power tools of any kind back in the day. I look forward to following your progress this summer! I believe you will have a warm and welcoming entry in the end.
how lucky your fellow residents are to have you there to take this on. amazing to see the hard work and detail in these stairs. Amazing what craftsmen of olden days acheived.
Crazy out of square stairs! And I’m so glad you are going to be able to restore that lovely railing.
And thanks for the skim coating tips. I am going to have to do the upper walls in my bathroom, so it’s timely and seems like something I can tackle myself.
Skim coating takes a while to get the hang of, but it’s definitely a doable DIY project. And even if worst comes to worst, you can always sand out your mistakes once the joint compound dries!