May 132015
 
 May 13, 2015  Out and About 10 Responses »

Putnam Square Eagle Hill

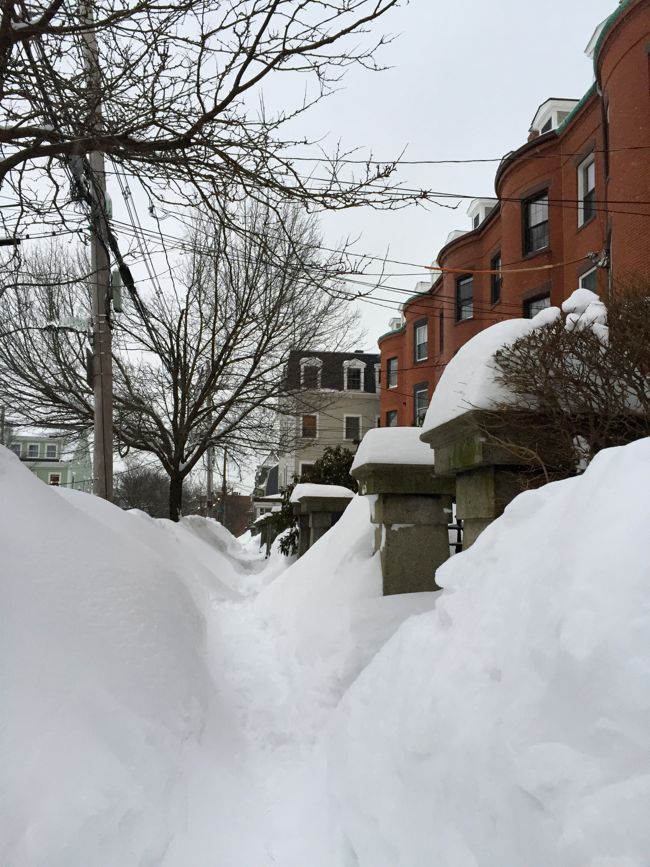
We took advantage of the beautiful weather this past weekend and went for a walk through East Boston’s Eagle Hill neighborhood.

Eagle Hill is a quiet, mostly residential neighborhood tucked into the northwest corner of East Boston, directly across the harbor from Charlestown, another of Boston’s harbor-front neighborhoods. Eagle Hill’s dense collection of wood-frame, Victorian houses, hilly terrain, and proximity to the waterfront – not to mention the large number of excellent Mexican and Central American restaurants around the neighborhood – remind me a little of San Francisco. It’s an architecturally unique area within Boston, and a large swath of the neighborhood near the top of the hill has been designated a historic district under the National Register of Historic Places.

Eagle Hill Map

We took a meandering route, beginning at Bremen Street Park, a long strip of green space next to a raised highway that was reclaimed from an airport parking lot in 2007. Leaving the park behind, we slowly zig-zagged our way up the Hill, wandering down a street and then moving up a block and walking back the way we had come. Eagle Hill is laid out in a grid, with east/west streets named for Revolutionary War battles (Saratoga, Lexington, Trenton) and north/south streets named for Revolutionary War generals (Marion, Brooks, Putnam). This naming system, put in place in the 1830s, seems appropriate, given that the second battle of the Revolutionary War was fought on and around Eagle Hill back when the area was pastureland. American forces sunk a British schooner just off the coast of Eagle Hill in the first naval engagement of the war. Aside from the street names, nothing remains to commemorate the battle, although this Memorial Day, a community canoe and kayak regatta will retrace part of the battleground along the East Boston shoreline.

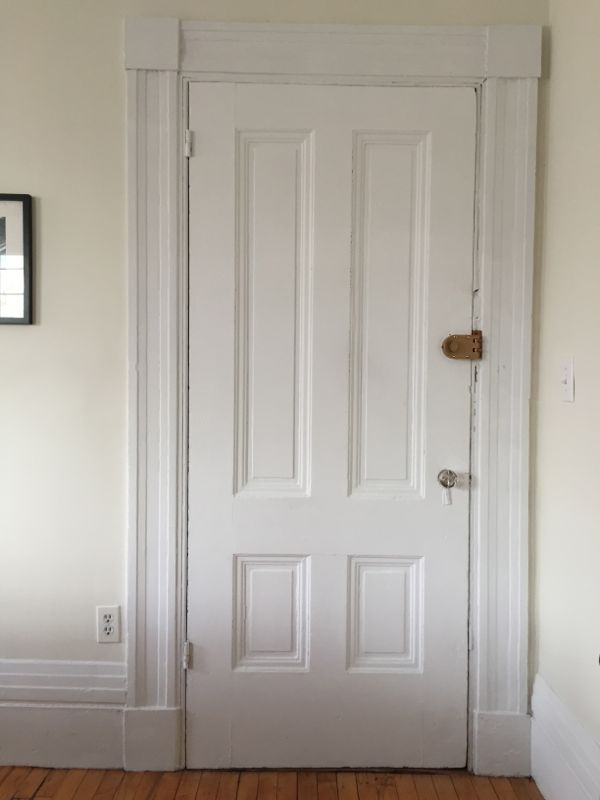
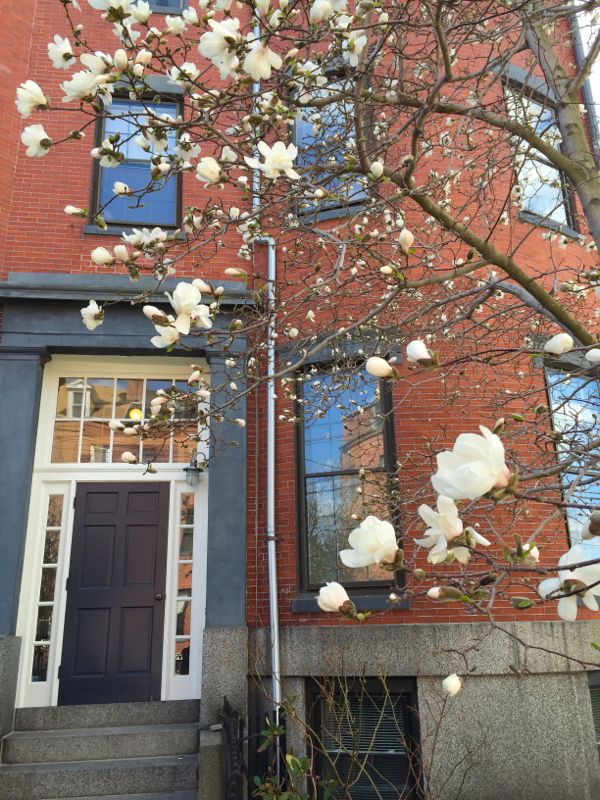
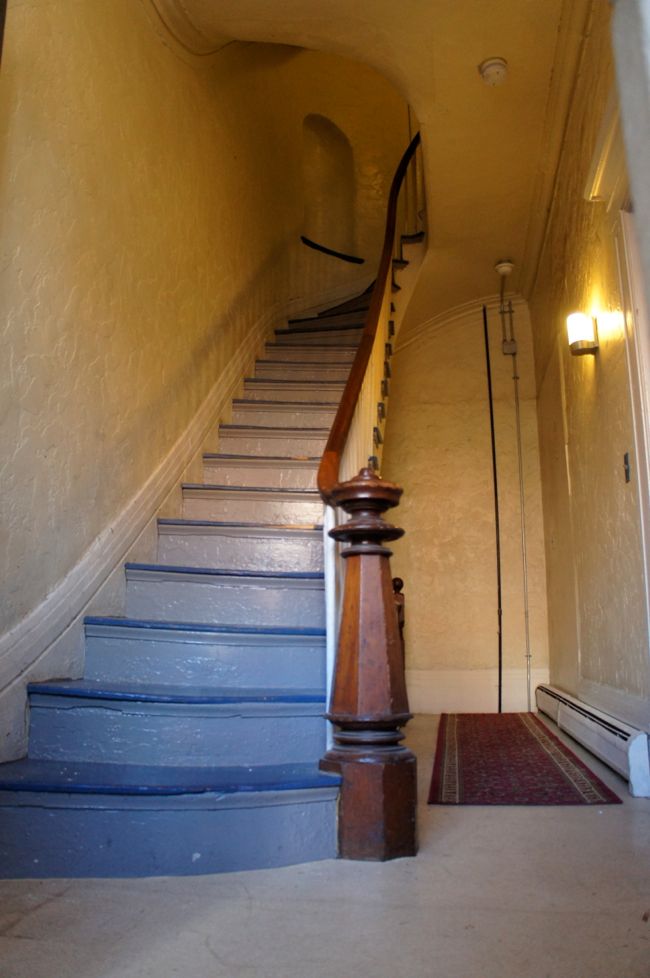
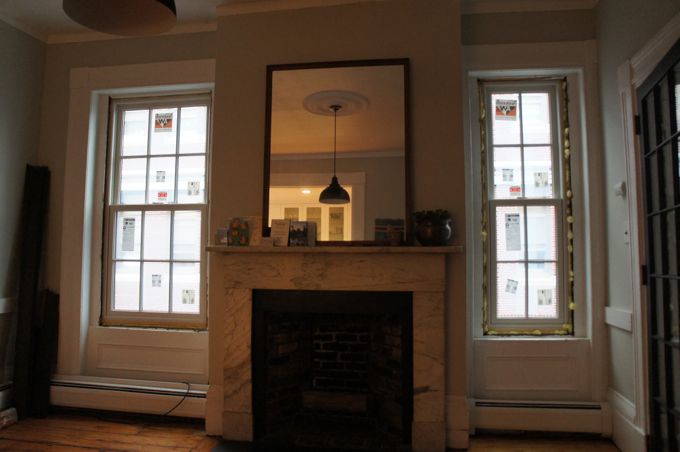
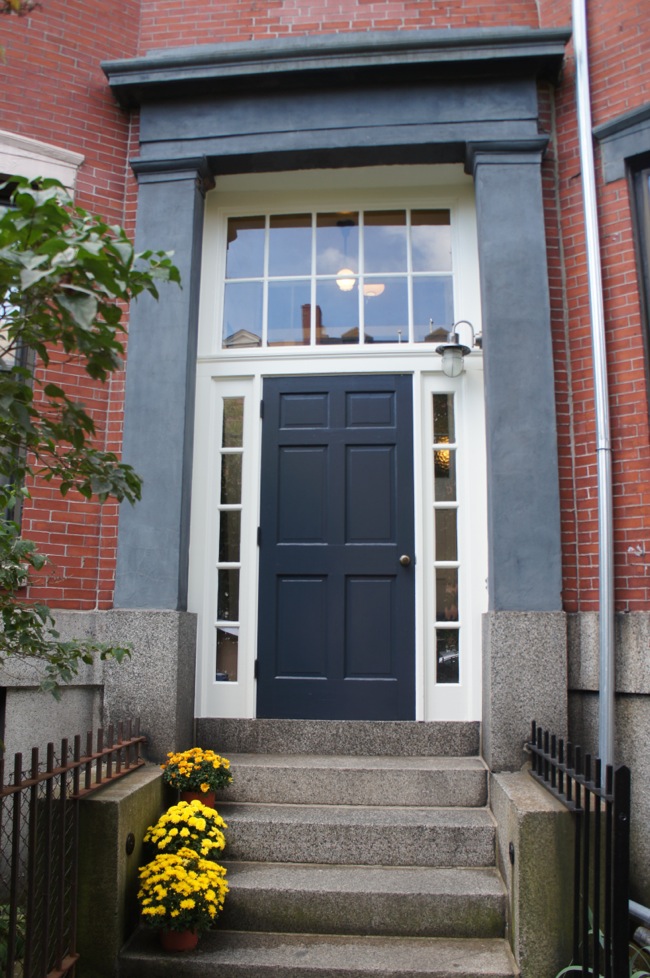
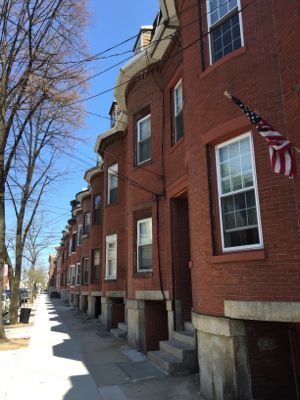
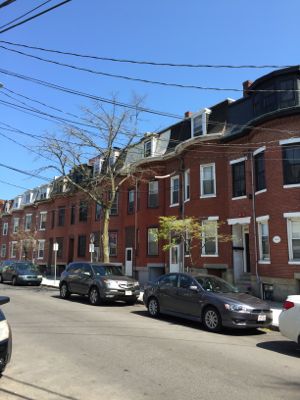
Whenever I visit Eagle Hill, I find myself admiring the neighborhood’s architecture. As we walked, we passed block after block of late-19th century houses, many with immaculately restored facades. At the foot of the Hill, we walked along a full block of mansard-roofed, brick row houses built in the 1860s.

saratoga street row houses 1saratoga street row houses 2

Saratoga Street Row Houses 3

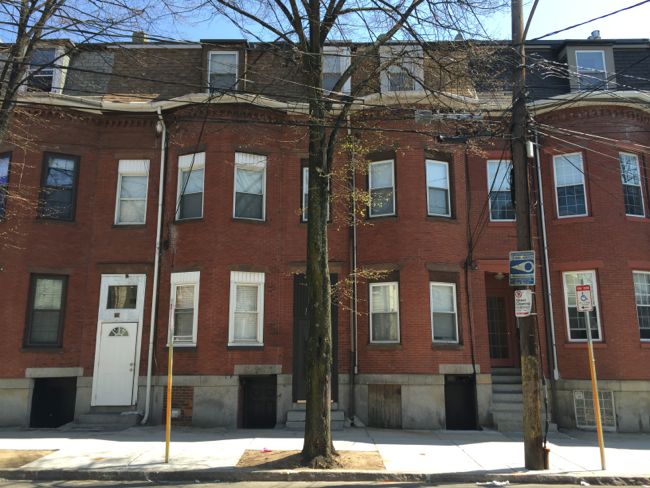
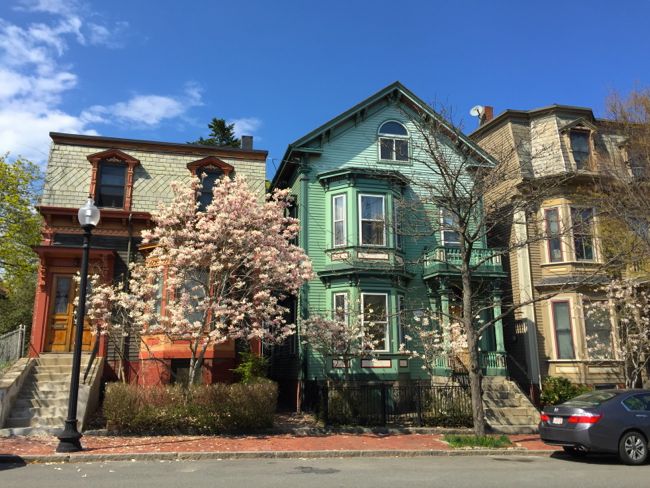
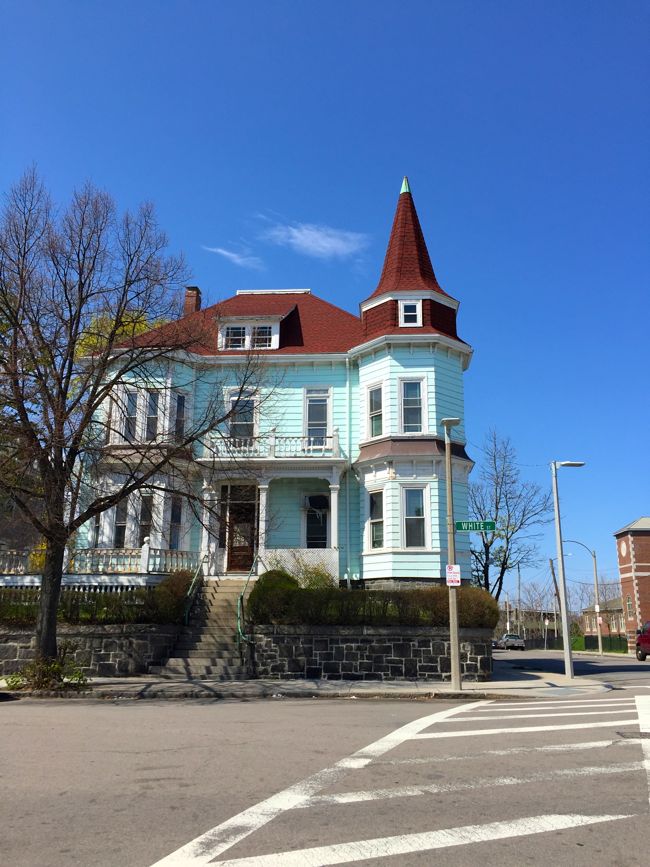
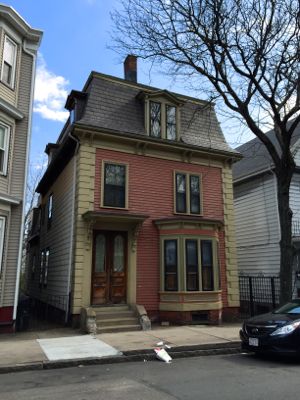
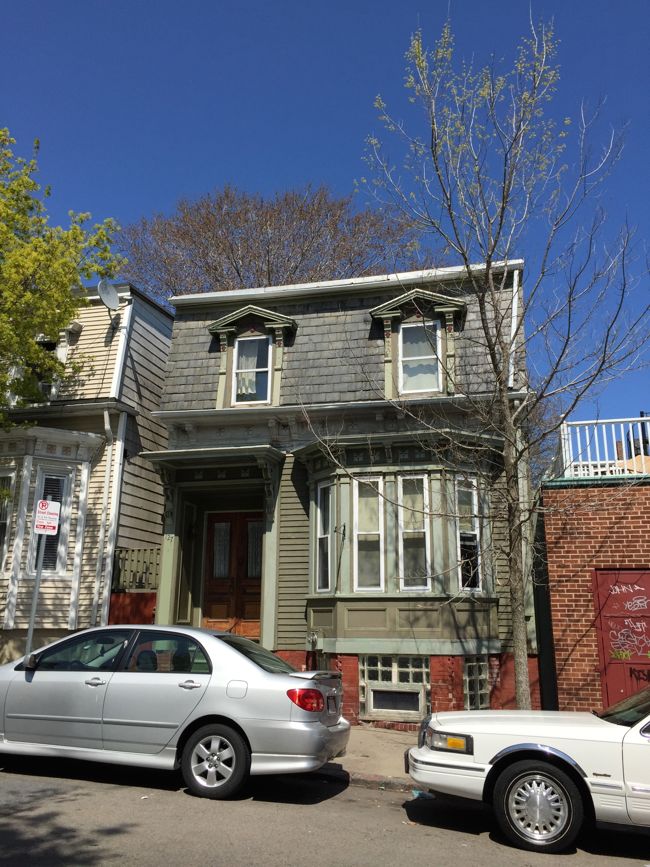
Eagle Hill was divided into residential parcels and sold for development beginning in the 1830s. The original developers envisioned the area as a high-end suburb, perched atop a hill, separated from downtown by the harbor, and filled with spacious estates owned by some of Boston’s wealthiest residents. A number of these single-family, suburban mansions were actually built and several, like these two located near the top of the Hill, survive to this day.

White Street Mansion

Trenton Street Mansion

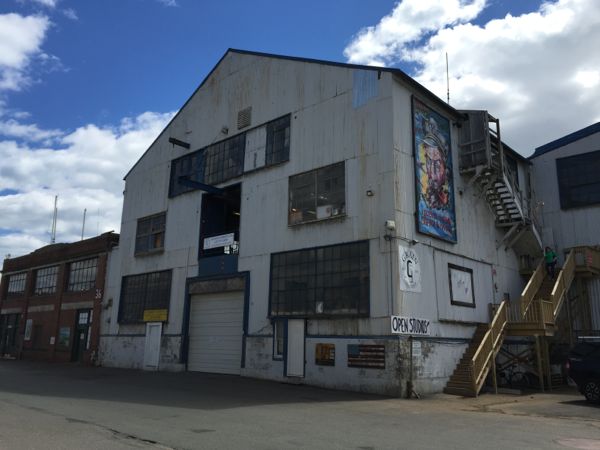
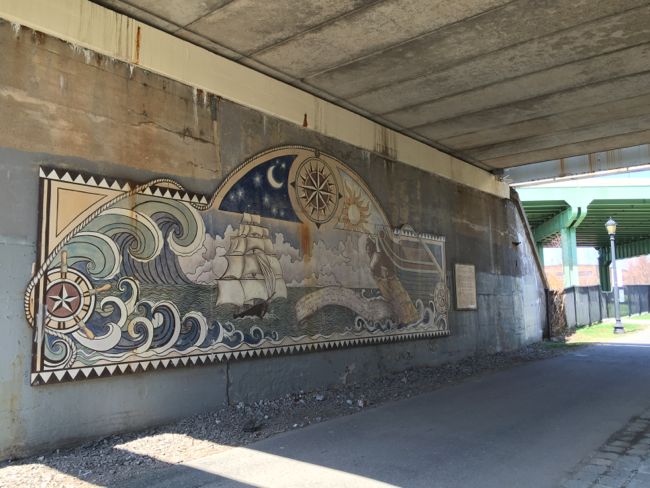
By the mid-1800s, East Boston, with its expansive waterfront along Boston’s inner harbor, had become a center of the shipbuilding industry in New England. During the 1850s, some of the fastest clipper ships in the world were built here. The Flying Cloud, one of the most famous clipper ships of its time, was built by Donald McKay at his East Boston shipyard, and in 1853 set the sailing record for the “Golden Route” from New York to San Francisco around Cape Horn, covering over 16,000 miles in 89 days. The record stood for over 130 years until it was broken in 1984. There are a number of plaques and murals in East Boston’s parks that celebrate the neighborhood’s maritime history, including this mural along the East Boston Greenway.

East Boston Maritime History Mural

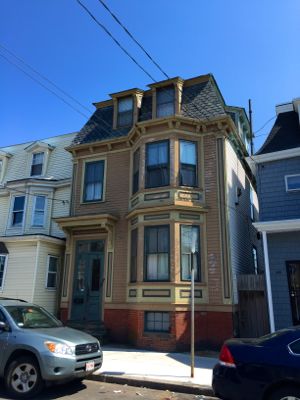
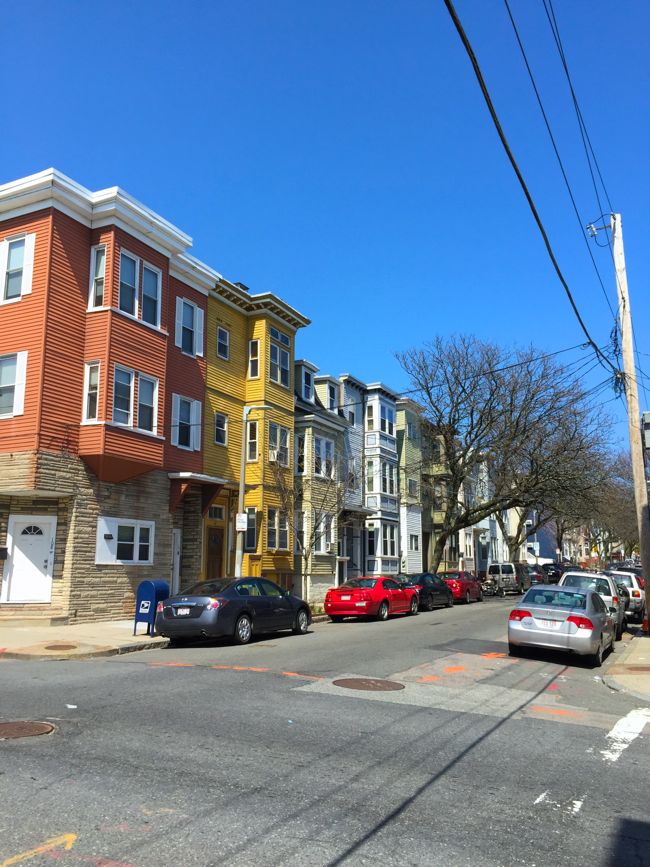
East Boston’s shipbuilding industry expanded rapidly during the California Gold Rush, as demand increased for quick transportation to and from the west coast. As shipyards along the waterfront grew, they attracted carpenters, sail makers, and other shipbuilding artisans to the area, many of whom hailed from the Canadian Maritime Provinces. Most of Eagle Hill’s current housing stock was built between 1850 and 1890 to house this influx of middle-class workers. Many of the shipbuilders who constructed their homes on Eagle Hill viewed their private residences as advertisements for their work, and so a bunch of especially fancy homes were built here during the clipper ship era. Houses dating from this time were almost exclusively built in the Italianate and Second Empire styles popular in the late 1800s (think lots of mansard roofs and paneled window bays). Despite the original developers’ hopes for a wealthy, suburban neighborhood, Eagle Hill began to take on its present urban character during this time. Two and three story end houses, with the short, gabled end of the house facing the street, were built one after the next on long, narrow lots.

Eagle Hill End House 1 Eagle Hill End House 2


As we continued up the Hill, we passed Angela’s Cafe, one of the best Mexican restaurants in Boston. We were tempted to stop in for a snack, but the line for a table was out the door, so we moved on. The wide array of Latin American restaurants and corner stores in and around Eagle Hill is a reflection of the neighborhood’s large Central and South American immigrant community. In part because East Boston has a long history as a transportation hub, it has been home to a large immigrant population for well over 100 years. Irish, Italian, and Jewish immigrants arrived in East Boston beginning in the late 19th century, and as demand for housing increased in the early 20th century, many of Eagle Hill’s formerly single family homes were divided into apartments. Mansard roofs on some houses were squared off to make room for a full top floor apartment, and many houses in the neighborhood were modified to more closely resemble triple deckers, the three story apartment buildings that were being built in other working class Boston neighborhoods at the time.

East Boston Triple Deckers

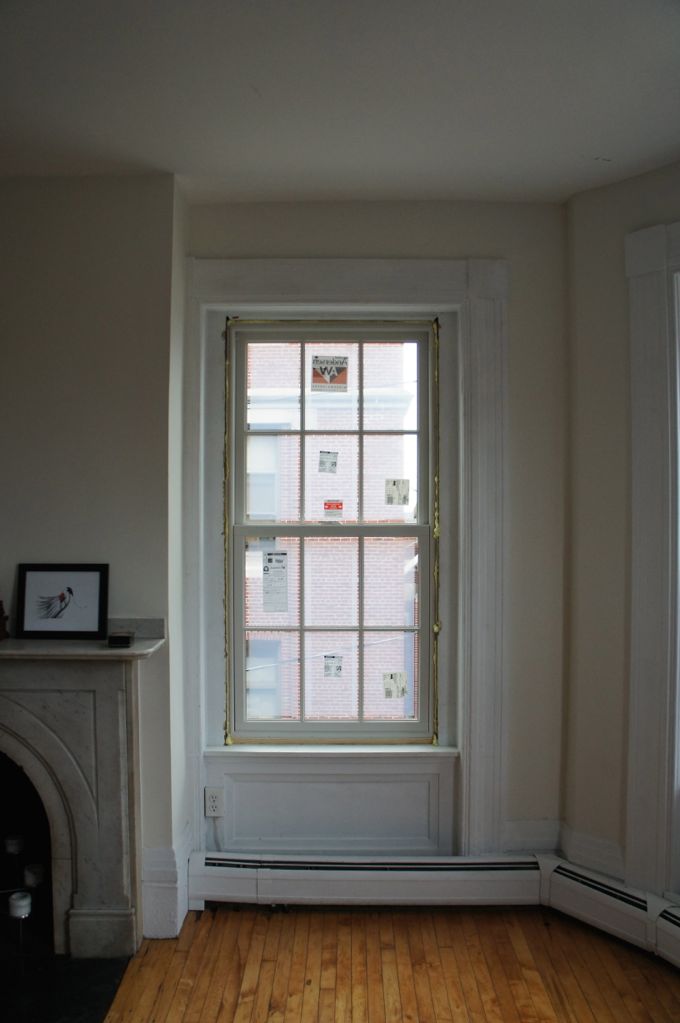
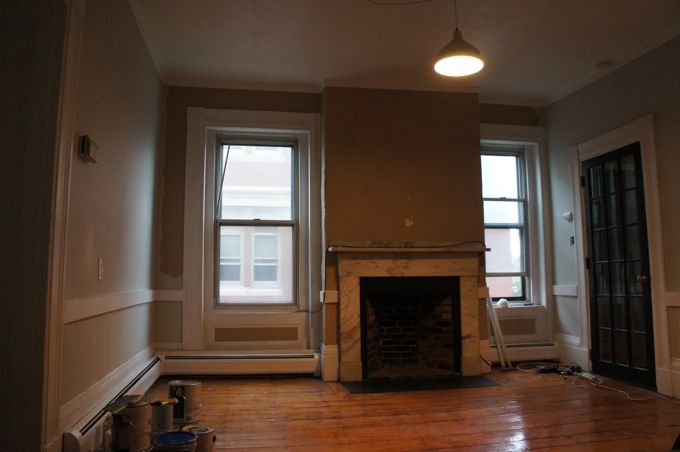
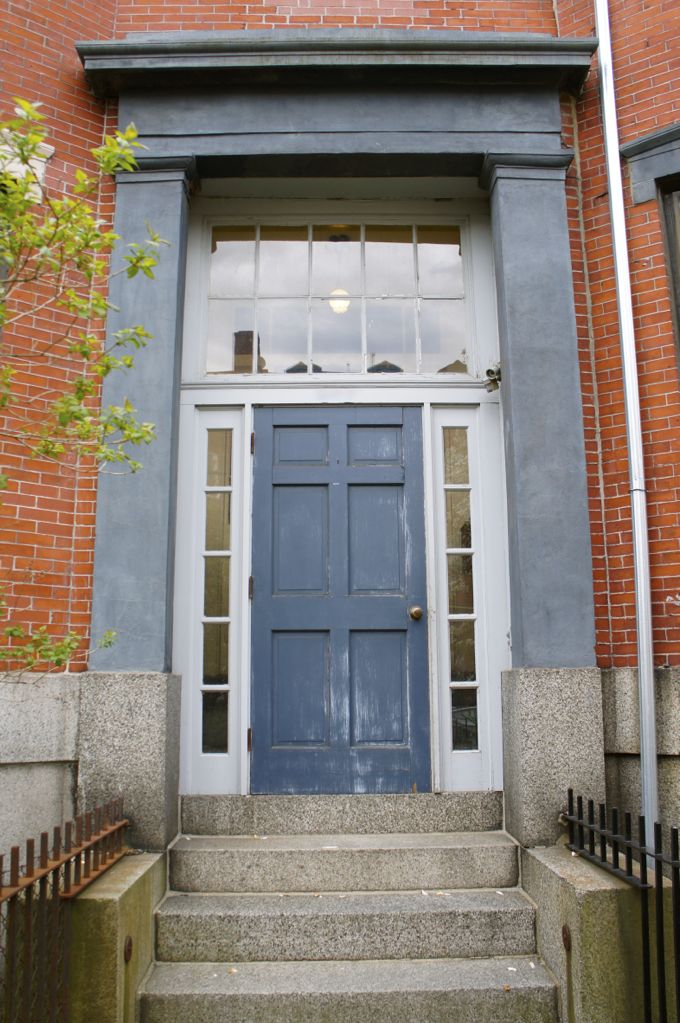
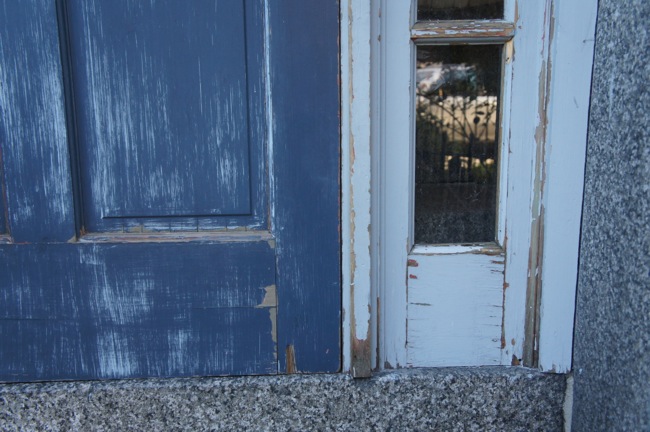
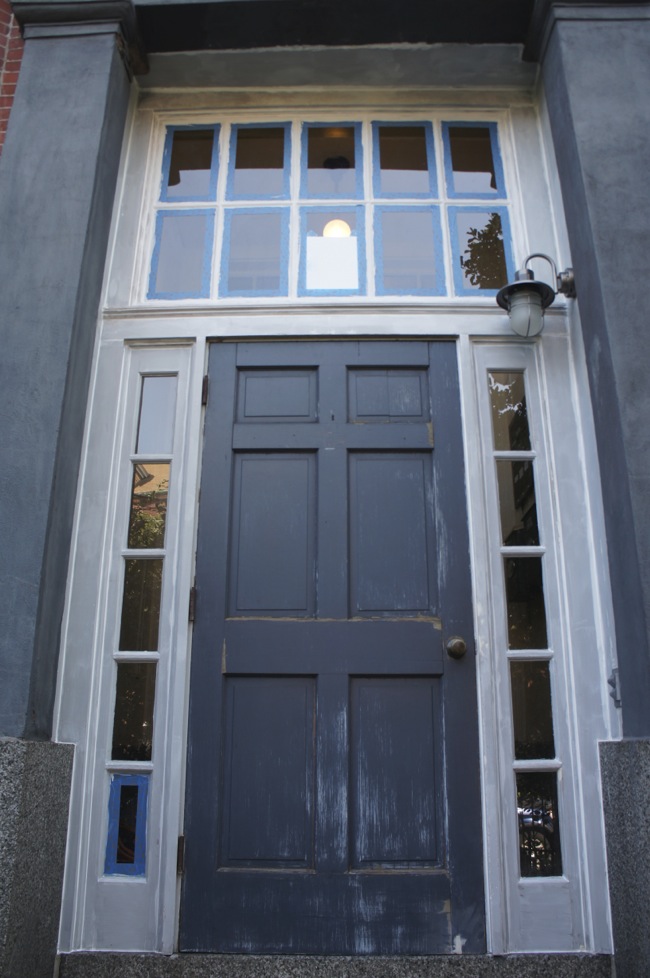
Over the course of the 20th century, a lot of Eagle Hill’s 19th century architecture was heavily modified. External ornamentation was removed and houses were re-sided in vinyl and cedar shingles. Original slate roofs were replaced with asphalt shingles and copper gutters were traded for aluminum. Most of these modifications were made in the name of modernization and convenience before the value of the Victorian architecture had been fully recognized. But in the late 1980s, a group of Eagle Hill residents formed the Eagle Hill Civic Association to advocate for restoration and preservation of the neighborhood’s historic architecture. Their efforts led to the designation of the neighborhood as a National Register of Historic Places historic district in 1998. During the past 25 years, many Eagle Hill homeowners have restored their houses’ historic facades. And even as we walked around the neighborhood last weekend, we saw a lot of ongoing renovation and restoration projects.

Eagle Hill Renovation

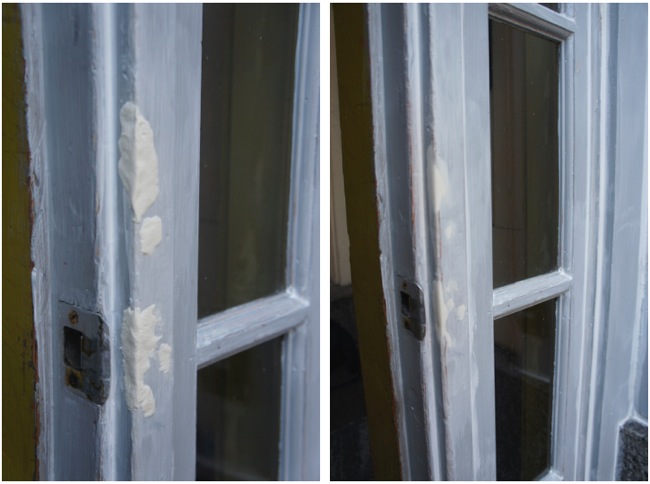
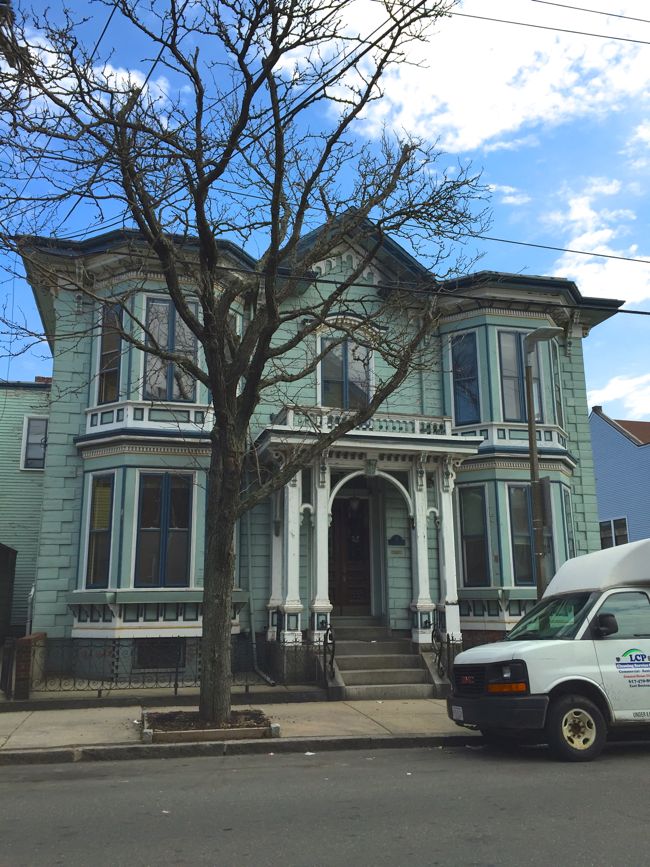
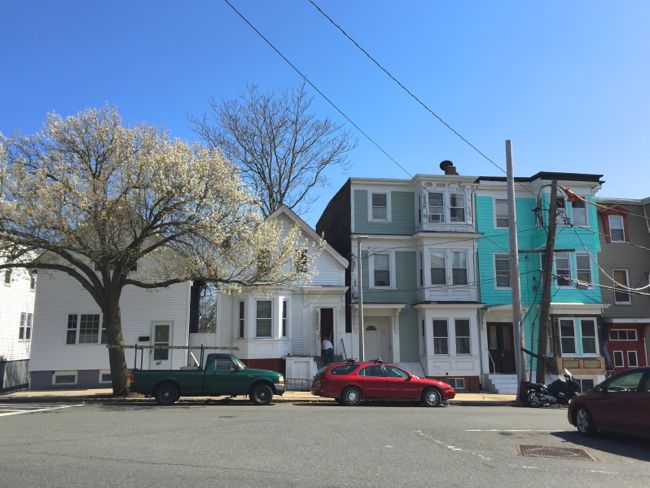
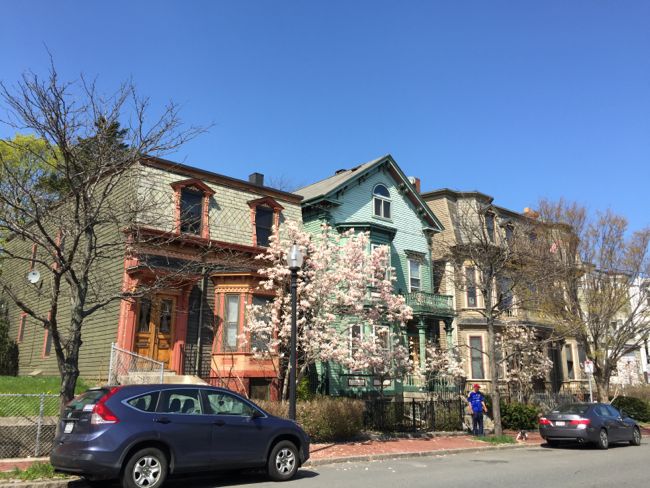
A restoration project had just begun on the teal house on the right in the picture below. The vinyl siding was removed around the lower window bay, exposing the original wood paneling.

Eagle Hill Restoration

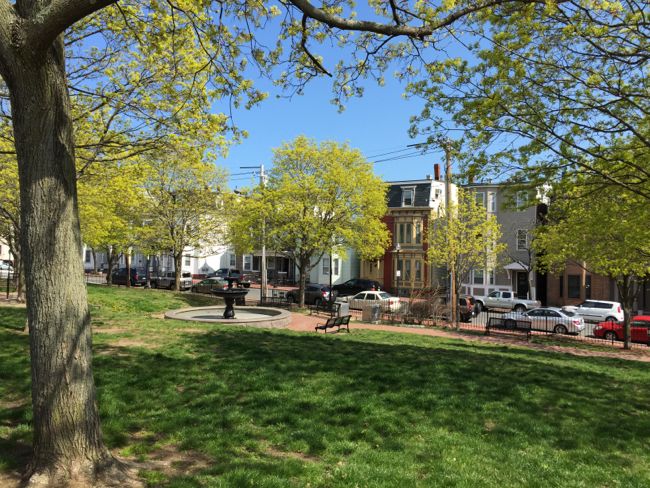
As we reached the top of the Hill, we came across one of the neighborhood’s largest collections of fully restored houses surrounding Putnam Square. Putnam Square is really more of a triangle where three streets intersect with a small park and a fountain at its center. On a nice day, it’s a great spot to sit on a bench and relax for a bit.

Putnam Square East Boston 1

Putnam Square East Boston 2

Some of my favorite houses in Eagle Hill are little, two-story, mansard-roofed cottages. There’s a bunch of them scattered around the neighborhood, but I haven’t come across this kind of house anywhere else. I like the way that such a grand architectural style was imposed on a modestly-sized house. Most of these cottages seem to have been too small to convert into apartments and so remain single family homes today. If I were ever to buy a single family house, I think one of these with a nice back yard would be ideal.

Mansard Cottage 1

Mansard Cottage 2

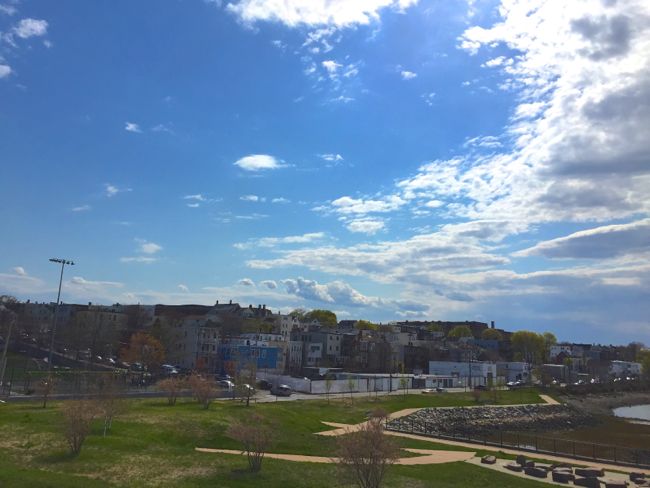
After wandering through Putnam Square, we walked down the back side of the Hill to the Condor Street Urban Wild, a former industrial site along Chelsea Creek that underwent hazardous waste cleanup and ecological restoration in 2003. The site is now a mixture of natural coastal habitat, including a salt marsh, mud flat, and meadow. It offers a tiny glimpse of what Eagle Hill may have looked like hundreds of years ago, before it was settled.

Condor Street Urban Wild

Today, Eagle Hill, along with the rest of East Boston, remains one of Boston’s more economically and culturally diverse neighborhoods. But signs of gentrification have begun to appear within the past few years. Rents and property values, although still affordable by Boston standards, are on the rise, and overeager real estate agents have begun comparing East Boston to Brooklyn. Community improvements, including a new library branch, and new parks, playgrounds, and athletic fields have popped up all over the neighborhood. East Boston has a long history of welcoming newcomers to the city, whether young professionals or recent immigrants. The neighborhood also has a strong tradition of community activism – residents fought the encroachment of Logan Airport and advocated for more green space for decades, and, more recently, blocked a proposed casino. So East Boston seems well positioned to deal with the challenge of ensuring that the neighborhood remains welcoming, affordable, and desirable for all residents.

Eagle Hill is an often overlooked neighborhood. There are even people who have lived in Boston for years who have never heard of it. So if you find yourself in Boston and are looking for a historic, off-the-beaten-path neighborhood to explore, jump on a blue line train, head across the harbor, and check out Eagle Hill.


May 062015
 
 May 6, 2015  Living Room 7 Responses »

A few months ago, we got a new tv. After years of living in tiny apartments and watching tv primarily on our computers, we were ready to watch tv and movies on the big screen – well, a bigger screen anyway. And since we now had plenty of space in the living room, we chose a big, 40-inch LG tv. But we were still figuring out how best to lay out the room at the time, and we weren’t exactly sure where to put the tv. We wanted to be able to watch tv comfortably, but we also didn’t want the tv to be the room’s focal point.

The most obvious option was to hang the tv above the fireplace mantel. But in order to clear the mantel, the center of the tv would have to be at least five and half feet above the floor, which, given the size of the room and the height of the couch, would make for some serious neck strain after watching a two hour movie. Besides, the original, marble fireplace is the focal point of the room, and one of the most impressive features in the entire condo, so it didn’t seem right to distract from it with a tv.

This left the wall in the corner of the room between the entrance and the fireplace as the only viable spot. At first, I thought putting the tv in the corner was a poor choice from a viewing angle perspective, but then I realized I could use an articulated wall mount that would allow us to pull the tv away from the wall and angle it into the room when we’re using it. And when we’re not using it, the tv would recede into the corner.

Corner TV Wall

So we hung the tv in the corner, which, as you can see, left us with a mess of cables running down the wall. There are various cord managers that can be used to conceal cables against a wall or even inside a wall, but this corner of the living room was looking pretty barren. What we really needed was some kind of cabinet below the tv that would hide the cables. But the baseboard radiator would prevent a cabinet from sitting against the wall, and unless the cabinet was really shallow, it would protrude into the room past the mantel, which wouldn’t really look right.

I looked for some sort of wall-mounted cabinet/shelving/drawers that would fit under the tv and above the radiator, but I came up empty handed. Eventually, I realized that the ideal solution would be custom, built-in cabinetry. The shallow alcove formed by the chimney and the corner seems to be asking to be filled with cabinetry and shelving.

Grain Wood Shop

I got in touch with Brandon, the owner of Grain Wood Shop – a custom wood working and furniture shop located in one of the old warehouses in the Boston Harbor Shipyard right here in East Boston – about building a custom built-in. He came over and took a look at the space, and after some back and forth, here’s the design we came up with:

Built-in Plan

Since this built-in will be a more or less permanent addition to the condo, I wanted to make sure it matched the room’s original architectural elements. After looking through a bunch of pictures of 19th century built-in cabinetry, I decided that this unit should look like a true built-in. In other words, it should be flush with the wall and extend from the floor to the ceiling. Initially, I was picturing cabinets below the tv and shelving above. But after talking to Brandon, I decided to go with four drawers under the tv. The drawers will be more functional and look more interesting than a pair of cabinets. In order to accommodate the radiator, which will be buried under the drawers, the baseboard along the bottom of the built-in will be fitted with a metal grate, allowing heat to escape. The whole thing will be painted white to match the trim.

Living Room Wall

Here’s a shot of the living room’s side wall. The built-in will go in the alcove to the left of the fireplace, and in an effort to maintain the room’s symmetry, I’d like it to mimic some of the design details of the window on the right. Specifically, I asked Brandon to surround the built-in with casing that replicates the chunky, column-like casing found in the rest of the condo. And again, for the sake of symmetry, I decided to run the built-in shelving only as high as the window, stopping short of the ceiling. I’ll use a piece of sheetrock to close the gap between the ceiling and the top of the shelving, effectively creating a soffit, as a way to preserve the built-in look of the shelving. We’ll lose some shelf space by not taking the shelves to the ceiling, but I think it will look more balanced to maintain a consistent height between the shelving and the room’s four windows. And if we took the shelves to the ceiling, we wouldn’t be able to reach the top shelf anyway.

Panel Door

The four drawers under the tv will have raised panel fronts inspired by the paneling of the original door located directly across the room from the new built-in.

Panel Door Closeup

Technology changes quickly, and designing permanent features of a house – like built-in cabinetry – around a single piece of technology – like a tv – generally seems like a bad idea. Just ask all those people with late-90s tube tv niches over their fireplaces. But the design of this built-in is somewhat flexible, in that extra shelving can be added later on to fill the area that will house the tv. So years from now when tvs are obsolete and we’re all watching holograms, whoever lives in this condo can convert this built-in to a full bookcase – assuming that books and shelves haven’t become totally obsolete as well.

Brandon is currently in the process of building the cabinetry, but before he can install it, I need to get my electrician to move an outlet  for the tv. If all goes according to plan, everything should be done within the next few weeks.

Apr 262015
 
 April 26, 2015  Uncategorized 2 Responses »

Magnolia Blooms

It’s been over two months since my last post, and you may be wondering, ‘what ever happened to that stairwell renovation?’ The short answer is, winter happened. Boston shut down for most of February as consecutive snow storms dropped a historically unprecedented amount of snow on the city. The public transit system was effectively unusable for more than a month, so I ended up spending a lot of time at home. But even so, it was so dark, and cold, and dreary, that I couldn’t muster the motivation to tackle any major renovation work.

But now spring finally seems to have arrived. We’ve had a handful of warm, sunny days, and the magnolia tree in front of my building bloomed this past week. Gregg, our contractor, has caught up on a backlog of work from the winter, but before he starts working on the stairs he’s taking care of a more pressing project: building new bulkhead doors to the cellar. Over the course of the winter, the old, wooden bulkhead was completely crushed, and when the snow melted – all nine feet of it – all that was left was a pile of boards leaning against the side of the building. Gregg  is currently building a new bulkhead out of pressure treated lumber framing and pine planks. As long as we regularly seal/paint the new bulkhead it should hold up much better than the old one.

Maybe my greatest home-related accomplishment this winter, as sad as that is, was finding two more slip shades to complete the living room chandelier.

markel chandelier 2

As you may remember, I put the complete chandelier together using original parts from the 1930s, most of which I bought on eBay. The total cost for this project ended up being around $250, which included the cost of the cast iron frame and canopy, the slip shades, new cloth-covered wire and sockets, paint, and light bulbs. At $13-35 each, the slip shades themselves were the single biggest expense. Completely refurbished versions of this chandelier seem to go for as much as $1000, so even though it took months to find all the parts I needed, I think it was worthwhile.

markel chandelier

With longer days and warmer weather ahead of us, I have a bunch of new projects in the works, in the stairwell and beyond – so stay tuned, for real this time. And since I don’t have any actual updates on the stairwell renovation, I’ll leave you with a picture of a much larger, much fancier stairwell. We just got back from visiting my brother in Baltimore, and this is the stairwell in his building, a formerly-single-family townhouse (really a semi-detached mansion) built in 1850 and lavishly renovated in the 1890s that is now divided into ten spacious apartments.

Baltimore stairwell

Feb 092015
 
 February 9, 2015  Uncategorized 14 Responses »

A week and a half ago, I had just started repairing the plaster ceiling in my building’s common laundry area on the ground floor of the stairwell, and things weren’t going well. After drilling a dozen holes in the ceiling, I hadn’t found a joist. Each new hole I drilled created a little cascade of plaster dust and loosened the surrounding plaster even more. I would later discover that the ceiling joists in this part of the stairwell not only run in the opposite direction from what I had expected, but are also spaced at irregular intervals.

Last year, I used construction adhesive to repair the loose plaster walls in the bedroom, which worked well and seems to be holding up all these months later. But since a large portion of the ceiling in the laundry area had completely detached from the lath, and was fighting a losing battle against the forces of gravity, I decided to use plaster buttons to reattach it to the lath.

Plaster buttons are special washers that can be used with screws to secure plaster to the underlying lath. The idea is that the plaster button distributes the pressure from the screw and prevents the surrounding plaster from cracking. Then, once the plaster is secure, the plaster buttons can be hidden with a skim coat of plaster or joint compound.

I began working in a corner of the ceiling where a small section of plaster had come loose. To fully support the weight of the ceiling, it’s best to screw plaster buttons directly into a ceiling joist. But as we’ve already established, joists were hard to come by in this corner of the ceiling. So instead, I settled for screwing the plaster buttons into the lath. But as I tightened the screw on the first plaster button, the entire plaster button punched through the crumbly plaster. The plaster in this area was so soft that it seemed to be held together by the ceiling paint and little else. I did my best to gently secure the surrounding plaster with more plaster buttons, but in the end I was left with a mess.

Plaster buttons in ceiling

I decided to leave the hole I had created in the ceiling for the time being and moved on to the ceiling’s main problem area – a roughly 3 foot by 4 foot section of cracked and buckled plaster that seemed ready to collapse at any moment.

Cracked Plaster Ceiling

When I tried pushing the loose plaster back into place, I discovered that a bunch of plaster chunks had gathered above the loose plaster, preventing it from sitting flush against the lath. The loose plaster also had the consistency of damp cardboard, so I decided to pull it all down and replace it with sheetrock. I used a utility knife to cut a line between the loose plaster and the stable plaster to prevent any damage to the stable parts of the ceiling, and to keep the area of missing plaster as square as possible so that it would be easy to fill in with sheetrock later. And then I  set about peeling the old plaster away in big chunks.

Every time I remove old plaster, I think I’ll be able to contain the dust, but it never works out that way. I did my best to set up plastic drop cloths to seal off the floor and the washer and dryer. But as I pulled down the ceiling, I was showered in sandy plaster dust, which I expected, and a thick black grime of unknown origin, which I did not expect. It seemed to be the sort of black dust that tends to accumulate in cities. It must have settled in the space above the ceiling during the century-and-a-half since the ceiling was installed. Some of the dust that rained down on me probably originated in Industrial-Revolution-era coal fires. I could really feel the history. Fortunately, I was wearing a respirator, so I wasn’t breathing in the history.

After a shower and some intensive shop vaccing, I went out and picked up a sheet of 3/8-inch sheetrock, which is about the same thickness as the existing plaster. I used a 3-foot by 4-foot panel of sheetrock to fill in the area of missing plaster. I screwed the sheetrock directly into the ceiling joists, which of course were now easy to find since I had completely exposed them.

Once the sheetrock patch was up, there was a half-inch gap between the existing ceiling and the new patch. I covered this gap with drywall tape and a 50:50 mixture of joint compound and plaster of paris, sometimes called hybrid plaster. The plaster of paris acts as a hardening agent, while the joint compound keeps the mixture smooth and workable. This hybrid plaster hardens in about 10 minutes, which meant I had to work quickly using small batches of plaster, but it also made it possible for me to apply two coats of plaster in one day. And unlike joint compound, the hybrid plaster doesn’t shrink as it dries. If you’re interested in mixing up some hybrid plaster yourself, this guy on youtube will show you how it’s done.

Sheetrock Patch

As for that disastrous section of the ceiling that I filled with holes and plaster buttons, I was able to pull away some of the loose plaster and re-plaster over the whole mess. Although it still needs touching up, this section of the ceiling now looks much better and feels reasonably solid.Ceiling Skim Coat

The ceiling is now almost ready for paint. All that’s left is to touch up a few spots with another coat of joint compound and some light sanding to smooth everything out.

As you may have heard, we’ve gotten some snow here in Boston over the past few days. There’s over five feet of snow on the ground as of today, which means that sidewalks have been reduced to slippery, single-file trenches, and the time-honored Boston tradition of using overturned trash cans and folding chairs as parking space savers in the days after a snow storm is threatening to become a permanent practice. It also means that Gregg hasn’t been able to get started working on the front stairs. But assuming it ever stops snowing, I’ll share some more progress on the front stairs.Boston Snow

Jan 242015
 
 January 24, 2015  Uncategorized 12 Responses »

Front StairsA few months ago, I sold my old sofa on Craigslist. When the buyer came over to pick it up, I buzzed her in, and as she walked inside she turned to her husband and exclaimed, “Oh! It’s all old inside!” She seemed genuinely shocked by the state of the front stairwell. Maybe she had unrealistically high expectations for the building’s interior after seeing the exterior (including the newly repaired and repainted front door). Or maybe her expectations were neutral and the stairwell just looked so crappy that she felt the need to say something. I was still upstairs at the time, so I don’t think she realized I heard her, but I wasn’t offended anyway. In fact, I remember having a similar reaction the first time I walked into the building when I was thinking about renting my now-condo, although I didn’t say anything out loud. In the two years since I first saw it, I’ve gotten used to the run-down state of the stairwell. But every now and then I pause and really look at it, and behind the dull paint, dim lighting, and chipped stair treads, it’s actually a really beautiful space. The original architecture is more or less intact, and like so much of the rest of the building it has a lot of Potential.

The stairwell is a common area in the building, so it falls under the purview of the condo association, which consists of me and the owners of the other three units in the building.  We’ve neglected the stairwell for the past few years in favor of more pressing maintenance projects, but this winter we finally decided to invest some time and money in the space. Let’s take a look at the current state of the stairwell and some of the changes we have planned for it.

Laundry Area Under the Stairs

This is the ground floor of the stairwell, one floor down from the main entranceway. This narrow hallway serves mainly as our common laundry area. The washer and dryer are tucked underneath the stairs, which is an efficient use of space. The door on the left at the end of the hallway leads down to the cellar. The washer and dryer are only a few years old, but every other aspect of this little hallway is in rough shape. I’m pretty sure it hasn’t been updated, or even maintained, since the 60s, and it’s seen some heavy use over the years. The linoleum floor tiles, which are beginning to crack and peel, are stuck directly to the original pine floors. I’d love to pull up the linoleum tiles someday and refinish the original floors, provided the tiles aren’t full of asbestos. It’d be nice to spruce up the laundry area as well with some fresh paint and some new shelving.

Cracked Plaster Ceiling

Of all the problems in the hallway, the one that requires the most immediate attention is the ceiling. A big section of  plaster in the center of the ceiling is detached from the underlying lath. The plaster has cracked under its own weight, and at its worst point, the ceiling is hanging down about three inches below the lath. It’s a pretty precarious situation, and there’s a very real risk that a big chunk of plaster could fall on someone’s head without warning. So needless to say, I’m planning to fix the ceiling asap. I’ll try to reattach the existing plaster to the lath, and if that doesn’t work, I’ll strip away the loose plaster and replace it with sheetrock.

Front Entrance

Moving upstairs to the first floor, this is the view looking toward the building’s main entrance. The first thing you’ll notice is that this space is really dark. Since the stairwell is located in the center of the building, it doesn’t get much natural light, which means we keep the overhead lights on most of the time (we should really install a motion sensor light switch). It also means that this space doesn’t photograph well. But at this point, the dim lighting might be for the best. It helps disguise the fact that every wall in the stairwell has been slathered in a chunky textured plaster treatment. Combined with the dim lighting, the textured plaster walls gives the stairwell a cave-like appearance that is completely at odds with the space’s original architectural elements. Eventually I’d like to skim coat all of the stairwell walls to a smooth finish. It will be a big job, but it will make a huge difference. And luckily, the walls seem really solid  – unlike most of the original plaster walls in the rest of the building – so there won’t be any extensive plaster repair needed.

A few other things I’d like to change on this level: The flooring consists of vinyl sheeting on top of a quarter-inch plywood underlayment. I’m almost positive that the original pine floors are hidden under the vinyl and plywood, and I’d eventually like to uncover and refinish them. Of course, there’s some risk involved in uncovering the original floors, since we won’t know what condition they’re in until we’ve torn out the current flooring, but I think it will be worth it. Also, the trim around the entrance way is inexplicably painted red, but that’s nothing that can’t be taken care of with some white paint and a lot of primer. And once I get around to painting the walls, I’ll also paint the exposed gas line and electrical conduit to match. I’d also like to replace the wall sconces with something brighter and more attractive.

Front Stairs

This is the view of the main staircase as you enter the building. There are a lot of impressive, original architectural details here – the newel post, the handrail, all of the curved trim and plasterwork – but there are also a lot of problems. I can’t count the number of times I’ve had friends over who have noted that the stairs are “kind of scary,” or asked “are these stairs safe?” Since I walk up and down these stairs a few times a day, I’ve gotten used to them. But the truth is, these stairs aren’t as safe as they could be. It’s not that the stairs are in danger of collapsing (trust me, we’ve had several contractors reassure us on this point), but the stairs simply don’t meet modern code. Since they’re so old, they’re not required to meet current code, but at the same time building code exists for a reason. The stairs are narrower than most modern stairs, the handrail is significantly lower, and the steps themselves are uneven, all of which adds up to a trip and fall hazard.

Newel Post

So we’re bringing my contractor, Gregg, in to address some of these problems. He’ll replace and level all of the stair treads, replace all of the balusters, and raise the existing handrail a few inches. In order to raise the handrail, he’ll also have to raise the newel post, probably by putting some sort of inconspicuous blocking under it.

SONY DSC

The current stair treads are pine, which is a soft wood that wouldn’t be expected to last more than a few decades in this application. As you can see, many of the treads are chipped and cracked, and some of them have deep grooves worn into the center by decades of shuffling shoes. The current plan is for Gregg to replace the old treads with more-durable hardwood treads.

stair trim

Here’s a closeup look at one of the textured walls. Besides looking crappy, all the nooks and crannies on the walls collect a ton of dust – I’m not used to having to dust vertical surfaces. Below the wall is a really cool baseboard that curves upward, following the pitch of the stairs. The baseboard and a lot of the other woodwork in the stairwell is in rough shape. It’s covered in countless layers of cracked and chipped paint. Ideally I’d like to strip off all of the old paint and start fresh. Since most of the old paint here likely contains lead, the safest way to strip it is using a wet chemical stripper. But stripping the paint with a chemical stripper sounds like a lot of work, so it remains to be seen if I actually end up doing it.

coffin cornerOn the way up to the second floor, there’s a rounded nook built into the curved corner of the stairwell. Apparently these nooks were pretty common in 19th century row house stairwells. They’re sometimes called coffin corners, a name that originates from the misconception that these nooks were built to provide extra room for pallbearers to maneuver a coffin down the stairs. In reality, these corner nooks were built as display shelves for decorative items like a vase or statue. Someday, I’d like to use this little nook as it was intended and put a large vase in it for fresh flowers.

Second Floor LandingHere’s the second floor landing, right outside my condo. It’s a narrow, dimly lit space. The original pine floors are intact and exposed here, but they desperately need to be refinished – the finish is worn down to bare wood in spots. The curved railing continues up to the third floor, so when Gregg raises it he’ll have to do it as a single piece. The stairs up to the third floor are more of the same – worn stair treads that need replacing, and lots of textured plaster.

Right now, the front stairwell isn’t pretty, but someday it’ll look great. Gregg is set to start working on it next week, so stay tuned for updates.

Looking Downstairs

Jan 072015
 
 January 7, 2015  Dining Room, Living Room 16 Responses »

Window Exteriors

Up until a week ago the windows in my dining room weren’t really functional. They were old aluminum windows that had exceeded their intended lifespan. Although they were double-paned, the seal between the panes had broken, leaving the windows cloudy and effectively uninsulated. Aside from being drafty and hard to see through, the windows were almost impossible to actually open. The tracks and counterweights were broken, so that one window required a herculean effort to push closed, while the other window wouldn’t stay open at all. So the windows didn’t let a lot of light in, didn’t provide insulation from the outdoors, and didn’t open – they pretty much weren’t doing any of the things that a window is supposed to do.

Old Windows

Clearly, it was time for some new windows. And while I was at it, I decided to replace another barely-functional aluminum window on the same side of the building in the living room.

Old Window

Unfortunately, the original windows on this side of the building were removed decades ago. The windows on the front of the building, on the other hand, are more or less original – likely more than 100 years old anyway. The picture above shows the front corner of the living room, with the decrepit aluminum window on the left and an original window on the right. As you can see, the original windows are double hung with six over six divided lights, a common window style in Greek Revival architecture. And as you can also see, the original, divided-light windows fit in much better with the building’s architecture and just plain look better than the newer aluminum windows.

Once I decided to replace the aluminum windows, I started looking for new windows that would approximate the look of the building’s originals. Unfortunately, real divided light windows made up of separate panes of glass are pretty rare these days. They’re actually more difficult to produce and less energy-efficient than non-divided windows.  Instead, most window manufacturers make ‘simulated divided light windows’, which have decorative grilles stuck to the inside and outside of the window and sometimes have a divider between the panes as well.

After looking at a few different options, I settled on simulated divided light windows made by Andersen. They’re not a perfect match for the building’s original windows, but they’re pretty close. The exteriors of the windows are vinyl-clad, while the interiors are painted wood. I placed an order for the windows with a local distributor, and 4 to 6 weeks later, the windows showed up.

When my contractor, Gregg, came over a few days later to install the windows, he opened the boxes and was surprised to find new construction windows inside. New windows generally come in two configurations: new construction and replacement inserts. New construction windows are designed to be attached to the surrounding wall framing, which is usually only exposed during an extensive renovation or new construction project. Replacement insert windows are installed in the existing window frame and are designed to make installation minimally invasive. In this case, I wanted replacement insert windows. But through some sort of mistake or misunderstanding, I ended up with new construction windows.

The windows were a custom order, so Andersen wouldn’t take them back. And a few days of increasingly frustrating back-and-forth phone calls with the window distributor concluded with them refusing to exchange or refund the windows. So I was stuck with them. But by this time, Gregg had a plan to install the new construction windows and was confident he could make them work. It took him longer than he expected, but he managed to get all three windows in.

New Windows Installed

New Living Room Window

Since the new windows were slightly different sizes than the old windows, Gregg had to add new interior and exterior trim. We decided to use Azek vinyl boards for the exterior trim. Unlike wood, the vinyl trim won’t require any maintenance, which is nice since the windows are two-and-a-half stories above the street. The one drawback was that Azek vinyl boards are white, while the exterior trim around the rest of the building’s windows is dark brown. The obvious solution to this problem was to paint the vinyl boards dark brown. But it turns out that painting vinyl a dark color can cause problems: vinyl expands much more than wood when heated, and a dark paint can cause vinyl to absorb so much heat from the sun that it actually buckles. The guy at the paint store helped me match the dark brown color of the existing trim without using any black pigment (he used blue instead, which won’t absorb as much heat). I used a high-bind primer called Stix before painting, and only painted the exposed sides of the trim. Here’s the trim after painting, organized in three piles, one for each window:

Painted Vinyl Trim

Once it was installed, the new trim matched the building’s existing windows and the exterior color of the new windows almost perfectly.

The interior trim consisted of 1×2 boards and a few pieces of quarter-round to cover the unfinished portions of the new windows. I patched the new trim with Ready Patch and caulked the seams so that it blended in with the existing window casing. After a fresh coat of paint, the new trim pieces were all but unnoticeable.

Now, before we check out some photos of the finished windows, it seems like a good time to take a step back and remember what the dining room looked like just a few short months ago:

SONY DSC

The floors were dull and worn, the plaster around the fireplace was textured and lumpy, most of the room was painted a depressing brown, and, of course, the windows were falling apart (if you look closely at the window on the left, you can see that part of the upper track is falling off). This picture was taken a few months ago, part-way through the kitchen renovation. At this point I had already replaced the door to the living room, and begun painting the room.

SONY DSC

And here’s the dining room now. The new windows make a huge difference. The room finally looks clean and finished, like a space where I’d actually want to hang out and eat a meal, like, you know, a usable dining room.

Dining Room After

Sorry for all of the dark pictures, but it’s a dark and miserable time of year, so it’s the best I could do.

Living Room Window After

Finally, here’s the new living room window. It’s a pretty close match for the room’s original windows, and it looks more natural here than the old aluminum windows  – not to mention the fact that it’s insulated and completely functional.

Living Room Window After

Nov 212014
 
 November 21, 2014  Living Room 9 Responses »

markel chandelier diagram

I had just finished putting the final coat of spray paint on my new, antique chandelier frame when I felt the first raindrop. I looked down at the disassembled chandelier parts, still glistening with wet paint, spread out on sheets of newspaper under the magnolia tree in front of my building. I had spent the last two hours carefully taping off the gold-painted sections of the chandelier frame, cutting away the excess painters’ tape with a razor blade, and applying a coat of clean metal primer followed by a few quick, light coats of Rustoleum ‘Bright Coat’ silver metallic spray paint. Another raindrop landed on my head. After hours of work, it would only take a few minutes for the chandelier’s still-wet metallic finish to be streaked with rain.

I gathered up the freshly painted ceiling canopy as quickly as possible, doing my best to only touch the unpainted interior, and balanced it in one hand. Then I grabbed the chandelier mast in my other hand, holding it precariously by the screw at its base. I ran inside, propped the mast against the fireplace, and put the canopy on a nearby magazine. Back outside, the rain was coming down faster, but the leafy branches of the magnolia tree seemed to have protected the main body of the chandelier from the worst of it. I picked up the chandelier body and shielded it from the rain with a sheet of newspaper as I ran for the door.

Once everything was safely inside, I spread all of the chandelier parts out on a flattened cardboard box and inspected the damage. No water droplets or streaks. So far so good. But there in the center of the chandelier body was a big thumbprint. I looked down at my hands and, sure enough, my right thumb was covered in sticky silver paint.

Because the paint’s metallic finish was so shiny – almost chrome-like – the dull, gray thumbprint stuck out like… well, like a sore thumb. The directions on the spray paint said to wait 48 hours before adding another coat. So two days later I sanded the thumbprint down with extra fine sandpaper and repainted the chandelier base with a light coat of spray paint.

chandelier mast

The thumbprint turned out to be the first in a series of things to go wrong with this project.

As I was researching paint options to recreate the chandelier’s original metallic finish, I came across a technique that involves using wood stain over metallic spray paint to mimic the look of tarnish. The idea is that the stain settles in the corners and crevices of an object, darkening those areas and providing some depth. It sounded like kind of a crazy idea, but it had worked for a few internet people so I figured I’d give it a try.

A few days after repainting the chandelier frame, I brushed some Minwax dark walnut stain on a small section of the ceiling canopy. After waiting about a minute, I tried to wipe off the excess stain with a rag. But the stain seemed to have partially dissolved the underlying metallic paint, leaving the finish dull, streaky, and sticky. It wasn’t what I had expected at all, and it certainly didn’t look like subtle tarnish. So after some more sanding and another coat of silver paint, I was back where I started. I decided that the bright, metallic finish looked just fine as it was.

Ceiling Canopy

Originally the chandelier had a two-tone finish, with most of it painted silver and a few sections highlighted with gold paint. I decided early on to stick to the chandelier’s original color scheme as I refinished it. The shiny, silver spray paint was an easy choice – it looked very similar to the original paint and gave a smooth, shiny finish – but it took me a while to find the right gold paint. I wanted a paint that I could brush on that had a realistic metallic finish. Eventually I settled on Liquid Leaf, an oil based paint that contains copper particles, which give the paint a convincing metallic sheen. It’s a really thick, buttery paint, so even though I brushed it onto the chandelier, it settled out and there weren’t any brush marks left behind.

chandelier paint

Once the frame was painted, I moved on to rewiring the chandelier. For obvious safety reasons, I didn’t want to reuse any of the original electrical components, which meant I had to find new sockets and new wire. Luckily, Home Depot had some bakelite sockets that were pretty much identical to the original 80-year-old sockets. As for the wire, I decided to use a gray, cotton-wrapped wire that would look inconspicuous against the silver chandelier. Although this was my first rewiring experience, it turned out to be fairly straight-forward: I connected short lengths of wire to each of the five sockets, and then connected the wires from the sockets to a central wire that would run to the ceiling box.

socket wiring


After the chandelier was wired and reassembled, all that was left was to actually hang the thing. The chandelier is made from cast iron and weighs about 25 pounds without the shades, so I enlisted Mara’s help to hang it. I didn’t think it would look right if we hung the chandelier directly against the ceiling, so before we got started, we added a foam, reproduction ceiling medallion that matches the one in the dining room.

Apparently ceiling fixture connections haven’t changed much in the last 80 years, so we were able to use a standard crossbar with a central thread to attach the chandelier to the ceiling electrical box. Because of the way the ceiling canopy was constructed, we could only lower the canopy a few inches, which made attaching the chandelier to the crossbar on the electrical box almost impossible. We used a tiny screw driver that just fit into the gap between the canopy and the ceiling, and we spent two hours wedging the screw driver above the canopy, trying to line up a tiny screw with the screw hole in the crossbar, dropping the screw, retrieving the screw and starting all over again. We alternated holding the chandelier and standing on the ladder trying to attach the top of the canopy to the ceiling crossbar. I was ready to give up after an hour of this, but Mara was persistent, and finally, she managed to find an angle that allowed her to line up the screws with the crossbar, and within a few minutes the chandelier was securely attached to the ceiling box.

A few days after hanging the chandelier, the (hopefully) last thing to go wrong with this project went wrong. As I switched the chandelier on one evening a few days after hanging it, there was a clicking sound and one of the bulbs went out. The bulbs were all brand new LED bulbs that are supposed to last 20 years; the wire to the socket must have popped loose, I thought. Unfortunately the wires were sealed up under the chandelier mast. At this point there was no way I was taking the entire chandelier down. So I managed to remove the body of the chandelier from the mast, only to find that all of the wires were secure – none of the wire nuts were even loose. Only then did I think to test the bulb, and sure enough, the bulb was a dud.

Part of the reason that this post has been delayed for so long, is that over the past few weeks I’ve been diligently searching for matching slip shades for the chandelier. I was hoping to share some pictures of the completed chandelier in this post, but despite my best efforts, I still only have three slip shades. I’ll post some pictures of the complete chandelier once I get my hands on two more shades. In the meantime, here’s the chandelier as it looks today:

Markel Chandelier 2

markel chandelier 1

Oct 132014
 
 October 13, 2014  Living Room 2 Responses »

About halfway through the kitchen renovation, my electrician added an outlet and an overhead light to the pantry closet. I had gutted the pantry down to the studs and lath, and as he worked, the electrician noticed that there was a small gap along the top of the pantry’s back wall. Through the gap, he could see into the space above the living room ceiling one room over.  For whatever reason, an overhead light fixture was never installed in the living room, so the electrician offered to put one in. Since there were no walls in the pantry, he assured me that he could run wiring for the light fixture and wall switch through the pantry, without cutting any extra holes in the living room ceiling and walls.

At this point in the renovation, the kitchen and dining room were an uninhabitable construction zone. So we spent a lot of time in the living room, using it not only as a living room, but also as a temporary kitchen, dining room, and storage area. But up until this point, we had relied on a single lamp to light the room, which meant that after dark, low mood lighting was the only option in this space. Adding an overhead light would make our lives a lot easier. I gave the electrician the go-ahead, and the next day he installed wiring for the light fixture and switch and added a temporary bare bulb fixture to the ceiling.

Bare Bulb

Almost seven months later, that temporary bare bulb fixture is still there. It’s not so much that we never got around to getting a light fixture, it’s that I couldn’t decide on just the right fixture. It’s a big room, so a chandelier made sense. But did I want a modern chandelier to keep things from feeling too stuffy? Or would a chandelier that matches the room’s traditional architecture look better? And complicating things further, I soon found out that a lot of chandeliers are really expensive – like more than $1000 expensive – and I wasn’t prepared to spend that kind of money. After a few months of this indecision, Mara was like, just buy a light fixture already – anything will look better than a bare bulb. And she had a point. So I was ready to buy this perfectly acceptable, if somewhat unexciting, chandelier from Home Depot when I came across this chandelier on eBay.

Slip Shade Chandelier

Image: Rejuvenation.com

It’s an art deco slip shade chandelier from the early 1930s made by Markel Electric Products, and it looked like a perfect fit for the living room. It’s a streamlined design, kind of like the Chrysler Building, with lots of bold lines and a few subtle, abstract leaf designs. This kind of slip shade light fixture was apparently really popular in the late 20s and early 30s. A lip around the edges of the glass slip shades allows them to rest on the chandelier frame with nothing more than gravity holding them in place. It’s an unusual design, and as far as I know, slip shade fixtures haven’t been produced since the early 40s. The overall style of the chandelier complemented some of the Greek Revival details in the living room, like the scroll design on the marble fireplace and the column-like window casing. It seemed like the ideal light fixture for the space.

Unfortunately, the seller was asking over $1000 for the chandelier. So I passed on it. But soon another identical chandelier showed up on eBay. It was also too expensive, but I started to wonder if these chandeliers are more common than I had previously thought. And then after some persistent searching, I began to notice parts of the same chandelier listed on eBay – a slip shade here, a ceiling canopy there. So I decided, against my better judgement, that I could buy all of the parts I needed on eBay and then refurbish and rebuild a complete chandelier for much less than it would cost to buy the same chandelier outright.

I found the chandelier frame and mast first. It was pretty beat up, but it would do. Sold. And luckily the same seller had listed the matching ceiling canopy separately, so I bought that as well, for a combined total of about $50.

Chandelier Parts

These are theoretically all of the parts I need to put the chandelier frame together. As you can see, the original metallic paint finish is in pretty rough shape, so I’m planning to repaint everything with silver and gold metallic paint. But aside from the finish, the frame is in pretty good condition — it’s made out of heavy cast iron, so there’s not a lot that can go wrong there. The chandelier’s 80-year-old electrical components are a completely different story.

Old Wiring

This decrepit, octopus-like bundle of wires is all that remains of the chandelier’s original wiring. I don’t want to mess around with ancient wiring that may or may not burst into flames the moment an electrical current is run through it, so I’m planning to buy new sockets and completely rewire the chandelier. This shouldn’t be too difficult, since all of the wiring sits exposed in the bowl of the chandelier.

All that I’m missing at this point is a complete set of five glass slip shades. The slip shades I need are particular to this light fixture. And since they’re made of glass and prone to breaking, they seem to be harder to come by, and more expensive, than the chandelier frame. So far, I’ve managed to buy three shades on eBay, ranging in price from $25 to $35 each. There are actually reproduction slip shades for this fixture available for $65 each, but I’d prefer to save some money and buy old shades. And in the meantime, while I’m scouring eBay for shades, I’ll get started painting and rewiring the chandelier frame.

Oct 052014
 
 October 5, 2014  Uncategorized 1 Response »

kitchen

I was interviewed a few weeks ago for a story in the Boston Globe that features my kitchen renovation. The story is titled “DIY Problems? Solved!” and it appears in this Sunday’s Globe. Now, in truth my kitchen renovation was really only partially a DIY project, but there were definitely some setbacks and challenges along the way, which are highlighted in the article. There’s also some interesting perspectives from a few contractors and Kit Stansley of DIY Diva about the benefits and challenges of undertaking DIY work on your home. Check it out here.

Sep 222014
 
 September 22, 2014  Exterior 22 Responses »

The front door is finally done, and it took most of the summer so I won’t draw it out any longer. Here’s the repaired and repainted front door:

Front Door After

Let’s take a look at where I started a few months ago:

Front Door Before

Front Door Before 2

The original paint on the door and surrounding side lights and transom was chipped and flaking and had even worn down to bare wood in places. Long slivers of crumbly glazing putty were peeling away from the transom window panes. A few of the glass panes had lost so much glazing putty that they looked like they might fall out of the window frame if they encountered a stiff breeze.  Clearly something needed to be done. So naturally I spent a few weeks agonizing over what color to paint the door before I started any actual work.

As you can see, I eventually settled on dark blue for the door and off white for the trim. These colors aren’t all that different from the original light blue-gray trim and medium blue door. Even though my neighbors pretty much gave me free reign to choose whatever colors I wanted, I didn’t want to upset anyone by doing anything too crazy. So I more or less stuck with the existing color scheme. I considered painting the door yellow after so many of you suggested it, and if I owned the entire building I might have gone for it. But in the end, something dark and traditional seemed like a safer choice.

Once I decided on dark blue, I had to pick a specific shade of dark blue. I’m easily influenced by the names and descriptions of paint colors, so when I began looking through Benjamin Moore colors online, I was immediately drawn to “Hale Navy,” which Benjamin Moore describes as, “a timeless classic, this deeply saturated shade of navy blue evokes rich maritime traditions and storied exploits at sea.” Do I want my front door to recall storied exploits at sea? Well now that you mention it, yes, yes I do. I was sold. Until I came across “Washington Blue,” the description for which reads, “suggesting gentility and culture, this deep, lush navy blue is based on the color created by hand-grinding Prussian blue in oil.” You had me at gentility and culture.

But after I picked up paint chips in a few different shades of dark blue at the paint store and held them up to the door, the Washington Blue looked too green in comparison to the blue-gray portico, and Hale Navy didn’t look dark enough. Instead I chose Polo Blue, which despite its preppy name, is a simple, inky blue-black. For the side lights and transom I chose French Canvas, a grayish off white that echoes the color of the building’s mortar.

Before I could start painting the door and trim, there was a long list of prep work to complete. I began by reglazing the transom window. I then moved on to the soul-crushingly-tedious work of scraping away every last bit of loose and peeling paint. Whoever originally painted the door apparently didn’t believe in the merits of priming raw wood before painting. So there was a seemingly never-ending amount of loose paint that needed to be scraped – a boring, awful process that took forever.

Once all of the loose paint was gone, I washed everything down with a sponge and soapy water followed by clean water. I let everything dry for an hour or so and then primed. I used a primer called Peel Stop Triple Thick made by Zinsser. As the name suggests, this primer is really thick. It’s designed to even out the surface of weathered wood, and again, as the name suggests, it’s supposed to prevent patches of old paint that are still adhered to the wood from peeling further. It goes on smoothly, and judging by how well it stuck to my hands, it binds tightly to the underlying paint and wood, but we’ll see how it holds up over time. I used an exterior oil based primer to prime the new glazing on the transom window (since the glazing itself is oil-based, an oil-based primer is needed to seal it).

After everything was primed, I caulked all of the seams in the trim. The side lights, transom, and trim had never been caulked before, which allowed water to seep into the cracks between pieces of trim, and was probably part of the reason why the trim was weathering so poorly. The caulk will help protect the trim from the elements, and as an added benefit it gives the whole entryway a more finished, seamless look.

Caulked Entryway

The bottom of the door and the edges of the door frame had sustained some pretty serious gouges over the years, so before I moved on to painting, I repaired the corners with wood filler. I used WoodEpox, which is a two part epoxy. It’s really easy to work with – just grab approximately equal sized chunks of each component and mash them together in your hands (preferably while wearing gloves). Then press the paste-like epoxy into the gouge, leave it to dry for a few hours, sand, and paint. WoodEpox is supposed to stay in place even on exterior wood that expands and contracts with changing weather, so we’ll see how it holds up. Here’s a corner of the doorframe that I repaired after applying the wood filler (left) and after sanding (right).

Wood Filler

Finally, I painted everything, which ended up being one of the quickest and most enjoyable parts of the entire project. I used Benjamin Moore’s exterior latex paint in soft gloss. It’s a nice, thick paint, and I only needed two coats to fully cover the door and trim. I considered Benjamin Moore’s “Grand Entrance” paints, which are their specialty front door paints. But the “Grand Entrance” paint is oil-based and the guy at the paint store convinced me that latex paint is just as durable as oil paint and, unlike oil paint, it won’t yellow over time.

The hinges on the door were completely rusted out, so once both sides of the door were painted, I took the whole thing down and removed the hinges, sanded them, and painted them with Rustoleum rusty metal primer and enamel topcoat. There are these big, rusted, iron bolt and washer things clamped to the granite on either side of the steps, so I decided to spray paint them while I was at it. I used a plastic drop cloth and painters’ tape to seal off the granite while I painted.

Stair Bolt

The door is solid wood and it’s really heavy, so Mara and I had a miserable time rehanging it. Since it opens onto the steps, it’s impossible to balance the door in the doorframe while screwing the hinges into the doorjamb. Instead I had to hold the door and try to maneuver it into place while Mara screwed the hinges into the jamb. We got it eventually, but it was an ordeal.

Front Door After

So there it is, the finished door. I still need to order a brass address plaque, and I’d also like to get a pair of brass toe kicks, but otherwise it’s done. I think it turned out nicely, and the neighbors seem to like it too, so we’ll call it a success. And even though I didn’t use “Hale Navy” in the end, the dark blue door with brass hardware surrounded by white trim has a definite maritime character, which seems fitting for a building located on the harbor in East Boston, a neighborhood that has historically been associated with the shipbuilding industry.