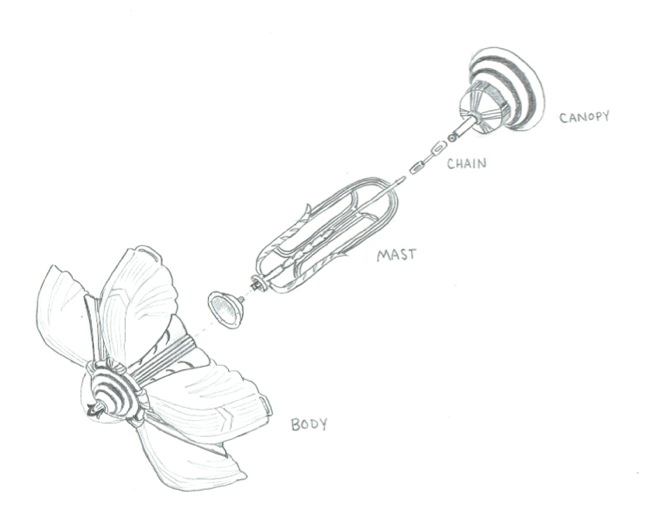
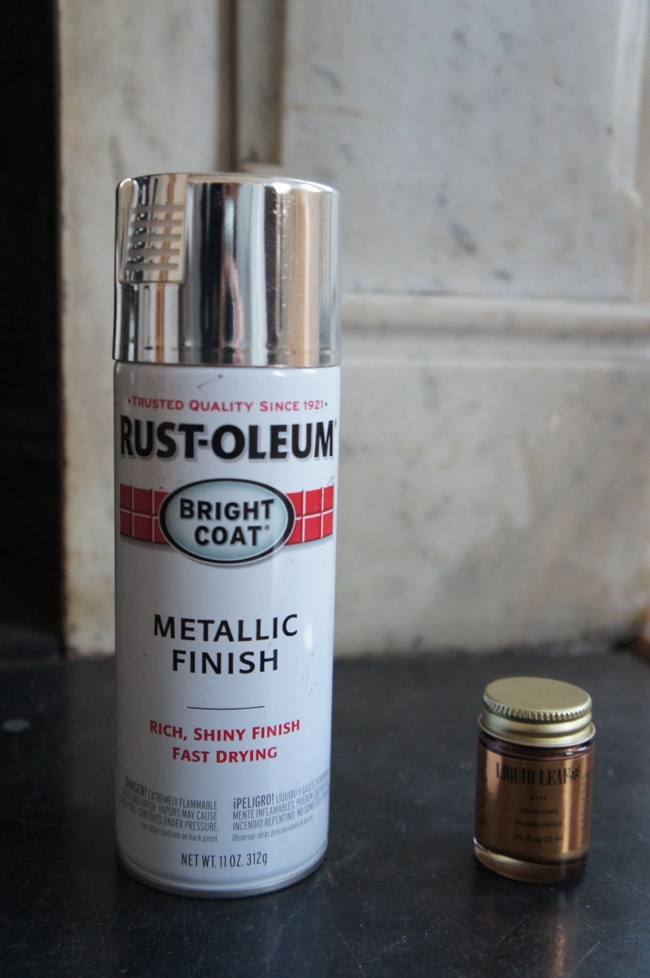
I had just finished putting the final coat of spray paint on my new, antique chandelier frame when I felt the first raindrop. I looked down at the disassembled chandelier parts, still glistening with wet paint, spread out on sheets of newspaper under the magnolia tree in front of my building. I had spent the last two hours carefully taping off the gold-painted sections of the chandelier frame, cutting away the excess painters’ tape with a razor blade, and applying a coat of clean metal primer followed by a few quick, light coats of Rustoleum ‘Bright Coat’ silver metallic spray paint. Another raindrop landed on my head. After hours of work, it would only take a few minutes for the chandelier’s still-wet metallic finish to be streaked with rain.
I gathered up the freshly painted ceiling canopy as quickly as possible, doing my best to only touch the unpainted interior, and balanced it in one hand. Then I grabbed the chandelier mast in my other hand, holding it precariously by the screw at its base. I ran inside, propped the mast against the fireplace, and put the canopy on a nearby magazine. Back outside, the rain was coming down faster, but the leafy branches of the magnolia tree seemed to have protected the main body of the chandelier from the worst of it. I picked up the chandelier body and shielded it from the rain with a sheet of newspaper as I ran for the door.
Once everything was safely inside, I spread all of the chandelier parts out on a flattened cardboard box and inspected the damage. No water droplets or streaks. So far so good. But there in the center of the chandelier body was a big thumbprint. I looked down at my hands and, sure enough, my right thumb was covered in sticky silver paint.
Because the paint’s metallic finish was so shiny – almost chrome-like – the dull, gray thumbprint stuck out like… well, like a sore thumb. The directions on the spray paint said to wait 48 hours before adding another coat. So two days later I sanded the thumbprint down with extra fine sandpaper and repainted the chandelier base with a light coat of spray paint.

The thumbprint turned out to be the first in a series of things to go wrong with this project.
As I was researching paint options to recreate the chandelier’s original metallic finish, I came across a technique that involves using wood stain over metallic spray paint to mimic the look of tarnish. The idea is that the stain settles in the corners and crevices of an object, darkening those areas and providing some depth. It sounded like kind of a crazy idea, but it had worked for a few internet people so I figured I’d give it a try.
A few days after repainting the chandelier frame, I brushed some Minwax dark walnut stain on a small section of the ceiling canopy. After waiting about a minute, I tried to wipe off the excess stain with a rag. But the stain seemed to have partially dissolved the underlying metallic paint, leaving the finish dull, streaky, and sticky. It wasn’t what I had expected at all, and it certainly didn’t look like subtle tarnish. So after some more sanding and another coat of silver paint, I was back where I started. I decided that the bright, metallic finish looked just fine as it was.

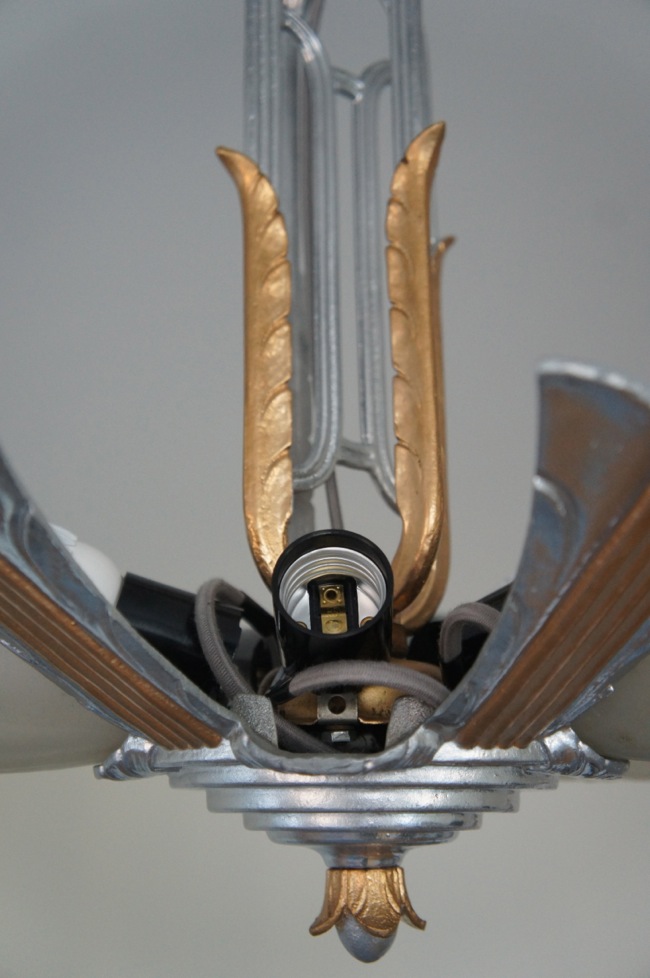
Originally the chandelier had a two-tone finish, with most of it painted silver and a few sections highlighted with gold paint. I decided early on to stick to the chandelier’s original color scheme as I refinished it. The shiny, silver spray paint was an easy choice – it looked very similar to the original paint and gave a smooth, shiny finish – but it took me a while to find the right gold paint. I wanted a paint that I could brush on that had a realistic metallic finish. Eventually I settled on Liquid Leaf, an oil based paint that contains copper particles, which give the paint a convincing metallic sheen. It’s a really thick, buttery paint, so even though I brushed it onto the chandelier, it settled out and there weren’t any brush marks left behind.
Once the frame was painted, I moved on to rewiring the chandelier. For obvious safety reasons, I didn’t want to reuse any of the original electrical components, which meant I had to find new sockets and new wire. Luckily, Home Depot had some bakelite sockets that were pretty much identical to the original 80-year-old sockets. As for the wire, I decided to use a gray, cotton-wrapped wire that would look inconspicuous against the silver chandelier. Although this was my first rewiring experience, it turned out to be fairly straight-forward: I connected short lengths of wire to each of the five sockets, and then connected the wires from the sockets to a central wire that would run to the ceiling box.
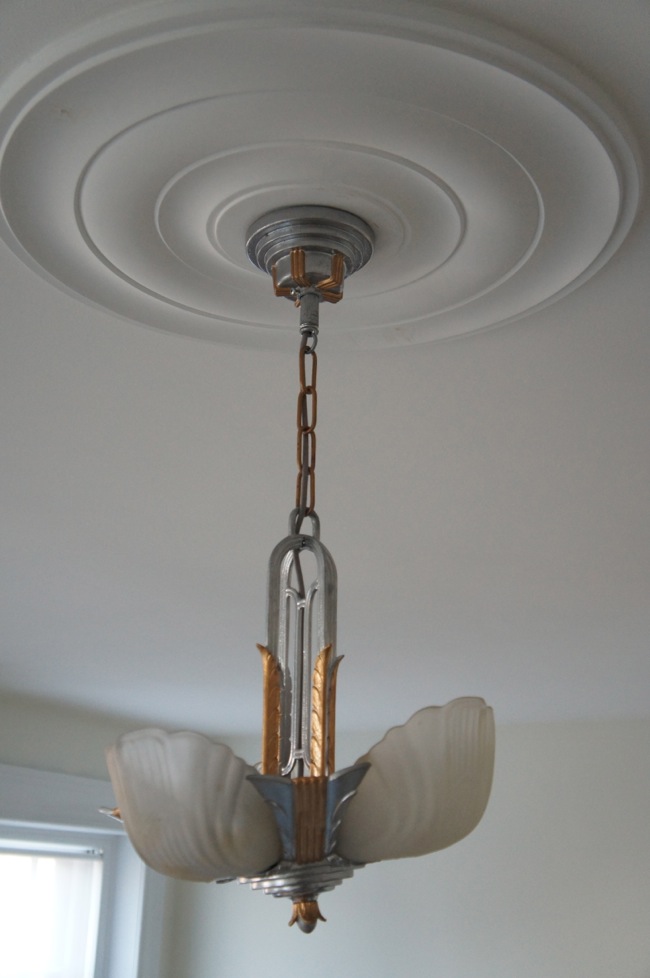
After the chandelier was wired and reassembled, all that was left was to actually hang the thing. The chandelier is made from cast iron and weighs about 25 pounds without the shades, so I enlisted Mara’s help to hang it. I didn’t think it would look right if we hung the chandelier directly against the ceiling, so before we got started, we added a foam, reproduction ceiling medallion that matches the one in the dining room.
Apparently ceiling fixture connections haven’t changed much in the last 80 years, so we were able to use a standard crossbar with a central thread to attach the chandelier to the ceiling electrical box. Because of the way the ceiling canopy was constructed, we could only lower the canopy a few inches, which made attaching the chandelier to the crossbar on the electrical box almost impossible. We used a tiny screw driver that just fit into the gap between the canopy and the ceiling, and we spent two hours wedging the screw driver above the canopy, trying to line up a tiny screw with the screw hole in the crossbar, dropping the screw, retrieving the screw and starting all over again. We alternated holding the chandelier and standing on the ladder trying to attach the top of the canopy to the ceiling crossbar. I was ready to give up after an hour of this, but Mara was persistent, and finally, she managed to find an angle that allowed her to line up the screws with the crossbar, and within a few minutes the chandelier was securely attached to the ceiling box.
A few days after hanging the chandelier, the (hopefully) last thing to go wrong with this project went wrong. As I switched the chandelier on one evening a few days after hanging it, there was a clicking sound and one of the bulbs went out. The bulbs were all brand new LED bulbs that are supposed to last 20 years; the wire to the socket must have popped loose, I thought. Unfortunately the wires were sealed up under the chandelier mast. At this point there was no way I was taking the entire chandelier down. So I managed to remove the body of the chandelier from the mast, only to find that all of the wires were secure – none of the wire nuts were even loose. Only then did I think to test the bulb, and sure enough, the bulb was a dud.
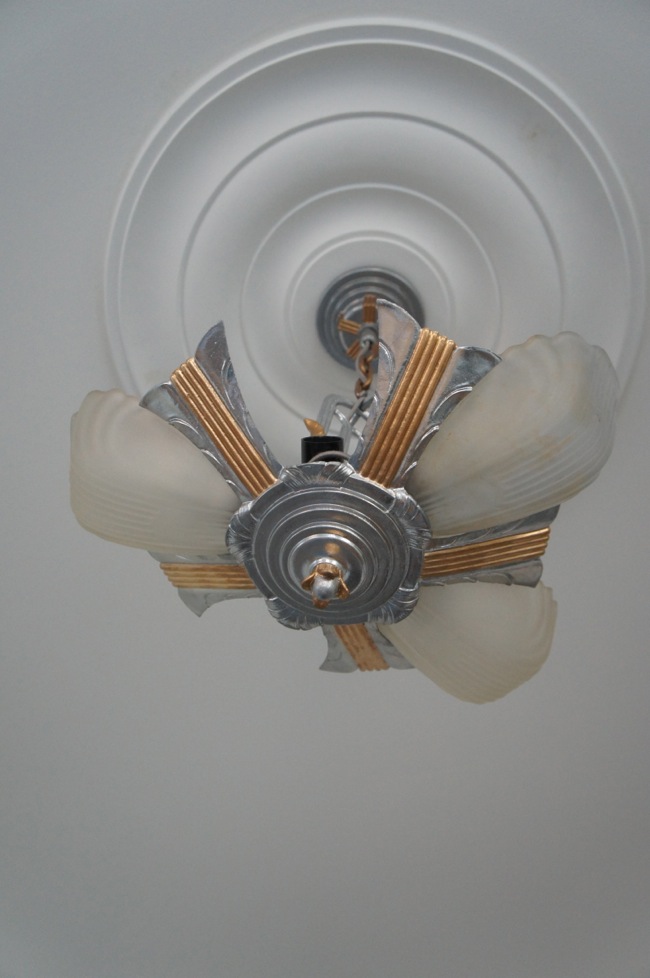
Part of the reason that this post has been delayed for so long, is that over the past few weeks I’ve been diligently searching for matching slip shades for the chandelier. I was hoping to share some pictures of the completed chandelier in this post, but despite my best efforts, I still only have three slip shades. I’ll post some pictures of the complete chandelier once I get my hands on two more shades. In the meantime, here’s the chandelier as it looks today:
Not sure if these are right, they look to be milk glass whereas yours appear to be frosted, but it’s worth a shot.
https://www.etsy.com/listing/208303839/art-deco-antique-glass-slip-shade?ref=sr_gallery_1&ga_search_query=art+deco+slip+shade&ga_page=2&ga_search_type=all&ga_view_type=gallery
You’re right, that actually is the type of shade I’m looking for, but in milk glass instead of frosted. This shade came in a lot of different colors, but I’ve never seen the milk glass version. Luckily for me, the frosted shades seem to be the most common, so I’m sure I’ll find some sooner or later!
Good luck finding your shades! I have a slipper chandelier hiding away in my attic, and it’s missing a shade, too. Although I have no immediate plans for it, I’ll never get rid of it. You’re inspiring me to try to rehab it!
Go for it! Rewiring sounds daunting, but it’s really not too bad. And with a little (or maybe a lot) of persistence you might find a replacement shade on eBay.
Your sketch of the chandelier is great! You did a great job with the paint. I love that you hung it up unfinished because it means you’re an optimist!
Thanks! Although in this case I may have been overly optimistic since it’s taking forever to find affordable replacement shades.
Looking good! best of luck with the shade hunt! I think I saw something similar at the Habitat Re-Store, I’ll go back this weekend and take a closer look.
Wow… impressive….you took so much effort to expain!! Kudos!
—————–
The Terrace EC
The interventions studied by MBE allow to restructure and give a new look to the places without too much invasive work.