Renovating the living room was one of the first major projects I undertook after moving into the condo. As my contractor, Gregg, started removing wallpaper and scraping old paint, he came across large swaths of water-damaged plaster and rotten woodwork along the front wall of the building. At the time, I assumed this was old water damage from a leak that had since been fixed. Gregg patched up the walls, replaced the rotten woodwork, and we moved on.
Then, a few months later after a day of heavy rain, I noticed water dripping down the front windows in between the actual windows and the storm windows. This didn’t seem normal, but I was still in denial at this point. Before long, my neighbors also started noticing evidence of leaks along the front of the building – water stains, crumbling plaster, and rotten woodwork. And then there were the puddles of water that accumulated at the front of the cellar after it rained.
Not wanting to deal with the implications of this overwhelming evidence, my neighbors and I instead decided to take the let’s-wait-and-see-maybe-the-problem-will-take-care-of-itself? approach. Of course, the problem didn’t take care of itself. The turning point came a little over a year ago when I came home one dark and stormy night to the drip, splat sound of water leaking onto my living room floor. The water was dripping through cracks in the woodwork surrounding the front windows and running over the trim onto the floor. After scrambling for towels and buckets, I got the situation under control. My downstairs neighbor had it even worse. His front windows were transformed into an unwelcome water feature, with gallons of water cascading over the sills during the night.
After this great flood incident, we were finally convinced that something needed to be done. According to some google research, the source of the leaks was either the roof, the exterior brick masonry, or, less likely, the gutter. We decided to start with the masonry. The first mason who looked at the front of the building described the brickwork as “swiss cheese like.” It seemed that we’d found the source of the leaks.
Brick buildings occasionally need to be repointed, a labor-intensive process that involves chiseling out the mortar joints between each brick to a depth of about 1/4 inch and then refilling the joints with fresh mortar. Mortar lasts about 40 or 50 years before it begins to weather, crack, and fall out of the joints. Apparently it had been well over 50 years since the front of our building was repointed, and it’s possible that the facade had never been repointed in the 165 years since the building was constructed.
At some point, someone tuck pointed the facade, a process that involves smearing a layer of fresh mortar on top of the mortar joints without cutting away the old mortar first. Tuck pointing is, at best, a stop gap measure. Since the new mortar doesn’t form a good bond with the old mortar, it too will crack and fall away within two or three years, which is exactly what happened on our building.
Because repointing is an expensive, labor-intensive process, we wanted to make sure it was done properly. And because our building is 165 years old, I soon learned that it would require special treatment. Most modern brick isn’t structural, it’s just a veneer placed over a wood or steel frame that holds the building up. But the exterior walls of my building are brick all the way through – it’s the only thing holding up the roof. In order to remain structurally sound, my building’s brick walls need the flexibility to shift and expand slightly over time, as the temperature changes and the building settles. It turns out that the mortar is a crucial part of this flexibility.
In any brick wall, the mortar needs to be softer than the brick to allow the bricks to move and expand over time. If the mortar is too hard, the bricks will eventually crack and chip. In the mid-19th century when my building was built, bricks were much softer than they are today, and instead of the cement-based mortar we use now, 19th century masons used soft mortar with a high lime and sand content. A similar custom-mixed mortar needs to be used to repoint historic brickwork. 19th century brickwork also looks different than newer brick walls, the bricks themselves are smaller and the mortar joints are narrower. Masons need to take extra care to preserve this look while repointing. Because of these special considerations, we decided to look for a mason that specializes in restoring historic brickwork. Since there are so many old, brick buildings in Boston, it turns out that there are a lot of masons who do this kind of work. After speaking to a few of them, we settled on MS Masonry.
My building’s facade has a lot of brownstone trim – sills, lintels, and pilasters and entablature surrounding the front door. Builders in the 19th century loved brownstone – it looks good, it’s locally available, and it’s soft and easy to carve into elaborate, decorative shapes. But it’s actually a terrible building material. It’s a type of sandstone, and it erodes when exposed to the elements. The brownstone bits on the front of my building had been painted to slow down the erosion process, but they were still beginning to wear away in spots.
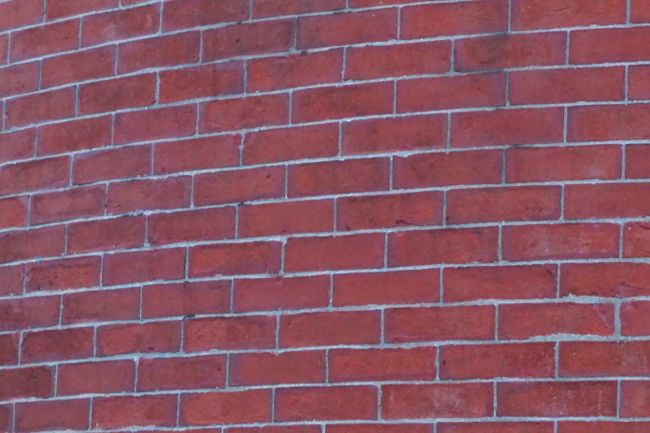
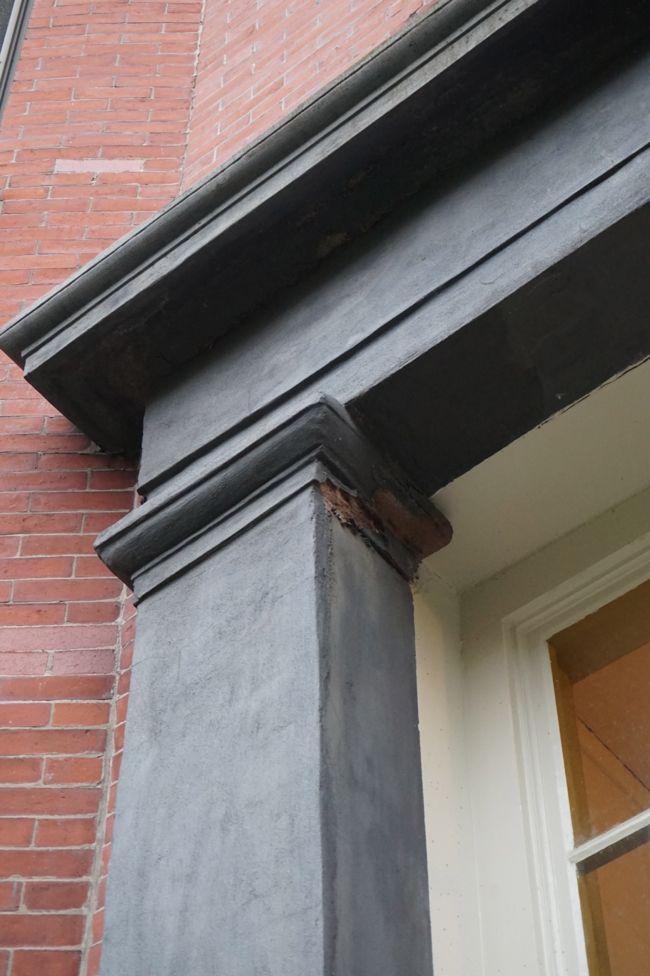
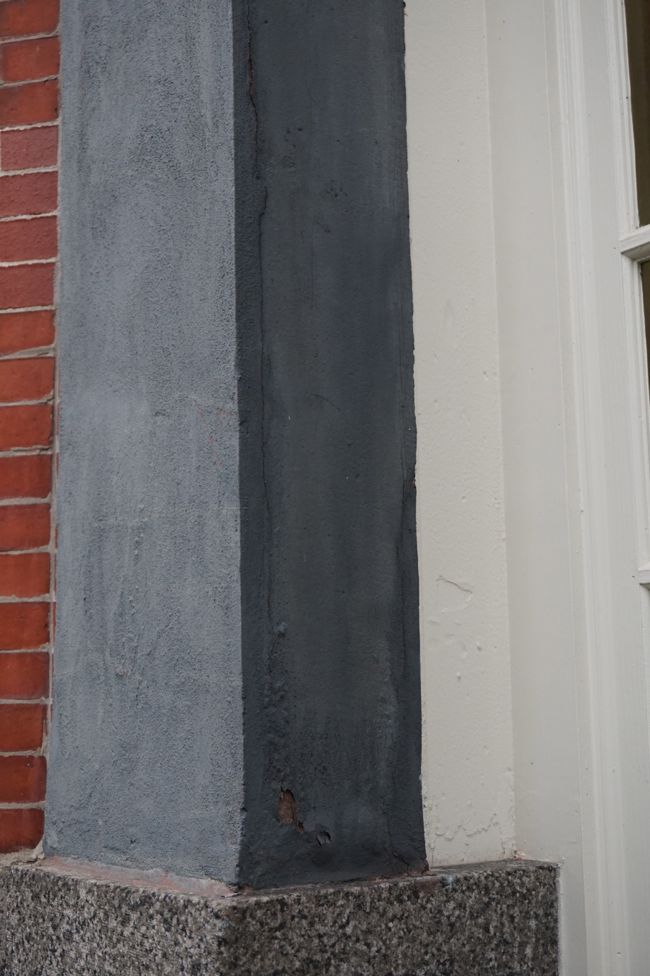
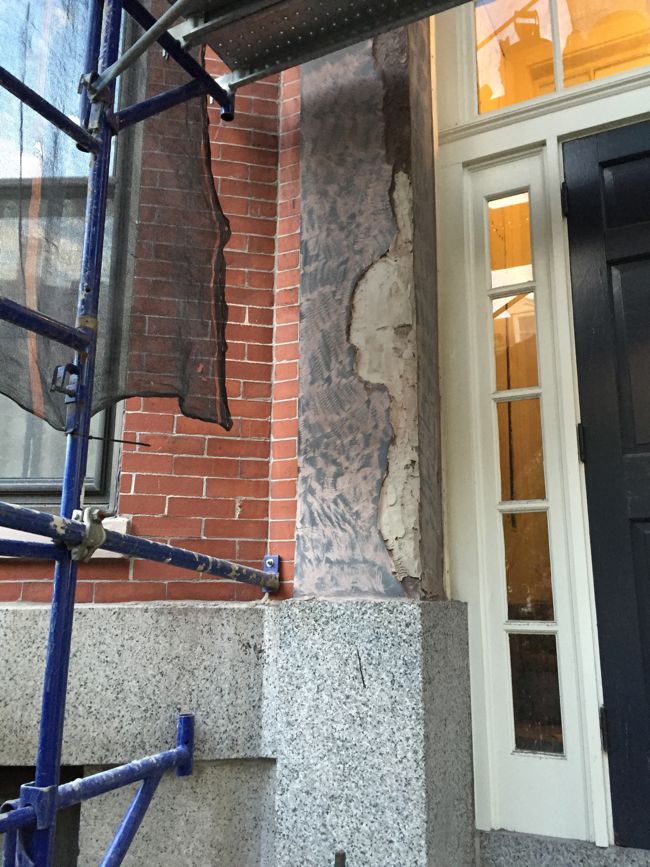
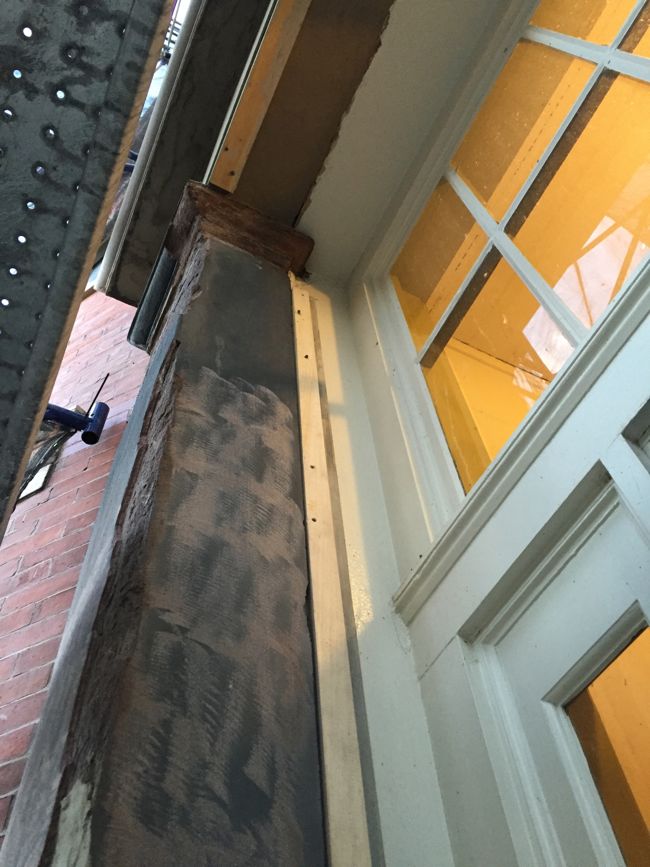
So while the masons were repointing the facade, we decided to go ahead and have them restore the weathered brownstone trim as well. The restoration process involved chipping away all of the loose and crumbling stone to reach a solid surface. The masons then refaced the stone trim using a stucco technique. They applied a special type of cement and sculpted the decorative details to recreate the original surface. Finally, they repainted the refaced trim to approximate the look of brownstone – we chose Benjamin Moore Whitall Brown, a gray-brown that’s about the same color as natural brownstone. Here’s some in progress shots of the brownstone restoration around the front door.
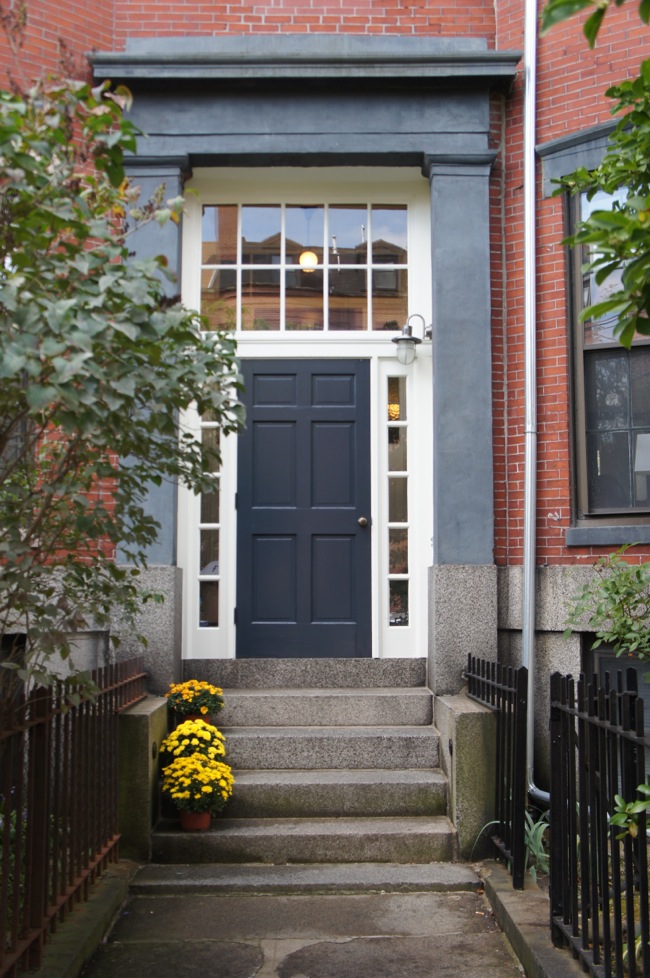
In the end, the entire restoration turned out great. The restored trim looks crisp and sharp, as it was originally intended to be. And now that the trim has been returned to its original brownstone color, the entire building looks more stately and dignified. The repointed brickwork looks about the same as it did before it was repointed, a sign of a sensitive restoration. And most importantly, in the months since the facade was repointed, the cellar seems to have dried out and we haven’t noticed water leaking into the front of the building.
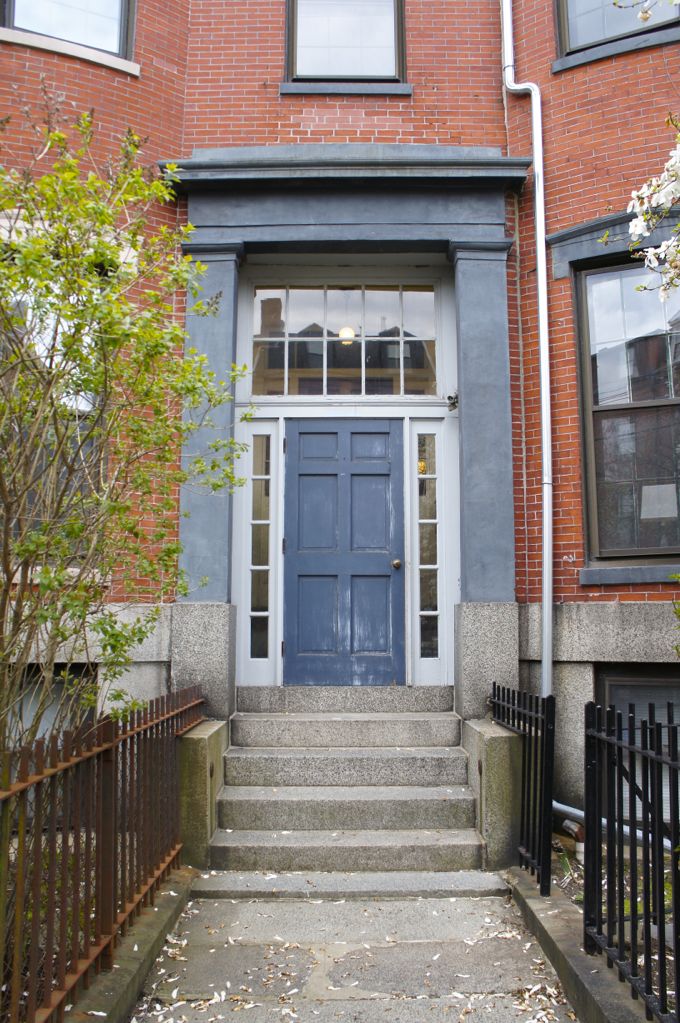
The front of the building has come a long way since I moved in. Four years ago, the front entrance looked like this:
And here it is after I repainted the front door and reglazed the transom window:
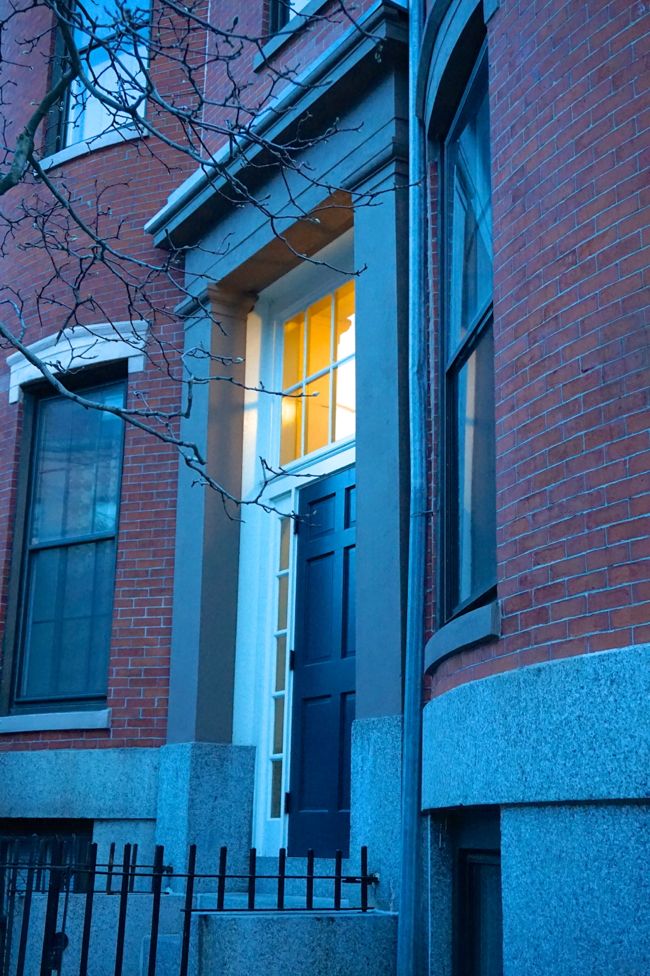
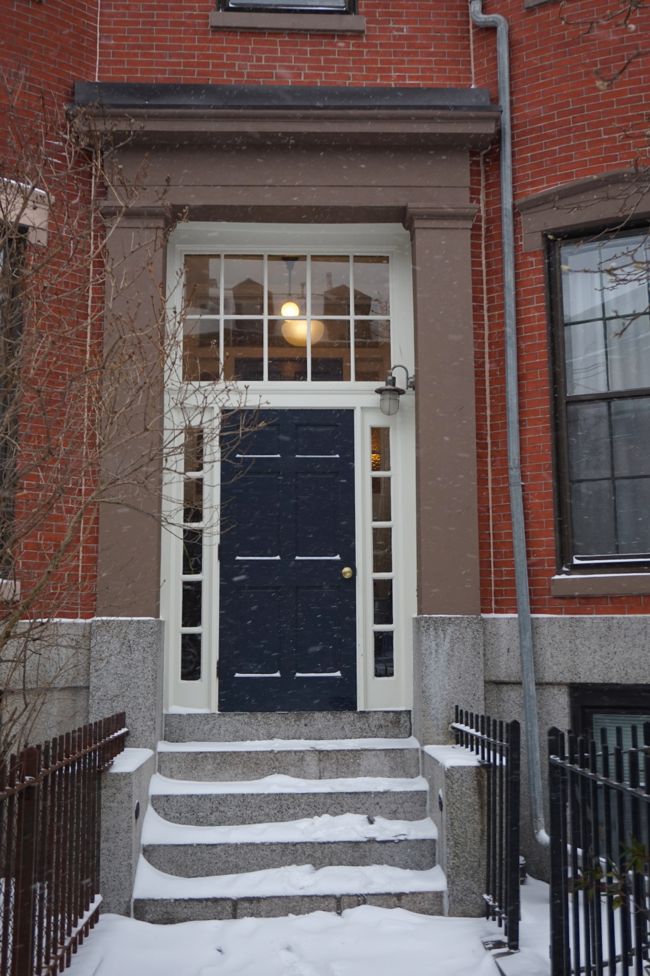
And finally, here’s the front entrance today, with newly restored brownstone trim:


What a horrible situation you had to endure ! You did a fantastic job repairing and restoring the façade !
Thanks! Although I can’t take too much credit — our masons did excellent work.
Gorgeous! Out of curiosity, since I have never lived in a condo/apartment building like this, do your HOA dues cover something as extensive as this brick work, or is this something everyone had to chip in for when it happened?
It ended up being a little of both. Since we knew this project was coming, we saved up in the association account (which is funded by HOA dues) for about a year. But in the end, we didn’t have quite enough to cover the whole project, so we all chipped in on a “special assessment” to make up the difference.
How long did the restoration take? And was it needed only on the front because that side faces the weather? It looks great, particularly the sandstone … and the snow highlights your front door perfectly! We’ll have to do a little repointing on our fireplace this summer … hope we can handle it ourselves, but you’ve got me thinking we should talk to some pros.
It took a team of masons about a month of full time work to finish the entire facade. Unfortunately, almost all of the brickwork on the building needs repointing… One wall was repointed a few years before the building was converted to condos, and we decided to tackle the facade next (the leaks along the front wall bumped up the urgency of this work). But over the next few years we’ll need to repoint the rest of the building as we can afford it.
I’ve never tried repointing myself, but if you’re just doing indoor fireplace brick, the work won’t need to hold up to the elements, so I’d imagine you could handle it yourself – just make sure you get the right type of mortar for your bricks to prevent cracking down the road.
The front of your building looks so classic. It’s great that your association is committed to the upkeep. Love the door color!
Thanks! I’m lucky that my neighbors are all on the same page as far as maintaining and improving the building. I think we all realized that the building needed some work when we bought into it.