Up until a week ago the windows in my dining room weren’t really functional. They were old aluminum windows that had exceeded their intended lifespan. Although they were double-paned, the seal between the panes had broken, leaving the windows cloudy and effectively uninsulated. Aside from being drafty and hard to see through, the windows were almost impossible to actually open. The tracks and counterweights were broken, so that one window required a herculean effort to push closed, while the other window wouldn’t stay open at all. So the windows didn’t let a lot of light in, didn’t provide insulation from the outdoors, and didn’t open – they pretty much weren’t doing any of the things that a window is supposed to do.
Clearly, it was time for some new windows. And while I was at it, I decided to replace another barely-functional aluminum window on the same side of the building in the living room.
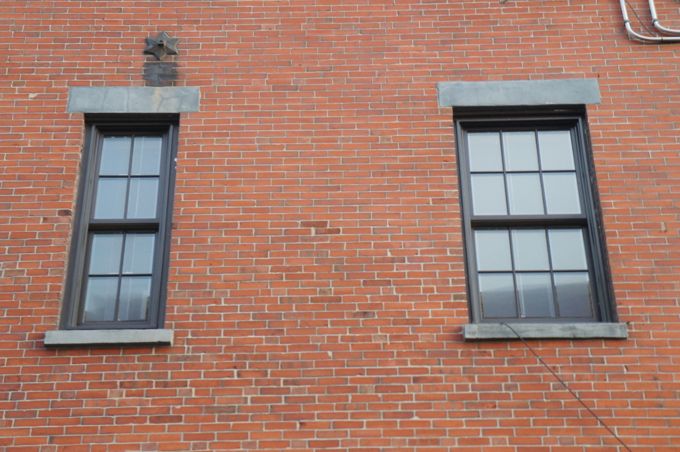
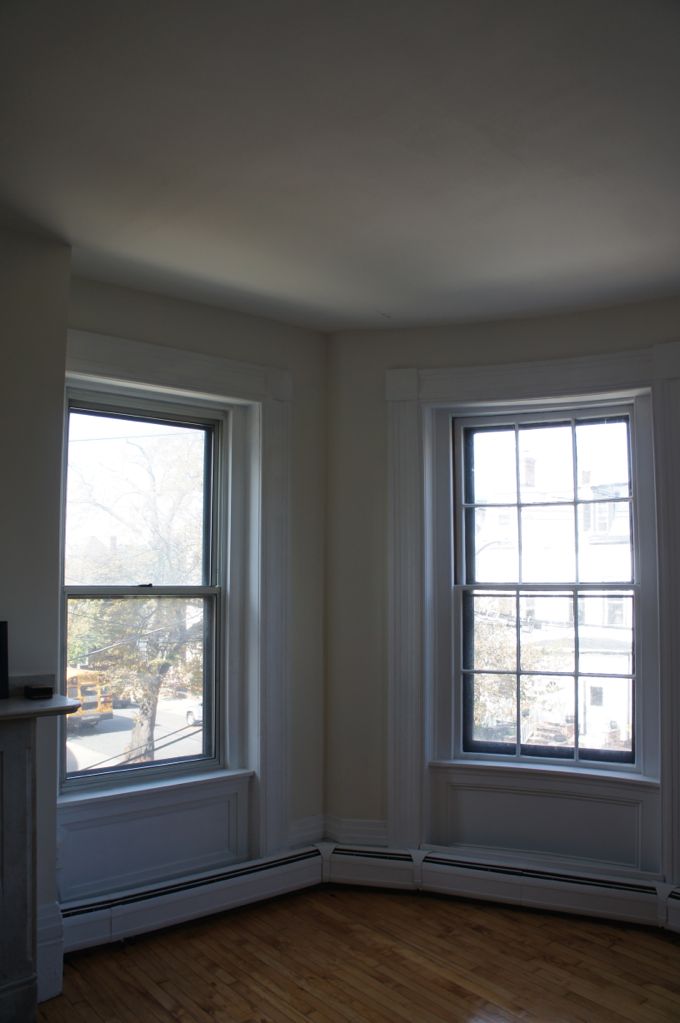
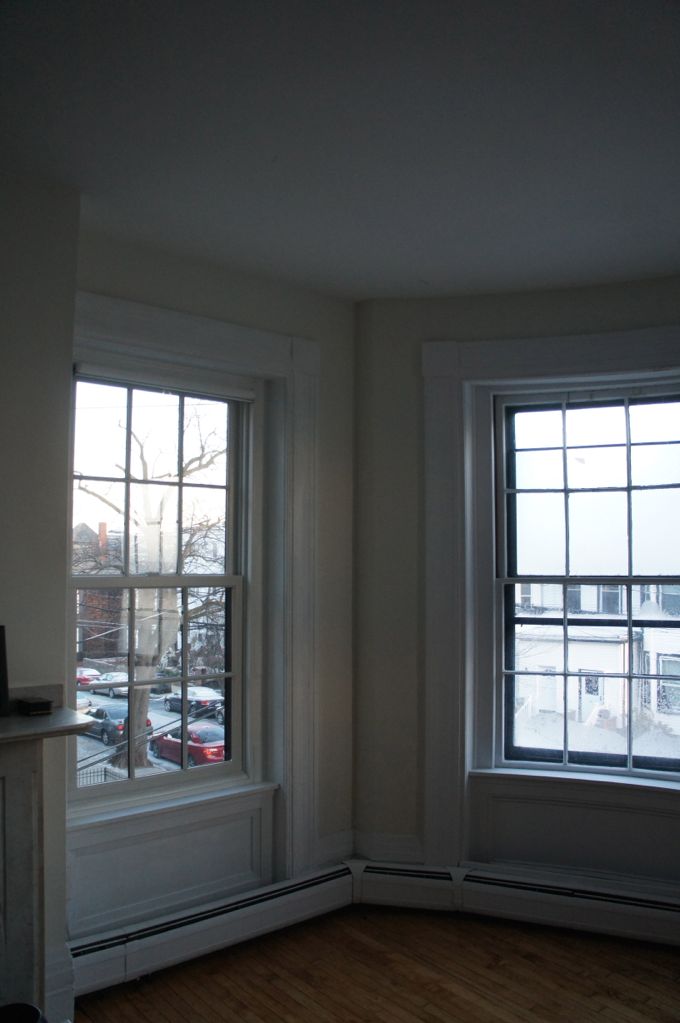
Unfortunately, the original windows on this side of the building were removed decades ago. The windows on the front of the building, on the other hand, are more or less original – likely more than 100 years old anyway. The picture above shows the front corner of the living room, with the decrepit aluminum window on the left and an original window on the right. As you can see, the original windows are double hung with six over six divided lights, a common window style in Greek Revival architecture. And as you can also see, the original, divided-light windows fit in much better with the building’s architecture and just plain look better than the newer aluminum windows.
Once I decided to replace the aluminum windows, I started looking for new windows that would approximate the look of the building’s originals. Unfortunately, real divided light windows made up of separate panes of glass are pretty rare these days. They’re actually more difficult to produce and less energy-efficient than non-divided windows. Instead, most window manufacturers make ‘simulated divided light windows’, which have decorative grilles stuck to the inside and outside of the window and sometimes have a divider between the panes as well.
After looking at a few different options, I settled on simulated divided light windows made by Andersen. They’re not a perfect match for the building’s original windows, but they’re pretty close. The exteriors of the windows are vinyl-clad, while the interiors are painted wood. I placed an order for the windows with a local distributor, and 4 to 6 weeks later, the windows showed up.
When my contractor, Gregg, came over a few days later to install the windows, he opened the boxes and was surprised to find new construction windows inside. New windows generally come in two configurations: new construction and replacement inserts. New construction windows are designed to be attached to the surrounding wall framing, which is usually only exposed during an extensive renovation or new construction project. Replacement insert windows are installed in the existing window frame and are designed to make installation minimally invasive. In this case, I wanted replacement insert windows. But through some sort of mistake or misunderstanding, I ended up with new construction windows.
The windows were a custom order, so Andersen wouldn’t take them back. And a few days of increasingly frustrating back-and-forth phone calls with the window distributor concluded with them refusing to exchange or refund the windows. So I was stuck with them. But by this time, Gregg had a plan to install the new construction windows and was confident he could make them work. It took him longer than he expected, but he managed to get all three windows in.
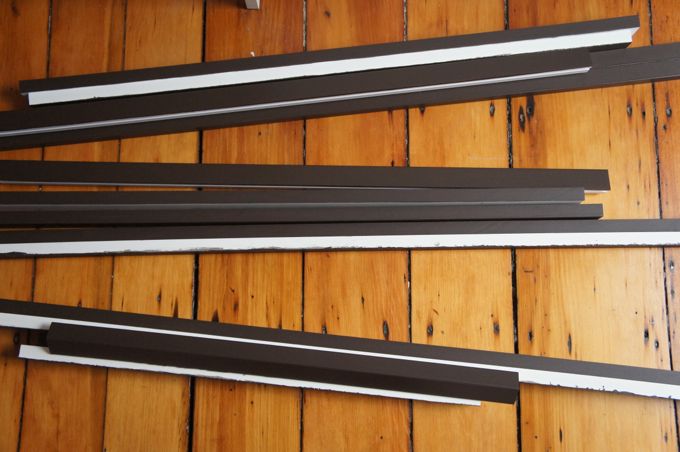
Since the new windows were slightly different sizes than the old windows, Gregg had to add new interior and exterior trim. We decided to use Azek vinyl boards for the exterior trim. Unlike wood, the vinyl trim won’t require any maintenance, which is nice since the windows are two-and-a-half stories above the street. The one drawback was that Azek vinyl boards are white, while the exterior trim around the rest of the building’s windows is dark brown. The obvious solution to this problem was to paint the vinyl boards dark brown. But it turns out that painting vinyl a dark color can cause problems: vinyl expands much more than wood when heated, and a dark paint can cause vinyl to absorb so much heat from the sun that it actually buckles. The guy at the paint store helped me match the dark brown color of the existing trim without using any black pigment (he used blue instead, which won’t absorb as much heat). I used a high-bind primer called Stix before painting, and only painted the exposed sides of the trim. Here’s the trim after painting, organized in three piles, one for each window:
Once it was installed, the new trim matched the building’s existing windows and the exterior color of the new windows almost perfectly.
The interior trim consisted of 1×2 boards and a few pieces of quarter-round to cover the unfinished portions of the new windows. I patched the new trim with Ready Patch and caulked the seams so that it blended in with the existing window casing. After a fresh coat of paint, the new trim pieces were all but unnoticeable.
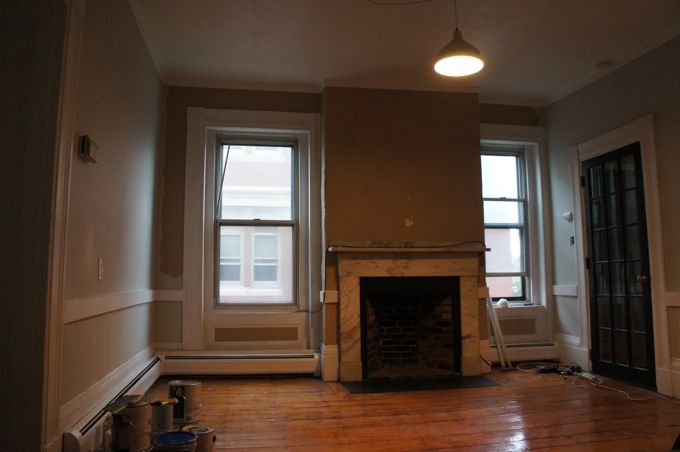
Now, before we check out some photos of the finished windows, it seems like a good time to take a step back and remember what the dining room looked like just a few short months ago:
The floors were dull and worn, the plaster around the fireplace was textured and lumpy, most of the room was painted a depressing brown, and, of course, the windows were falling apart (if you look closely at the window on the left, you can see that part of the upper track is falling off). This picture was taken a few months ago, part-way through the kitchen renovation. At this point I had already replaced the door to the living room, and begun painting the room.
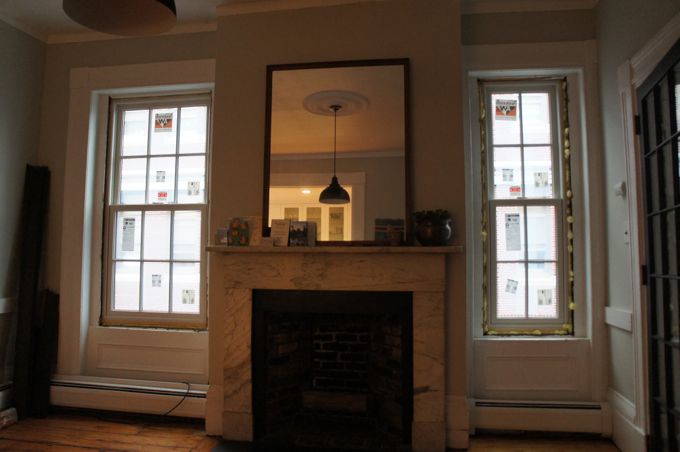
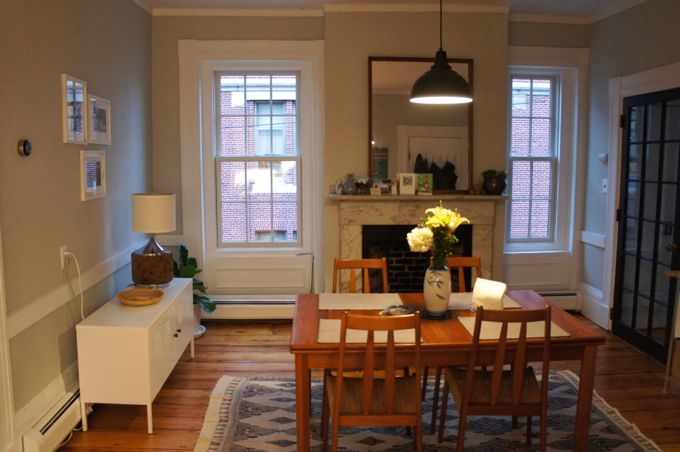
And here’s the dining room now. The new windows make a huge difference. The room finally looks clean and finished, like a space where I’d actually want to hang out and eat a meal, like, you know, a usable dining room.
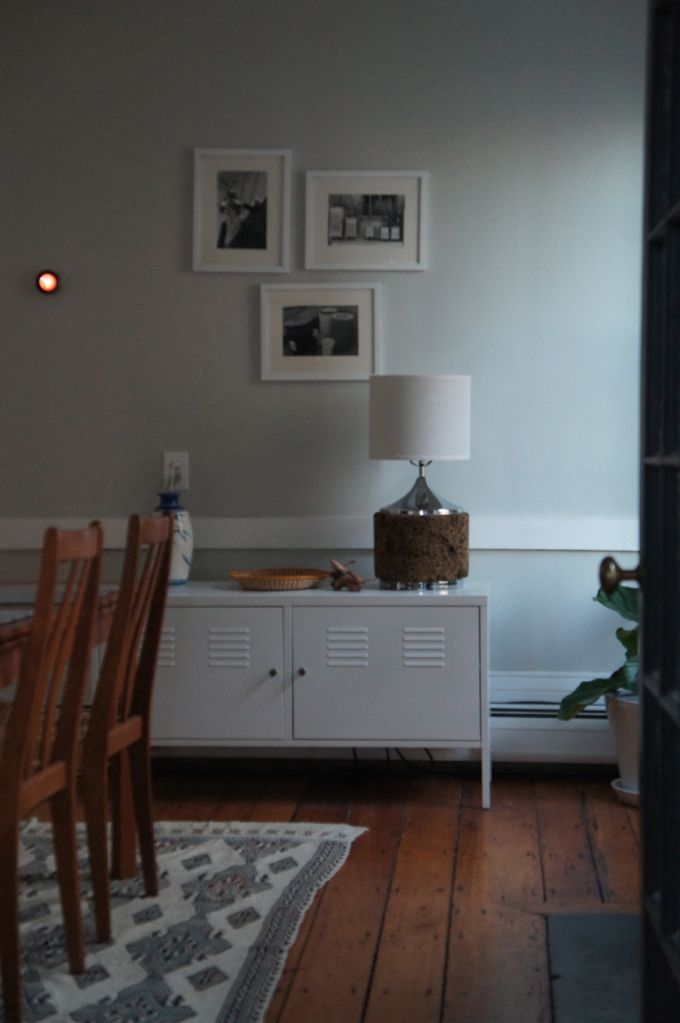
Sorry for all of the dark pictures, but it’s a dark and miserable time of year, so it’s the best I could do.
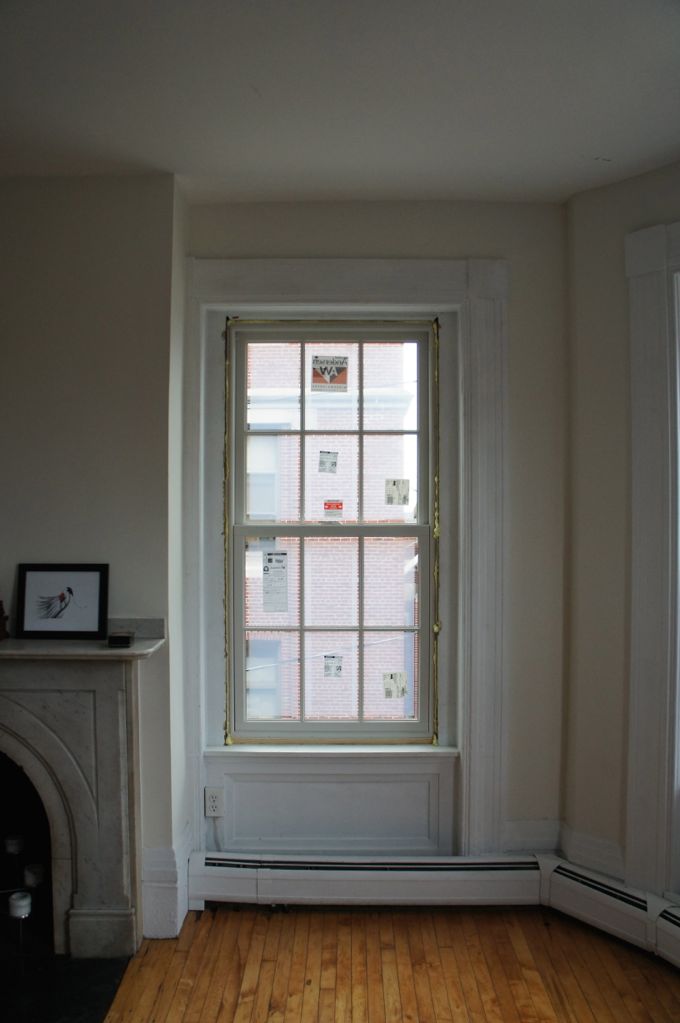
Finally, here’s the new living room window. It’s a pretty close match for the room’s original windows, and it looks more natural here than the old aluminum windows – not to mention the fact that it’s insulated and completely functional.


They look beautiful!
The windows look great! I’m wondering: how does the building co-op board (?) have much to say about the windows? I would assume they’d want all replacement windows to be the same, right? Are you steering everyone into these type of windows, when their time comes to make changes?
The windows on this side of the building are a bit of a hodgepodge since some were replaced before the building was converted to condos. Ideally we’d all use the same windows when it came time to replace them, but due to cost concerns and other preferences we decided it wasn’t realistic to require everyone to use the same replacement windows. Instead, we agreed to keep any new windows the same dark brown color.
Awesome workmanship. Looks great!
Wow, nice job! It must be a great feeling to look out through new windows. Do they make the house quieter, too?
Yes, it is noticeably quieter with the new windows — a nice side benefit!
Your projects are always an inspiration…and as always, beautiful end result!
You’re going to love how much sound they keep out. And since the other ones didn’t open or close properly, you’re going to LOVE that first Spring breeze through easily opened windows. Well done!
Yeah, considering it’s 9 degrees out right now, I’m really looking forward to opening all the windows on the first warm day of spring!
Wow, those are a really good match to the original windows. And your dining room looks fantastic. Your house is really coming together.
Andersen windows are really awesome. Great project.
Hi Dan,
Well I haven’t looked at your blog since Sept so there was a lot to catch up on! It all looks beautiful. As always, I am in awe at your attention to detail and the care you take to do jobs properly. Congratulations, you are creating a wonderful home. I hope the kitchen is still giving you pleasure. How is everything holding up? Oh and did you get a piece of furniture for the alcove?
The kitchen still pretty much looks and feels like new! The soapstone counters are accumulating a few nicks and scratches, but I think they look even better now that they’re a little broken in. After living with the kitchen for a while, we decided it was nice to have some open space by the window. So for now there’s just a counter-height stool in that corner. But that might change in the future if we decide we need more storage/counter space.
Great to hear Dan. I have always disliked stone worktops because granite just looks so hard and unforgiving but when I saw your soapstone I was intrigued – and may look into it when (sigh) we ever get to redo our kitchen, although I still really like wood.
PS Does Gregg fancy a working holiday to the uk (Oxford) to install our kitchen (in a year or so!). You struck gold there!
Well, you’d have to ask him, but I’m sure he’d be tempted!