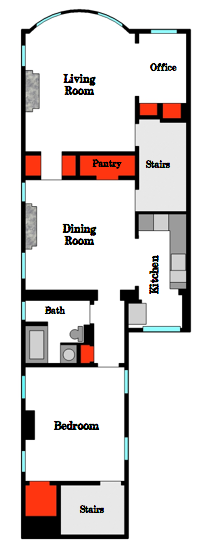
There are seven closets squeezed into my condo’s 960 square feet. None of these seven closets are particularly big – the biggest of them, the closet that I converted to a pantry during the kitchen renovation, just barely qualifies as a walk-in. But still, it’s a lot of closet space for a relatively small condo. Before moving to my current place in East Boston, I lived in Boston’s North End for three years in a series of tiny apartments with postage-stamp sized closets. Even with a dresser for extra clothes storage, fitting all of my clothes and all of Mara’s clothes into a tiny closet was a major challenge. There definitely wasn’t any leftover closet space for non-clothing items. So when I first moved into the condo, I was really excited to have a seemingly endless amount of closet space.
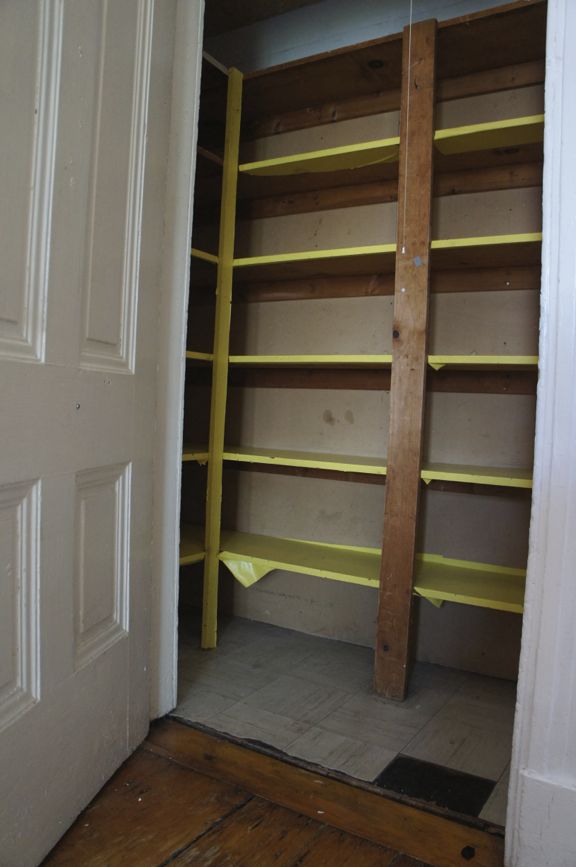
But once I actually started unpacking, I realized that most of the closets were in terrible condition. They were covered in a thick layer of grime and many of them were unfinished. It was as though someone got halfway through renovating the closets and lost the will to go on, leaving them with unfinished wallboard and makeshift plywood shelves. I quickly learned that cleaning decades-old, raw plywood and unfinished wallboard is a losing battle. The shelves in some of the closets had been covered in contact paper – clearly a last-ditch effort by a previous tenant to create a clean storage surface. But by the time I moved in, the contact paper was peeling and filthy. A few of the closets were so bad that they weren’t really suitable for storing anything that I wanted to keep clean. They looked like the kind of storage space you’d find in a garage or a shed. And at first, that’s exactly how I used these closets, as sort of en-suite sheds. They were filled with tools, construction materials, and not much else. Here’s a picture of the pantry before I renovated it this past year to give you an idea of what I was dealing with.
A lot of the closets were in rough shape, but the two closets that flank the short hallway connecting the living room and dining room were some of the worst. They were dusty and grimy and were closed in with unfinished louvered doors. And the hallway outside the closets wasn’t much better. The walls, the ceiling, and the trim were covered with a single, streaky coat of mayonnaise-colored paint. On top of everything, the overhead light fixture was dead, making it impossible to see inside the closets after dark, which may have been for the best given the sorry state of the interiors. Here’s an old picture of the hallway, taken from the living room. And yes, that cave-like hole in the wall contains the hallway and closets in question.
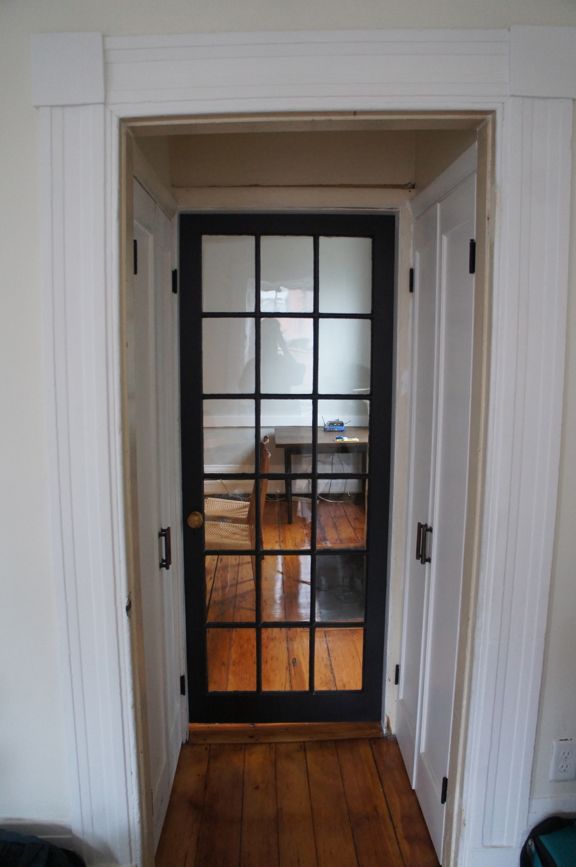
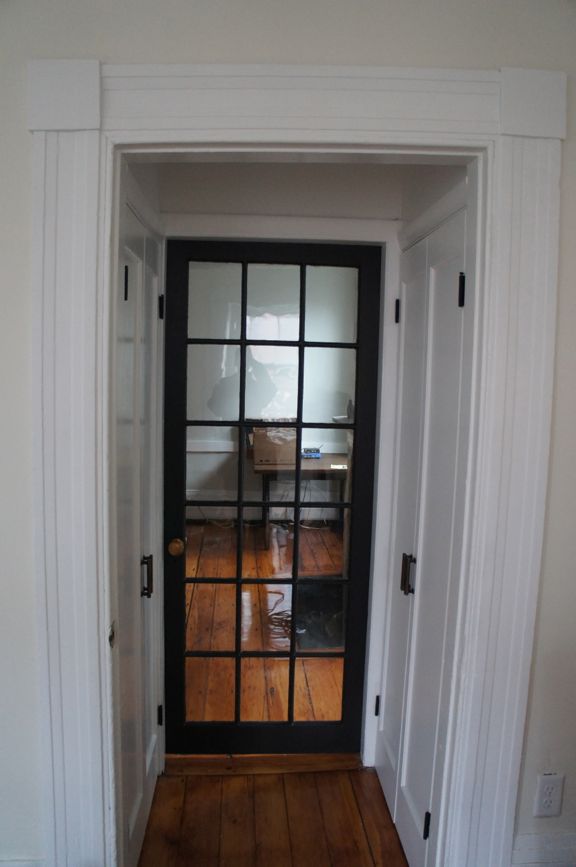
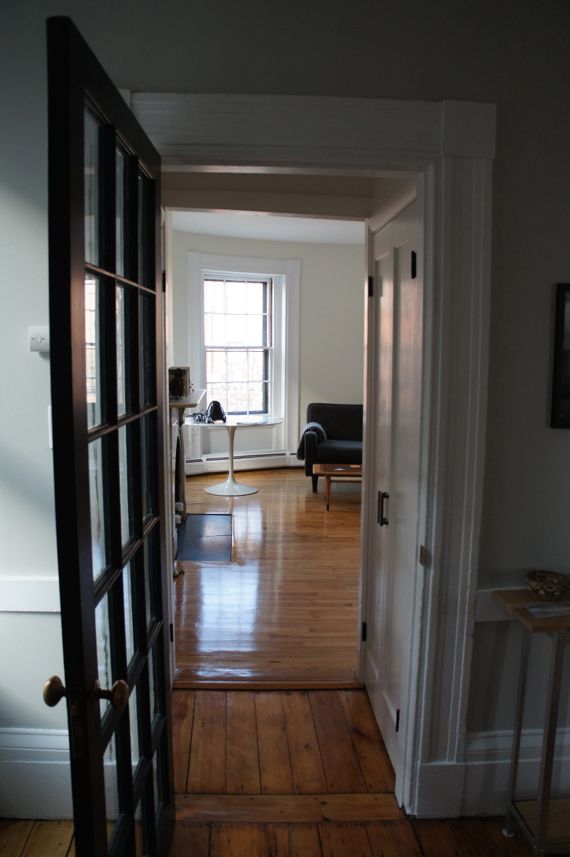
Over the past few months I’ve slowly begun to improve the closets and the hallway. If you read my last post about the living room, you might remember that this hallway – and the entire front room beyond it – was completely sealed off when I first moved in. After the hallway was opened up to the rest of the condo, the first order of business was to find a new door for the doorway between the hallway and the dining room. Since the dining room is located in the middle of the condo, it doesn’t get much natural light. The living room, on the other hand, is one of the brightest rooms in the condo. It made sense to look for a glass-front door that would provide some separation between the rooms while still allowing light from the living room into the dining room.
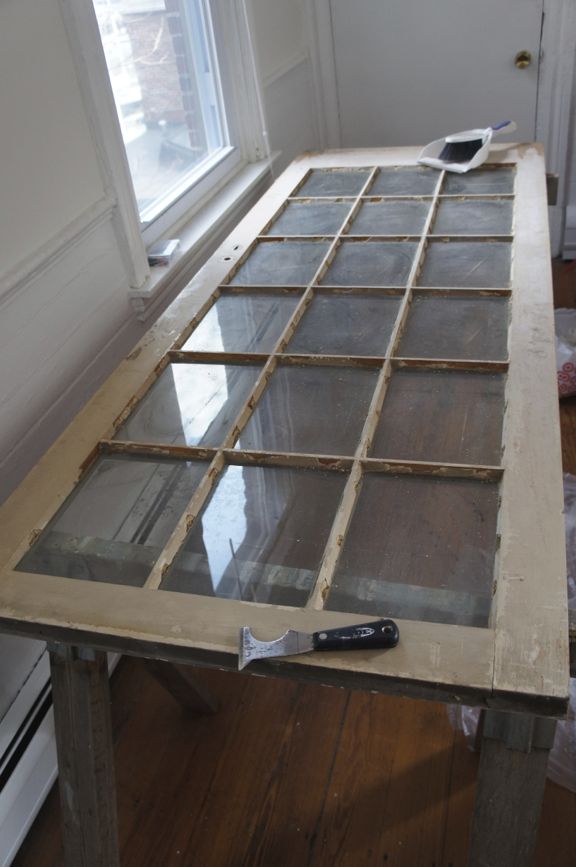
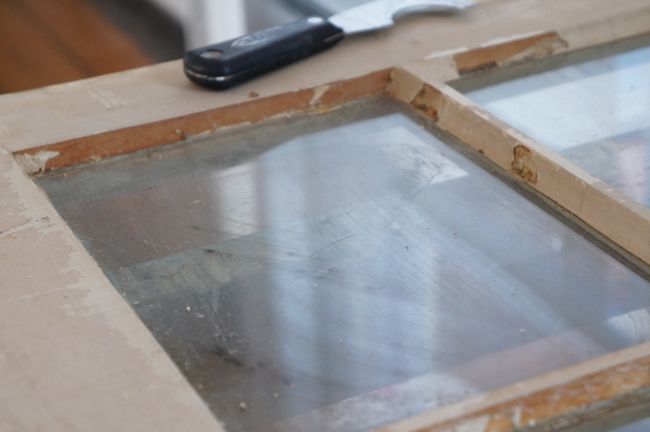
I found an old french door that was almost exactly the right size at an architectural salvage warehouse in New Bedford, MA. It was in decent condition for a salvaged door – all of the glass panes were intact. But the glazing putty around some of the glass had begun to crack and fall out. Once I got the door home, I set to work repairing the glazing. I scraped away all of the loose putty with a stiff putty knife, cleaned away all of the dust and grime, and spot-reglazed the areas of missing putty. Glazing putty takes a few days to cure and can take weeks to fully dry, so I waited about a week before priming and painting the door. Apparently, patience is important here, since painting putty that hasn’t cured provides an opportunity for black mildew to grow on the damp putty, leaving you with a permanently stained, moldy door. Pretty gross. Better to just wait a few days before painting.
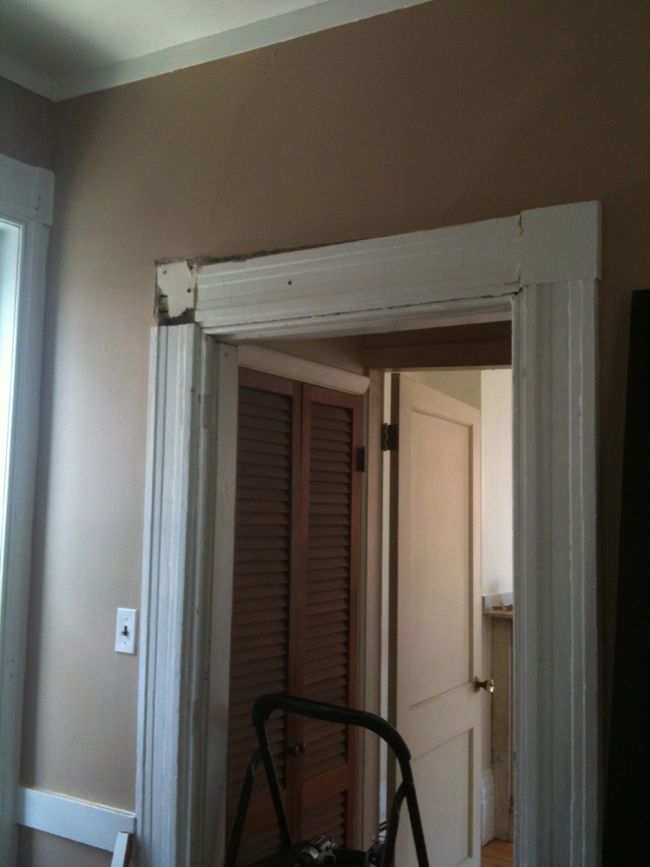
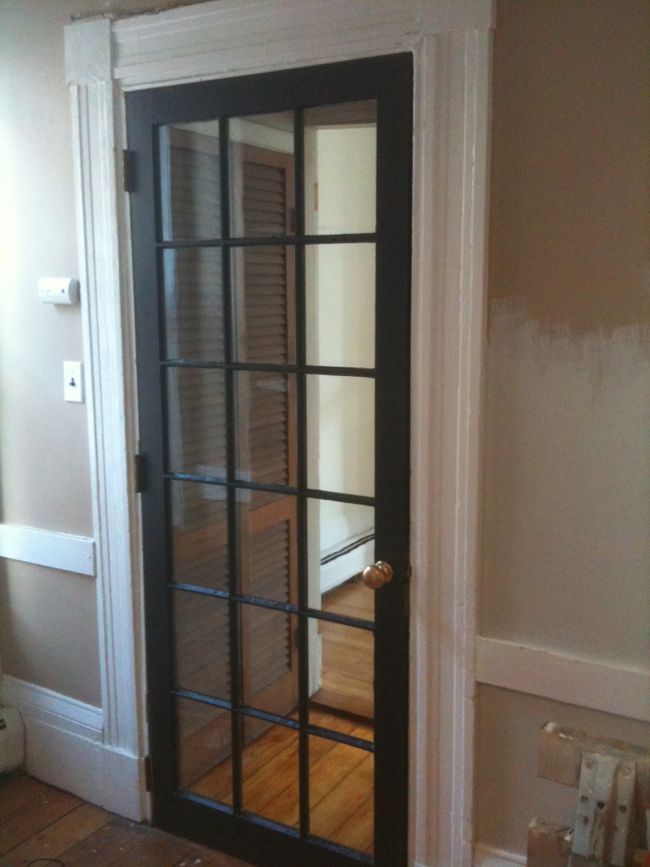
Cleaning, reglazing, and painting the door was tedious, but it was nothing compared to actually hanging the door. The top of the doorframe sloped dramatically downward to one side, creating a wacky, trapezoid-shaped doorway. The whole thing was comically out-of-level, and I wasn’t sure how to go about fitting my rectangular door into such a weirdly-shaped opening. So I called in my contractor, Gregg, to help put the door up. The obvious solution was to cut the door to fit in the trapezoidal opening. But since the door contains square panes of glass, cutting it into a crooked shape would look really strange, like a distorted funhouse door. Instead, Gregg decided to level the doorframe itself.
The crookedness of the doorframe was a result of the two doorjambs being different heights. Gregg used a sawzall to cut a chunk off the top of the higher jamb. Watching Gregg cut into the doorframe was like watching a risky surgical procedure. After removing the corner block from the casing around the door, it took him nearly an hour to cut through the dense, 165-year-old oak framing. He cut the jamb on a diagonal so that the lintel would fit together with the cut end of the jamb. And luckily, once the jamb was cut down to size, it only took a few taps with a rubber mallet to knock the lintel into place.
Once the doorframe was square and level, hanging the door was easy. We trimmed a few inches off the bottom of the door, attached the hinges, and popped the door into place. By the way, a helpful hint if you ever find yourself hanging a door – especially a really heavy, solid wood door: put a pry bar under the door to use as a lever; lift the door by stepping on the end of the pry bar, leaving your hands free to guide the door into place and screw the hinges into the doorjamb.
Before the new door was in place, the living room and dining room felt strangely disjointed, but the new french door really unified the two rooms. Unfortunately, because the door was mostly glass, the louvered closet doors were now on full display from both the living room and dining room. I understand that louvered doors are meant to allow air flow in and out of a closet, but in my experience their primary purpose seems to be dust collection. Having louvered doors on these closets just didn’t make sense. I wasn’t planning to use the closets for anything that would require extensive ventilation and the unfinished louvered doors were kind of an eyesore. They didn’t fit in with the rest of the condo’s architecture.
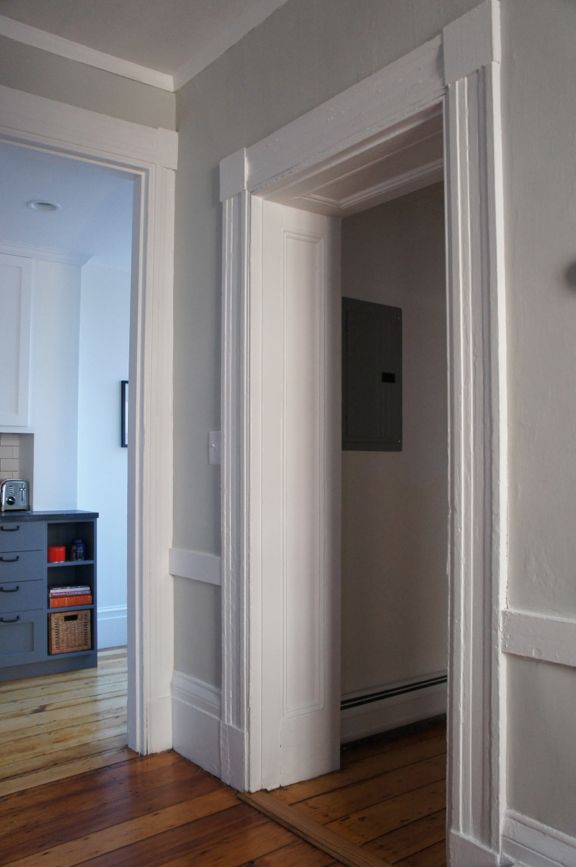
On the opposite side of the dining room, there’s an original doorway that’s surrounded by inset wood paneling.
I wanted to replicate the look of this doorway in the short hallway between the living room and dining room. So I decided to replace the louvered closet doors with single-panel double doors. I looked for salvaged single panel doors, but came up empty handed and ended up ordering two sets of new doors for the closets. The narrow double doors weren’t a stock size, so they had to be special ordered. It took a few weeks for the doors to arrive, but once they were installed, the hallway finally started to look like it belonged in the condo.
After I replaced the closet doors, the hallway needed to be cleaned up and painted. But at this point, I had bigger fish to fry. The kitchen renovation was in full swing and was demanding all of my spare time. So the hallway and closets remained dull and dumpy for weeks – months, really. Until this past week when I finally got around to finishing them. I painted the hallway trim and walls the same bright white as the doors. Eventually I’d like to do something nicer with the trim and casing around the closet doors, but for now, a fresh coat of white paint made the space look clean, finished, and all-around presentable.
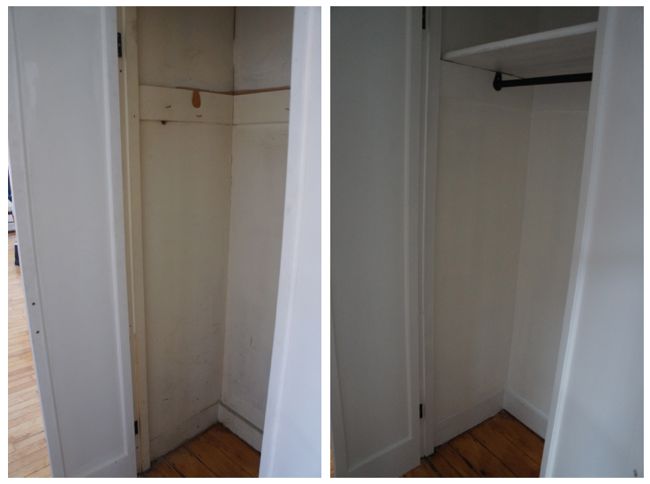
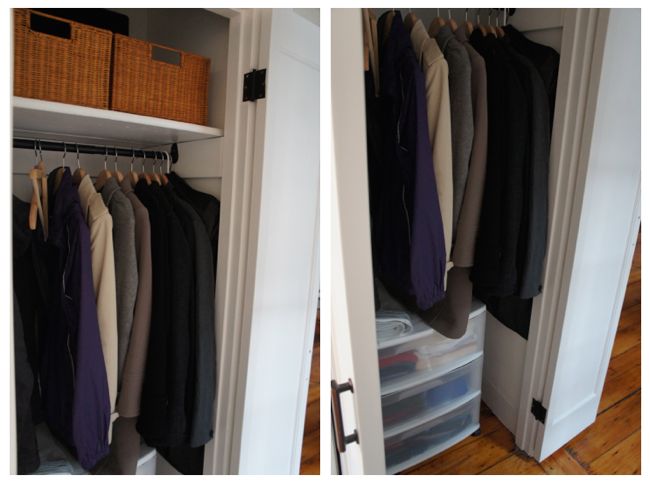
Mara and I decided to make one of the closets a coat closet/seasonal clothes storage closet. But like so many other closets in the condo, the interior of the closet was filthy and unfinished. As it was, I wasn’t comfortable putting a coat anywhere near this closet.
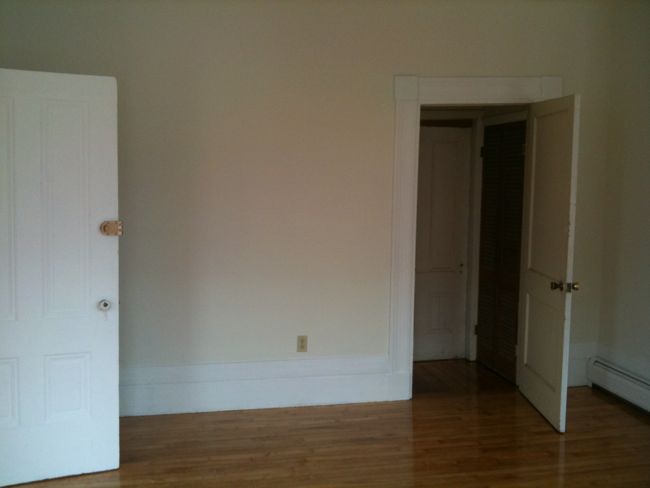
The drywall in the closet was never properly taped and finished, so I spent a few hours last weekend patching, taping, and sanding all of the interior walls. After priming and painting the whole mess, we moved a bunch of coats and winter clothes into the closet, which freed up some valuable space in the bedroom closet. It was hard to get a good picture of the finished coat closet since it’s such a tight space, so here’s two pictures that hopefully tell the whole story.
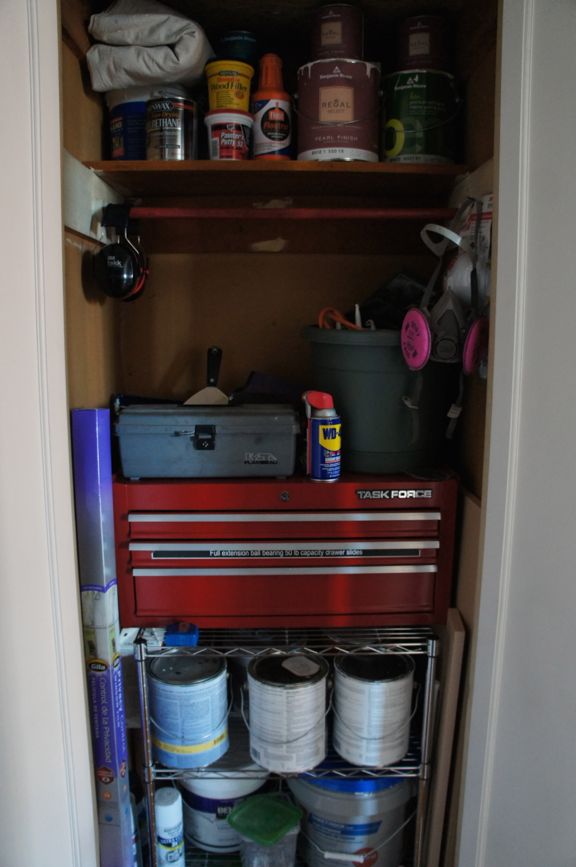
The closet opposite the new coat closet is also a mess of unfinished wallboard and general filth. But I decided to leave it as is for now and continue to use it as an en-suite shed. As I’ve renovated the condo over the past year, I’ve accumulated a ton of tools and assorted construction materials. While the kitchen renovation was ongoing, most of this stuff was spread out across the dining room and living room. But now that I’m making a real effort to make the condo a clean, habitable space, I needed to find a permanent storage solution for the leftover renovation materials. Fortunately, everything just barely fits in the unfinished hallway closet.
Most of the other closets in the condo still need some work. But reclaiming these hallway closets has gone a long way toward getting the condo cleaned up and organized. After living in a dusty construction site for months while we renovated the kitchen, it’s a huge relief to finally have a clean living space. On the other hand, now that all the construction stuff is gone, the condo is looking really empty.


It’s almost mind-blowing how quickly the current Renovation Diary—the one following yours—is going in comparison. But yours was so much fun to watch. This, though! This hallway and glass door probably make as much difference in the architecture as the kitchen did! Alright, the kitchen was a major reno and so gorgeous. But I have to say, I absolutely love this. I want to move in now. 😉
As Alyson said above, it’s interesting how quickly the current reno on renovation diary over on AT in comparison to yours, but her place wasn’t as old as yours, but still quite old (103 years and counting). Then again, she didn’t have nearly the surprises you ended up with so that helps but could have, judging by the state the kitchen was in before renovations. I will have to say though is your reno diary was far more fascinating due to the issues that came up during the renovations.
I’m liking how this one is shaping up as you work on other parts of the house, such as fixing that little hall like space between the dining room and living room for instance. The living room is beginning to take shape and look nice as well, now that all the walls are fixed in it.
One suggestion, if you NEED to use some of the closets in their current sorry state for the time being, buy plastic bins/tubs and store stuff in them to keep them off the dusty/dirty shelves until you can redo them, just a thought. At least this way, you can use your closets for now as you work on projects.
Good luck!
Jennifer’s kitchen renovation at Apartment Therapy does seem to be moving at light speed. It’s been fun to follow since stuff is happening so quickly. I’m actually a little jealous of her timeline. I think the main difference between her reno and mine is that she has a crew of professionals working on the kitchen full-time, which was necessary to speed up the timeline since she had to move out of her apartment for the duration of the renovation.
My impression was that Apartment Therapy, after all the complaining they suffered over the delays in their publishing of Dan’s posts, was planning on posting 3 (Renovation Diaries) entries a week. I think they even accelerated Dan’s last few posts and then eeked out the final reveal. So on Jennifer’s kitchen there would be a week between posts in real time, which means three weeks worth of construction work compressed into one week of Apt Therapy publishing time. But sometimes they only post two entries a week however, which skews the timeline further . All rather confusing and disorganised and no fault of the renovator!
I so appreciate the thoughtfulness you bring to each of your renovation projects. Taking a moment to consider the beautiful inset paneling of the opposite dining room doorway and then choosing to mimic it with the new closet doors. Finding a salvaged french door and restoring it. All of these thoughtful decisions and details make the whole place that more cohesive and lovely. Well done.
Thanks Sara!
Very nice! It’s amazing how those details add up and really let the nice bones of the apartment shine. I like how most of the doors and trim are white and then the one black door, it looks very sophisticated.
I love, love, love your curved windows. So lucky that they remained intact while the room was used for storage.
It’s too bad that the chimneys to your fireplaces can’t be brought up to code to allow them to be used, but they are quite lovely simply as design elements in the space. Did you ever find a fix for the break in the marble around the one in the dining room?
The fireplace in the dining room is bricked up, but the living room fireplace actually still has an open flue and could be made safe and functional with a chimney and flue liner. From what I understand, the liner would need to be installed from the roof down through the chimney, so it would be a pretty expensive undertaking, but maybe someday!
The cracked marble side panel on the dining room fireplace is still cracked. I had a mason take a look at it, and he told me that it wasn’t a structural component of the fireplace. He offered to repair it, but it isn’t all that noticeable, so I decided to hold off on the repair for now.
Good news about the living room fireplace. It’s definately a ‘down the road’ project, but so worth it. I’m going to have to reline the chimney in the bungalow at some point, but it’s not in the budget quite yet. (Central AC comes first. I have a hate for the window units – noisy, energy sucking things!)
Fabulous job on the doors! A note from experience, looking at your “en-suite shed”…if you’re not going to be using the paint or drywall compound for a while, donate it to a ReStore or similar center. Paint cans rust and the rust gets into the paint (it seems to happen no matter how well you try to take care of the top of the can) and drywall compound grows mold. I have an entire can of paint that was extra from my bedroom, it hasn’t been opened since it was colored at the store, but I am having a tough time parting with it, even though I know that should I ever need it again, it won’t be usable by the time I do.
[…] was taken a few months ago, part-way through the kitchen renovation. At this point I had already replaced the door to the living room, and begun painting the […]
The last shot, down the hallway to the Saarinen table, is a really lovely photo.
Thanks! That’s something that I really like about the condo – the views from room to room are really nicely framed.The original architects were thoughtful in the way they laid out the building.