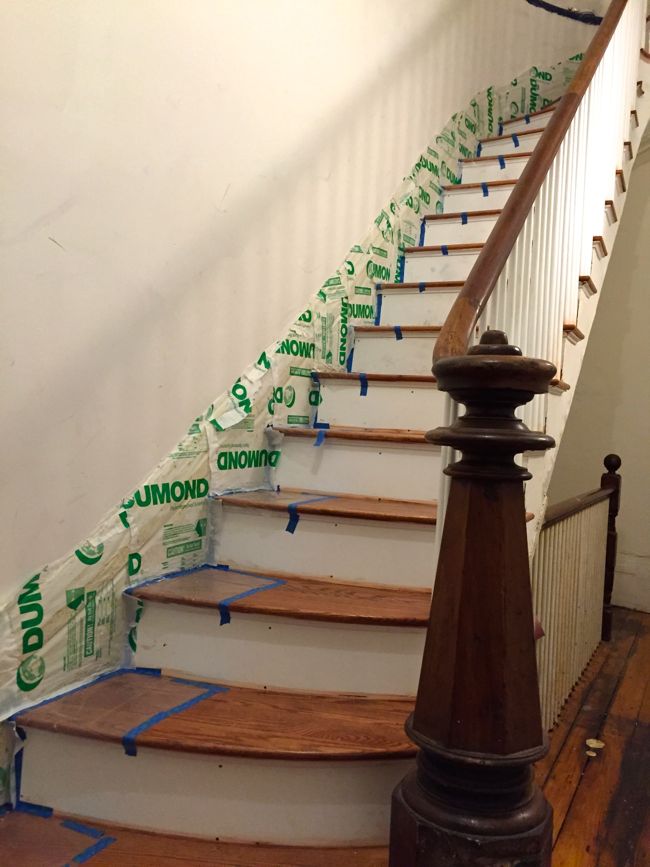
When we left off last time, I had just covered the most visible baseboard in the stairwell – the one that curves along the wall, following the first flight of stairs – in a thick layer of a pH-based paint stripping paste called Peel Away. Two days later, I was scraping the paste off the baseboard, and at first, everything seemed to be going according to plan. The stripping paste had started out with a frosting-like consistency, but after sitting on the baseboard for 48 hours, it had absorbed some of the old paint and begun to dry out and was now the consistency of damp cardboard. When I slid a plastic scraper under the edge of the wax-paper-covered paste, it came away easily, pulling multiple layers of old, softened paint with it. As the first sheet of stripping paste fell away, I peeked behind it, hoping to catch a glimpse of the raw wood baseboard for the first time in nearly 170 years. But instead, I saw a pitted, mottled patch of green-brown paint.
For a moment I wondered whether the baseboard was composed entirely of layer upon layer of old, crusty paint. Maybe I’d never reach the underlying wood. I pushed the thought aside and went back to scraping away the stripping paste. The paste slid off the baseboard easily, but it left behind a slimy, brown residue that needed to be cleaned off. As I rinsed the residue away with clean water and blotted it with paper towels, I noticed a little patch of wood grain, and then another, and another. There was an archipelago of tiny wood grain islands spread across the cleaned section of baseboard where, for whatever reason, the stripper had managed to eat through all of the old paint.
It was reassuring to have broken through to the underlying wood, even if only in a few spots, but it didn’t change the fact that most of the baseboard was still covered in three coats of paint – the same tenacious three coats of paint that I was left with last time, after testing the Peel Away stripper on a small section of baseboard. The Peel Away instructions specified that the stripping paste shouldn’t be left for more than 48 hours, otherwise it might dry out completely, making it nearly impossible to remove. Since I was about to exceed the 48 hour limit, there was only one thing to do: scrape all of the Peel Away paste off the baseboard, and figure out what to do about the left over layers of paint later. A few hours later, all of the stripping paste was gone, and the baseboard looked terrible. From a distance it had a shaggy, almost mossy appearance thanks to the layers of olive green and dark brown paint I’d exposed. It was unappealing to say the least.
I thought about giving up and just painting over those final three coats of old paint, but the surface of the baseboard was pitted and uneven, and after everything it wouldn’t look much different than when I started. No, I’d come this far, I told myself, and I owed it to myself and this baseboard to remove those last few layers of paint and restore the baseboard to its former splendor. I left the baseboard to dry out overnight, and the next day, I covered it in a fresh layer of Peel Away stripping paste.
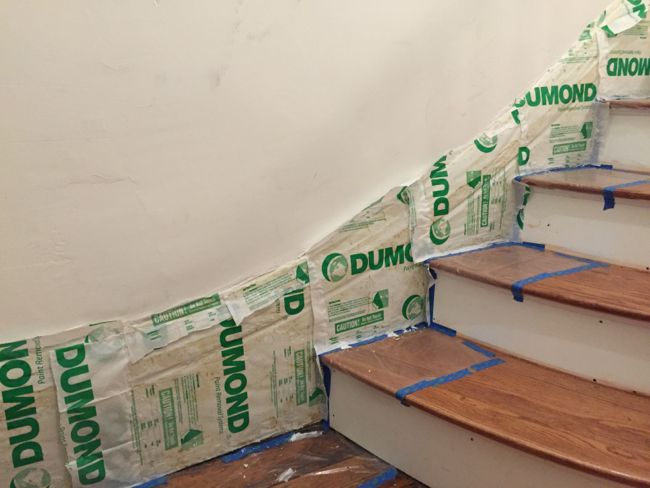
Coating the baseboard in stripper went faster this time. I precut trapezoids of wax paper to fit over each section of baseboard, which sped up the entire process once I began spreading the Peel Away paste. As I worked my way up the stairs, I fell into a rhythm: slather stripping paste over a section of baseboard, smooth a sheet of wax paper over the top, move up a step, and repeat.
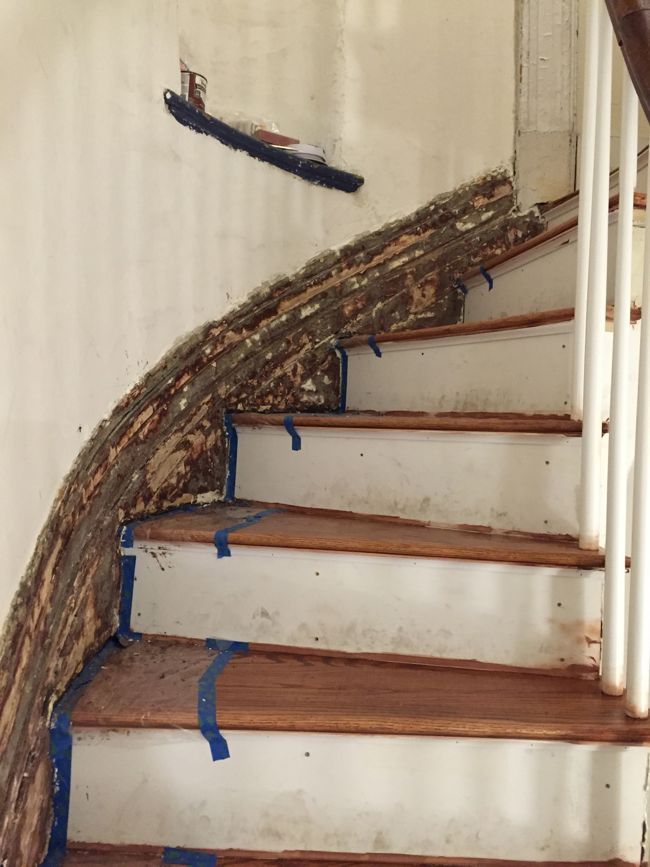
24 hours later, I went back and once again scraped a spongy, homogeneous layer of wax paper, stripping paste, and old paint off the baseboard. This time, I uncovered big expanses of raw wood with just a few stubborn patches of paint left behind. Like the rest of the wood originally used in the building, it was tight-grained yellow pine. And as I uncovered more and more of this antique pine, I thought about how amazing it is that no one had seen the baseboard in this raw, unfinished state since it was installed sometime in the 1840s. I began to imagine the stairwell as it must have been when construction drew to a close almost 170 years ago, with plasterers putting the finishing touches on the walls and crown moulding, and painters adding the first coat of white paint to the trim.
These thoughts were interrupted as I began to notice that the second-to-last coat of paint, a thick dark brown layer, had made a huge mess. Unlike the other layers of paint, it had completely liquefied under the stripping paste, and some of this dark brown liquid had dribbled down the baseboard and pooled along the edge of the stair treads. I’d guess that this dark brown layer was a faux bois, or fake wood grain, treatment dating from the late 1800s when the entire building was renovated and an addition was added off the back. Dark wood trim was in at the time, and those who couldn’t afford hardwood trim often used layers of paint and varnish to create a faux wood finish to cover inexpensive pine trim.
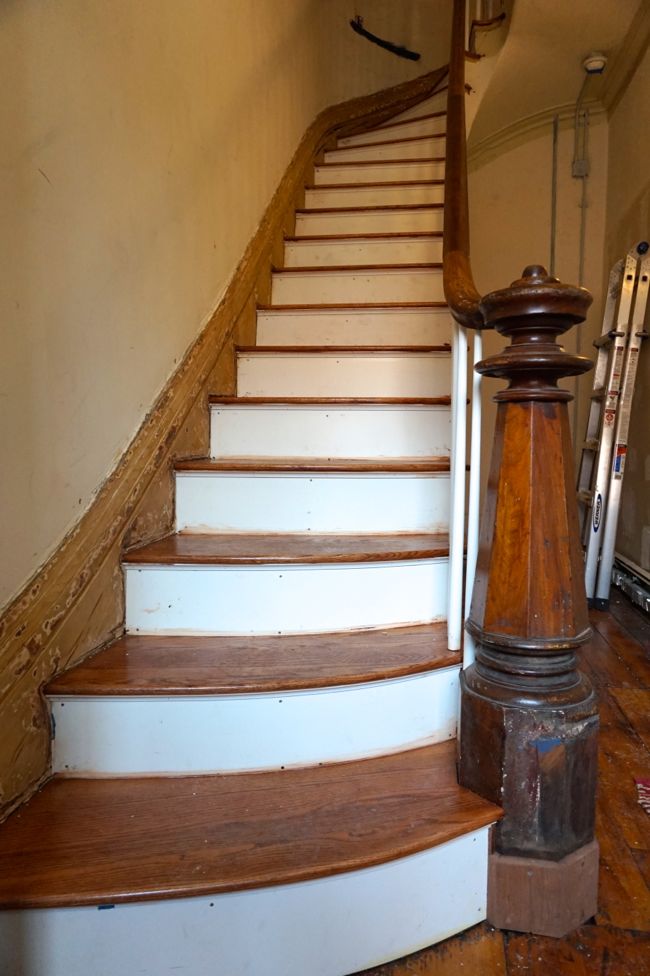
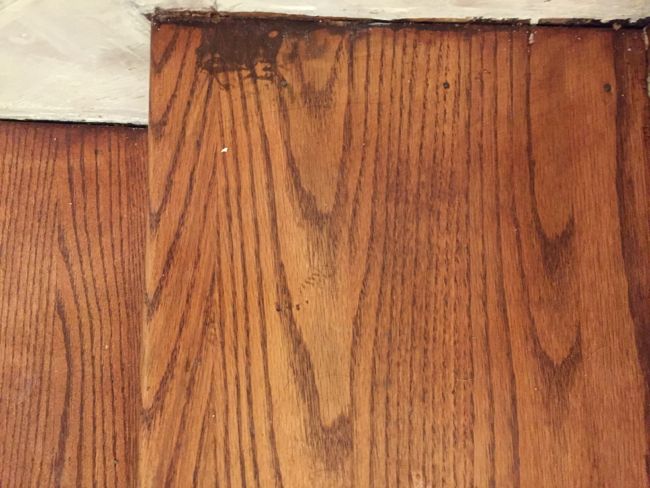
But this faux finish was now a pool of dark brown liquid slowly seeping into my newly finished stair treads. I wished I had stripped the baseboard before finishing the treads, but since I had to coordinate with the neighbors to finish the treads, the timing hadn’t worked out. And now, even though I had taped off the treads with plastic sheets and painters’ tape, some of the dissolved finish had worked its way under the plastic. I wiped it up with paper towels, and most of it came up without any trouble, but in a few spots, it left behind dark brown stains on the treads. The stains are small and aren’t very noticeable, so for now, I’m planning to leave them alone. Here’s a close-up of the biggest stain.
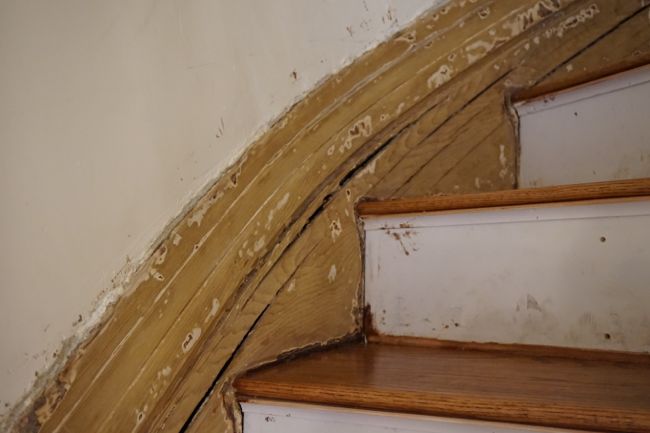
Once all of the stripping paste and paint was gone, I could see that the curved section of the baseboard had split in several places. This part of the baseboard is made up of 1/4-inch thick boards bent into place. These boards may have been installed when the wood was still green, or they may have been steamed before they were installed to make them more flexible. But either way, this wood has been under constant tension ever since, and as it dried out over time, it split and cracked. But these cracks should be easy to hide with some wood filler and paint.
Since Peel Away relies on very high pH to eat through old paint, the stripped baseboard needed to be neutralized before it could be repainted. The next day I dissolved the packet of citric acid that came with the bucket of Peel Away in a water spray bottle and soaked the baseboard with the resulting acidic solution. I waited for the baseboard to dry out and then sprayed it with the citric acid solution a second time for good measure. The Peel Away also came with some handy pH paper, which showed that the baseboard had reached pH 8 – close enough to neutral according to the instructions.
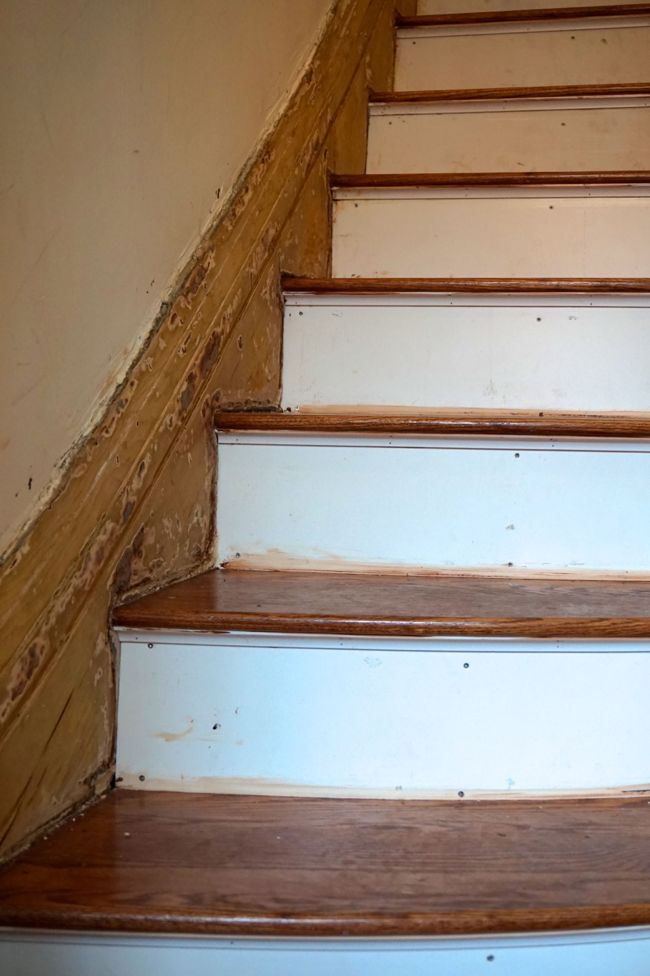
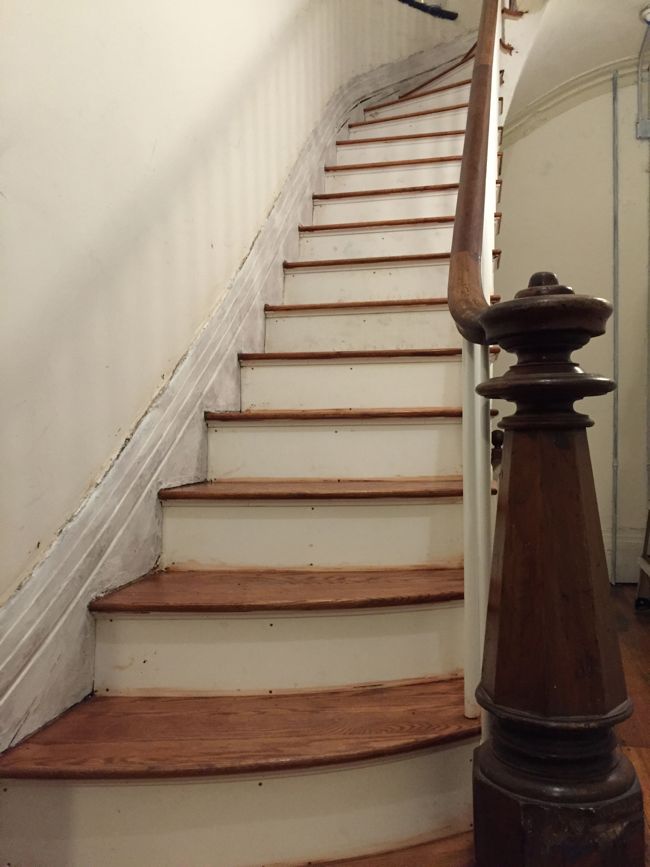
After letting the baseboard dry out overnight, I primed it with Zinnser B-I-N, a shellac primer. Shellac is great at stopping stains and raw wood resin from seeping through a top coat of paint. I’m not sure that there’s much resin left in the pine baseboard after 165 years, but better safe than sorry. (Fun fact: shellac is made of lac bug secretions that are scraped off the tree branches where the bugs live and dissolved in ethanol to make primer, which helps to explain why shellac primer costs twice as much as other primers.) Next up, wood filler, caulk, and finally, paint.
The experience of stripping paint was messy and frustrating, but at the same time it was some of the most satisfying work I’ve done in the stairwell. I’m left with mixed feelings. I simultaneously never want to strip paint again, and want to strip all of the trim in the entire building.

Oh, my, what a huge job this is! But now that you have primed with BIN, it is obvious how lovely those baseboards will look. You are tenacious, indeed!
It was fascinating to me to see the original close-grain pine exposed and to imagine workers scurrying about 170 years ago. That reminded me of an inn we stayed in close to Philadelphia that was well over 225 years old. I noticed in the dining room there was a simple stair tread, framed in a glass case, hanging on the wall. On the stair tread was a large signature in chalk. When the old stairs were rebuilt quite recently, they pulled up this old tread and discovered this chalk signature underneath it. The carpenter had left his “John Hancock” for posterity, and it was carefully preserved!
It’s always really cool to hear stories about people finding hidden messages from the past while renovating old homes. Unfortunately we didn’t come across any hidden notes while working on the stairs. I read somewhere that architectural plans or the original deed were sometimes hidden in the newel posts of old homes, so I had high hopes when we removed the newel post, but it turned out to be empty.
Thank you for your persistence and for the update. Well done!
That pic of the green and brown paint looks pretty scary … but once you’re into the process that far, there’s only one way out, right? Did you sand off the final little bits of paint? Amazing photo of the cracks. Imagine being forced into that position for 170 years! Wouldn’t it be great to time travel and see how those long-ago craftsmen created this stairwell? Kudos to you for your perseverance!
I decided to leave the final, stubborn bits of paint alone. Since they’re almost certainly lead-based, I didn’t want to scrape or sand them. And even with just a thin coat of primer, the left over bits of paint are pretty well disguised.
gosh all that work! just curious why you didnt stain and leave the basebord as wood instead of covering with paint?
‘baseboard’
There are a few reasons why we decided to paint the baseboard. The practical reason for painting was that the curved section of the baseboard was cracked in several places, and if the baseboard is ultimately painted, it’s easy to disguise these cracks with wood filler. If we stained the baseboard, we’d either have to leave the cracks exposed, or figure out how to repair them.
We also decided to paint for aesthetic reasons – the rest of the trim in the building is white, and since I probably won’t end up stripping all of it, a single stained baseboard might look out of place. Plus, it looks like the baseboard was originally painted white, and since white trim is a hallmark of Greek Revival architecture, a white baseboard will look right at home in the building.
I thought I’d see how you were getting on – I haven’t visited in a while. What an enormous task! But it’s looking amazing. I was just looking at my stair’s skirting board (uk name) yesterday and thinking that in all the houses I’ve lived in there always ends up being a big crack between it and the wall. You get a perfectly painted skirting board /wall and a short while later cracks appear. I wonder how it can be prevented -paint in the winter when things are shrunken? Load the stairs with weights when painting? Or is it unavoidable? Anyway I am always amazed at your thoroughness and attention to detail. Also I showed my science loving 10 yr old the element party video and he thought it was great.
Depending how big the crack is, I’d probably fill it with a flexible acrylic/latex caulk before painting. If the crack is wider than half a centimeter or so, you could try filling it with wood filler — Abatron makes some good wood filler, although I’m not sure if it’s available in the UK. Either way, I think you’re on the right track with your idea to paint in the winter when the wood is dried out and at its most shrunken. Good luck! (And I’m glad you and your son enjoyed the element party video — it’s an entertaining intro to the elements, but I especially like it because it highlights how the elements react with one another and form compounds.)
Come back!!!!!!!!
^What she said!!!
Sorry for the hiatus! It’s been a busy couple of weeks and I haven’t been able to devote much time to working on the stairwell. But look out for an update in the next week or so!
woo hoo! we’ll be here.
Woot! It’s looking really good. I have a stairwell (and several cabinets) worth of lead paint to strip and now I know what to use.