When I decided to install a built-in hutch in the living room, I only had a few goals for the project – first and foremost, I wanted a spot to hang the tv without having to deal with a bunch of cables running down the wall; I figured some extra storage space and a few shelves for books would be nice; and finally, I didn’t want the new cabinetry to look completely out-of-place in the room. But now that it’s installed and nearly finished, I think it’s safe to say that the new built-in has exceeded these modest goals.
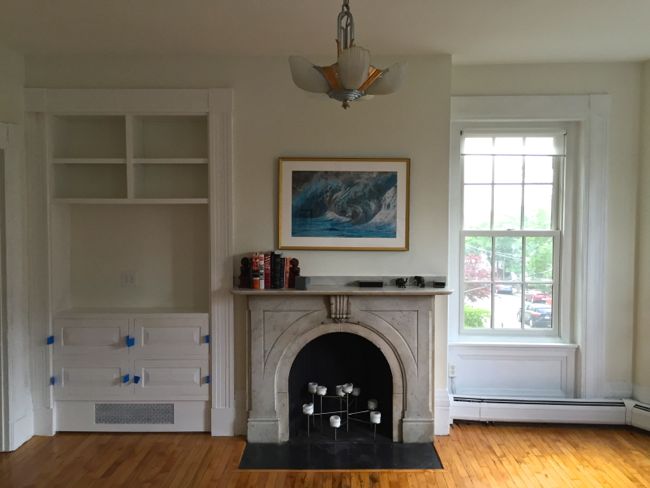
A few weeks ago, the corner of the living room next to the fireplace was dark, barren, and made all-but unusable by an awkwardly situated baseboard radiator. We mounted the tv in this corner, but the mess of cables running down the wall and a general sense of emptiness left this part of the room looking unfinished.
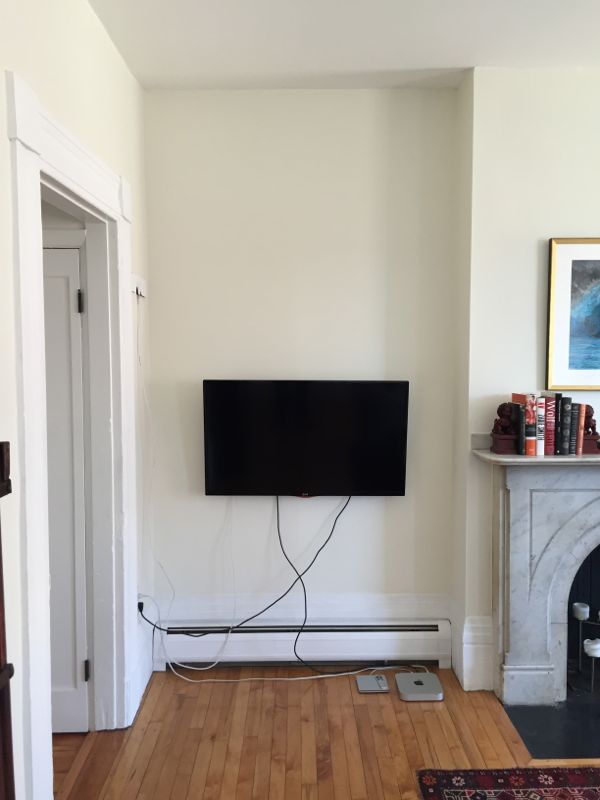
You might notice in the picture above that all of the power cables are plugged into an outlet on the left wall. We quickly realized that a built-in cabinet would make it difficult to run power cables to this outlet. So I asked my electrician to add a new outlet directly behind the tv. He ran new wiring from the old outlet, around the corner, and up to the center of the wall, a process that involved cutting a pretty big chunk of plaster out of the corner of the wall. But no big deal, I knew this corner would soon be covered up by the new built-in.
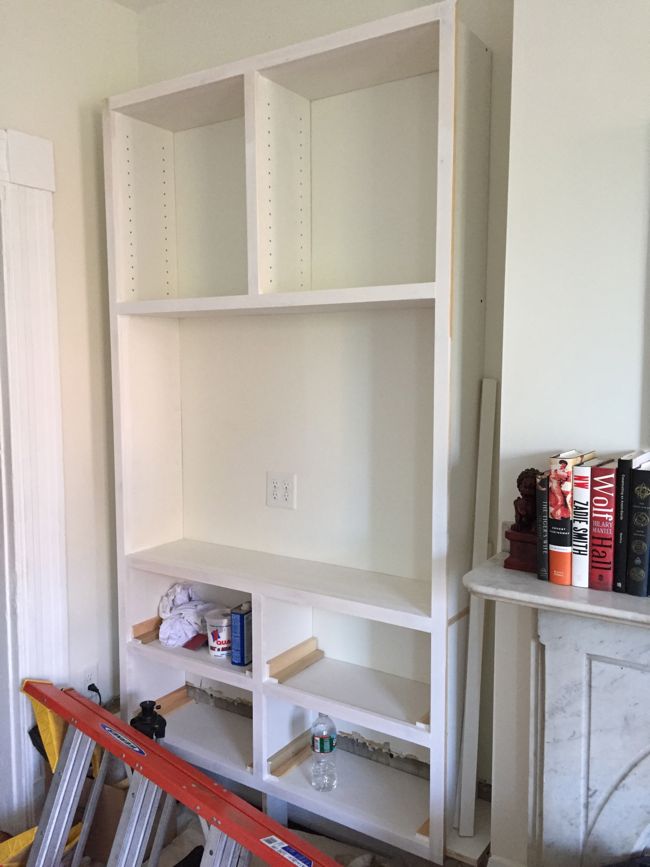
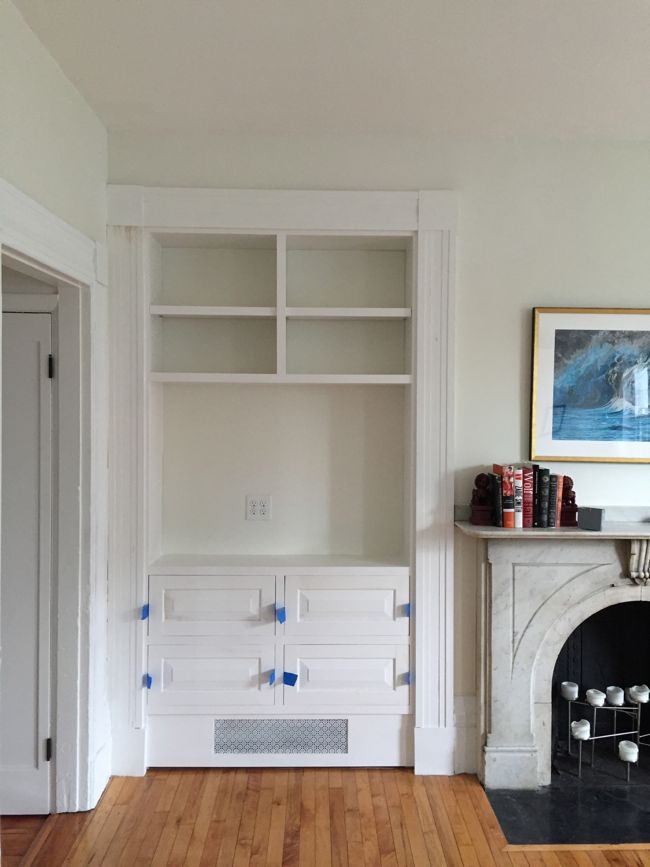
Over the past month or so, Brandon, the owner of Grain Woodshop here in East Boston, constructed and installed the built-in. He built the hutch in his shop in three pieces – a lower, four-drawer unit, an open space for the tv, and an upper shelving unit. He securely attached these three pieces to the wall using some carpentry wizardry, somehow insuring that everything was straight and level and really solid, despite the walls being uneven and not-so-solid. Here’s the cabinet carcass after the first day of installation work. (“cabinet carcass,” by the way, is an unappealing name for the cabinet box and frame; although the name might conjure images of a freshly killed and skinned cabinet, carcass construction is actually one of the first steps on the way to building a living, breathing, finished cabinet.)
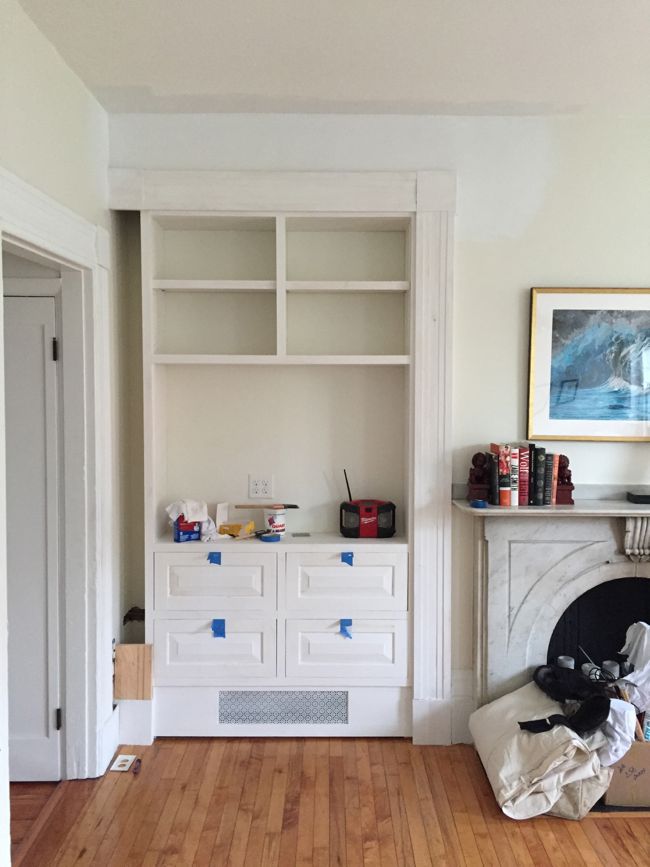
I decided that I didn’t want the shelving to go all the way to the ceiling for reasons both practical (I wouldn’t be able to reach the upper shelves) and aesthetic (a lower height would keep the built-in in line with the heights of the room’s windows). So next, Brandon filled in the gap between the top of the hutch and the ceiling with a piece of sheetrock.

And I taped and mudded the sheetrock so that it blends in seamlessly with the surrounding walls. Here it is after one coat of primer.

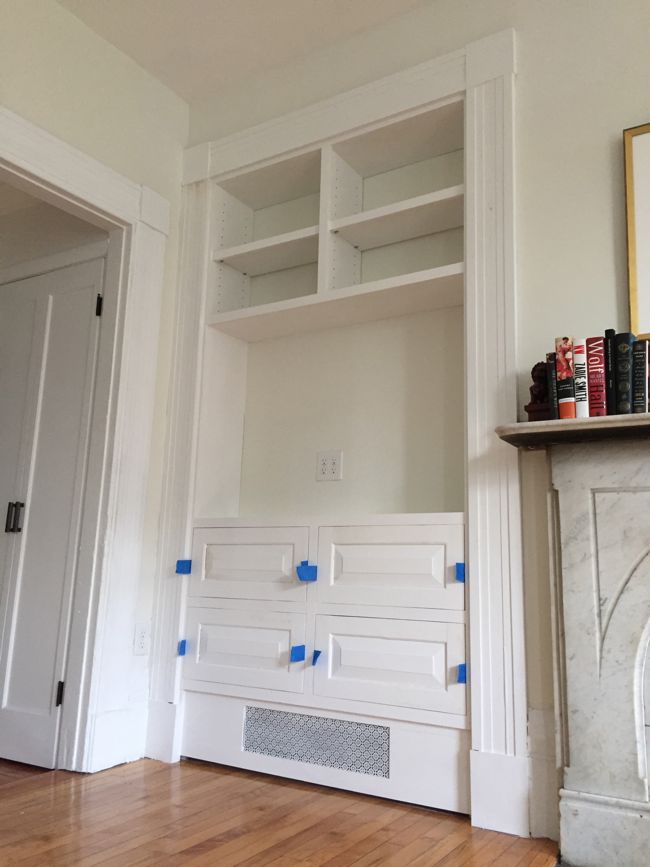
Next Brandon added the drawer fronts, and began installing the trim. He added a baseboard with a heating register grill set into it to allow heat from the radiator, which by this point was buried under the cabinet, to escape. Brandon custom milled casing for the built-in to match the original casing that surrounds the room’s doors and windows. But as he was installing the casing, we ran into a problem.

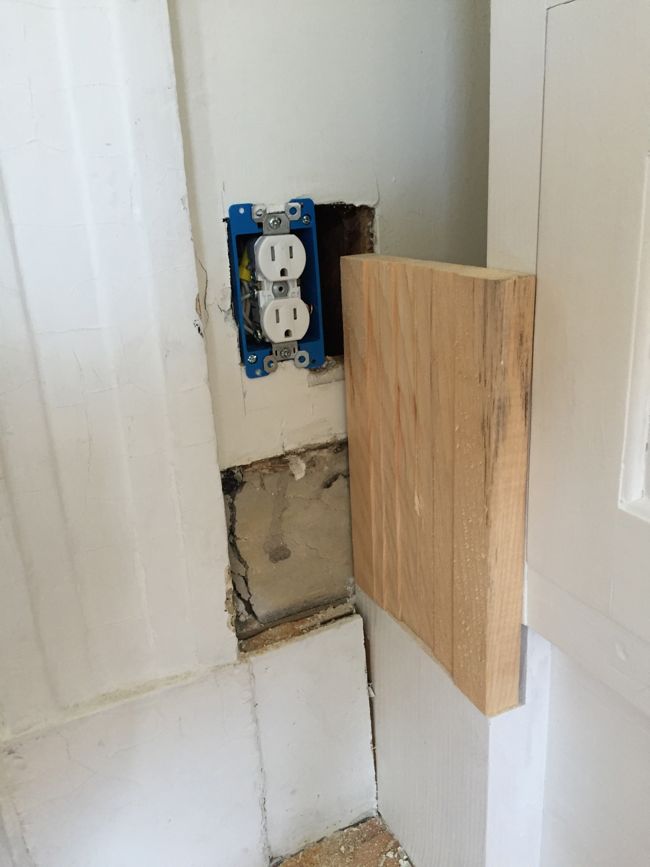
As you can see, the old outlet was in the way of the new casing. After consulting with my electrician, I decided that the best solution was to move the old outlet two inches to the left so that it would just clear the casing. Although I’d never done it before, moving the outlet wasn’t all that difficult. I turned off power to the circuit at the breaker box, removed the old outlet and pulled the wiring out of the electrical box. Then I cut out a section of plaster, added a new electrical box, and rewired the outlet. Since there’s no stud next to the new outlet, I had to use a “remodeling electrical box” which is designed to clamp onto the wall without the need for a stud.
 And here’s the new outlet after I patched and painted the surrounding wall.
 This past week, with the outlet out of the way, Brandon finished installing the trim and put a coat of paint on everything. The hutch isn’t completely finished – it needs another coat of paint, the drawer glides aren’t finished, and the drawers need pulls – but the bulk of the work is done, and it looks great. The whole room actually feels more balanced than it did without the built-in. The casing around the hutch reflects the size and proportions of the casing around the room’s windows, bringing some symmetry to the fireplace wall.
There have been a few other changes in the living room over the past few months, so look out for a living room update at some point when the built-in is finished.
As usual, Dan is the man! It looks so great!
Love these updates! I am also keen to see how the entryway turns out!
I’ll be back soon with a stairwell/entryway update!
I love how this turned out. Your thoughtfulness and attention to detail made a huge impact on this project. Once again, well done!
That space has been looking for this very cabinet its whole life. Beautifully done, as always!
It looks fantastic – as if it had always been there! great job!
Looks good. Do you have any plans to remove the baseboard heaters?
The baseboard radiators can be annoying when laying out furniture, but we don’t have any plans to get rid of them. A new heating system would be very expensive, and in a house of this age there aren’t really a lot of other options. Since the house wasn’t built with central heat in mind, there’s no room to install forced air heating/ac ducts without gutting the building.
Pow! Third pic from the bottom, the chandelier looks amazing with this new framing. I have thoughts about art for over the fireplace, if you’re interested ☺️
Thanks Joanna. We’ll probably stick with the seascape print above the fireplace for the time being, but I’d love to hear what artwork you have in mind anyway – I’m curious!
I do like the print but I think the frame is fighting with everything else. I was thinking a 3’tall by 2’wide canvas with no frame. Something with a simple but bright spot of color. if it were mine I would have an artsy friend paint for me, a single flower in a spring sort of blue with some gray to echo the cabinets across the room. Some light greenery behind, with the ground similar to the wall color.
Wow, if we hadn’t seen the ‘in progress’ pictures, I’d swear that was original to the apartment! You find the best contractors!
Thanks, that’s good to hear! My hope was that no one would pick out the cabinet as an out-of-place, modern addition to the room, even if it doesn’t look completely original on closer inspection.
I am a new reader, having recently discovered your kitchen renovation on Apt Therapy. It is a pleasure to read about your renovations in this historical home. Your kitchen is truly stunning, and I am fascinated by the stairwell redo. Also, you are a wonderful writer!
Thanks Isabella, and welcome!
Always love seeing what you are up to. You are so inspiring. This was such a cool idea and the outcome is beautiful. Only problem now is that it looks so good, it might be a distraction when watching TV!
Thanks Sherri, we just mounted the tv today, and I think it’s safe to say that I’d rather be distracted by the cabinetry while watching tv than a bunch of cables hanging down the wall!