When we left off last time, I was agonizing over paint colors for my building’s front door, but I hadn’t actually made any progress toward painting the door. (Thanks, by the way, to all of you who offered color suggestions – I still haven’t bought paint, so you’ll have to wait for another post to see what color(s) I end up choosing.) This past week I finally started in on the long list of prep work that needs to be done before I can actually paint the door.
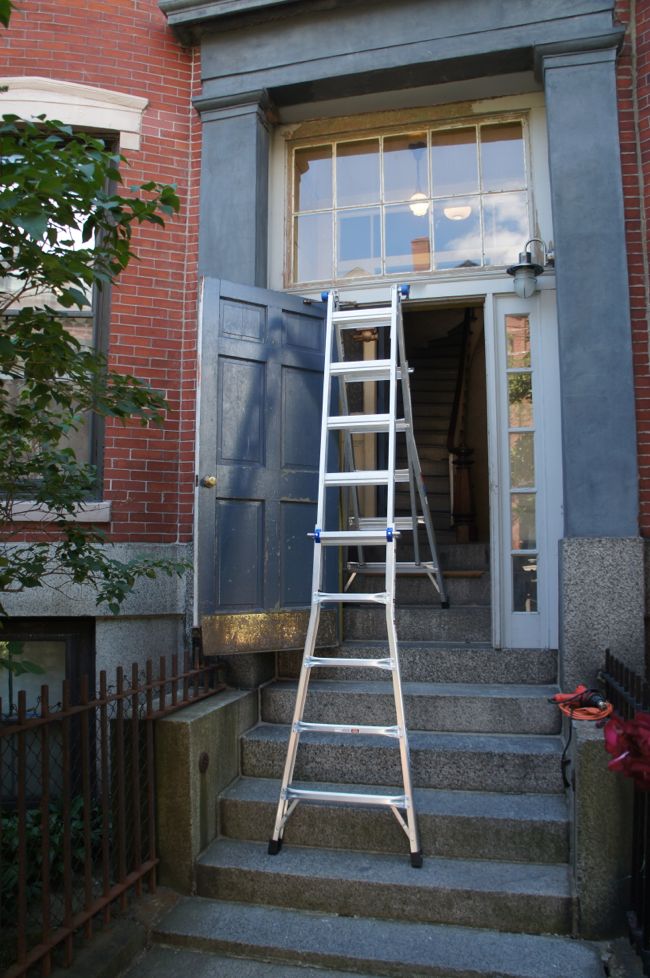
I decided to work from the top of the entryway down, so the first order of business was reglazing the transom window above the door. The window sits about 12 feet above the front steps, making it completely inaccessible with the short step ladder we had on hand. I ended up buying a new, 22-foot multi-position ladder to reach the window. Each side of the ladder can be adjusted independently, allowing it to be safely positioned on the steps. With all of the tall ceilings and narrow staircases in my building, I have a feeling this ladder will be getting some serious use even after this front door project is finished.
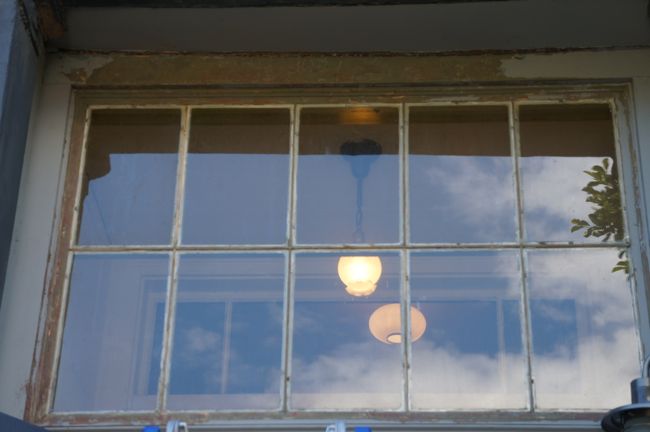
When I finally got an up-close look at the transom window, I found that it was a mess of cracked, crumbling, and missing glazing putty. Up until a few months ago when I reglazed a salvaged french door, I had no idea what glazing putty was. It turns out it’s an oil-based putty with the consistency of bread dough that was used to secure and seal panes of glass to the frames of old divided light windows. It’s no longer used on modern windows, most of which are not true divided light windows with separate glass panes. As glazing putty dries out over time, it can crack and flake away from the window, providing an opportunity for water to seep into the frame and rot the window. So every few years the putty needs to be replaced. And the putty on the transom window over the front door was long overdue for replacement.
The putty was in such bad shape that I was able to remove most of it by gently scraping it away from the window panes with a putty knife. I was worried about cracking the glass, so I was careful not to get too vigorous with my scraping. I removed the last, stubborn bits of old putty with a heat gun – the heat softened the putty to the point where I could easily scrape it off the window. If you ever find yourself reglazing a window, it’s technically possible to leave some of the old putty behind so long as it’s securely attached to the window, but it’s easier to apply the new putty without any of the old putty in the way. As I scraped away the old putty, I uncovered the glazing points – little metal triangles stuck into the wooden dividers around the window panes that act as clips to hold the glass in place. I made sure to keep all of the glazing points in place to prevent the glass from falling out of the window while I worked. Once I’d removed the putty and scraped away some of the surrounding loose paint, I was left with this:
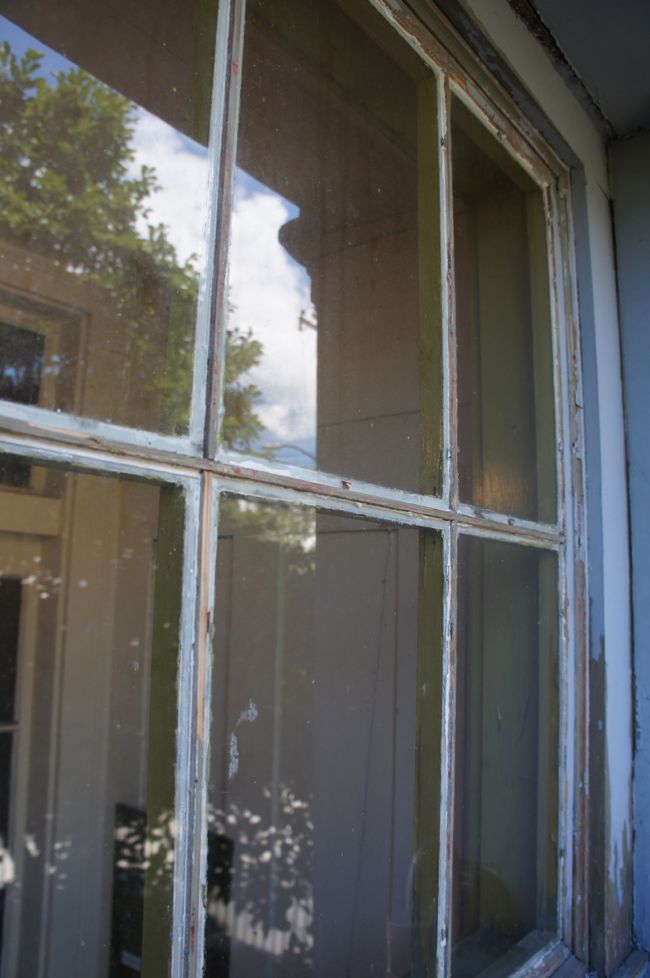
There seems to be some disagreement about whether it’s necessary to prime the exposed wood dividers before reglazing the window, but I figured it couldn’t hurt. So I taped off the windows and primed the dividers with an oil-based primer (this is important since the putty is also oil based). Once the primer was dry, I finally got down to the business of actually glazing the window. Most guides to glazing windows suggest removing the window from its frame and glazing it on a horizontal surface. That wasn’t really an option here since the transom window is built-in. So I glazed the window in place, which wasn’t so bad, although standing on a ladder working with my hands over my head for a few hours turned out to be exhausting.
Glazing technique is pretty straightforward, but it takes some practice to get the hang of it. I worked on one side of a pane at a time, packing the glazing putty into the corners between the glass and the wood divider with a putty knife. Then I ran the putty knife along the edge of the divider, removing excess putty and creating a sloped edge. The putty is forgiving – it can be smoothed out with a finger, or scraped out and reapplied if it becomes mangled beyond repair. Here’s the window after I finished glazing around all 10 of the panes:
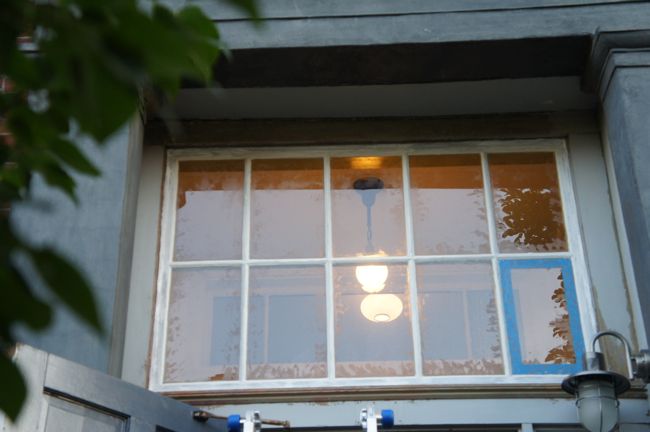

Once the putty has dried, I’ll clean off the oily residue on the windows left behind by the putty (the smudges in the pictures above). The instructions on the glazing putty suggest waiting 7 to 14 days for the putty to dry before priming and painting, but if the hot, swampy weather we’ve had in Boston for the past few days keeps up, it’ll probably be at least two weeks before the putty has dried enough to be painted. In the meantime, I’ll continue scraping the loose paint off of the door and surrounding trim.
I’m so glad to see someone else who knows how to use putty. I had the original windows in my house for years after we bought it and would re-putty a few of them every season. It actually a “zen” type job if you can work on them horizontally. I feel for your shoulders having to work vertically.
Well done!
I also noticed that once you get into it, glazing is one of those jobs that is strangely meditative. Although I would recommend taking the window out of the frame and glazing it on some saw horses whenever possible!
I love how thoroughly you work your projects. I hope that the neighborhood appreciates you as much as we do.
I have one of those ladders and love it. Folds down small enough to slip in beside my freezer and I can carry it around by myself – heavy, but do-able.
That window already ready looks better, primer and smudges notwithstanding.
I hope the other owners appreciate all the work you are doing! You should get a rebate on your HOA dues or assessments!!
Hi Dan, I love what you are doing to your home. Gregg and I both enjoyed our five years there, with many ideas of how to restore all the lovely details that are busting at the seams. I too was very intrigued by the history of the home, which led me to a local Italian man who shared many stories of his younger years, in our actual apartment on the first floor. 177 was once the ‘Goodwill House’, I had the honor of having the 80 something year old, East Boston native, over to chat in my former living room, where he once did the ‘jitterbug dance’. He said the piano was located right in the front room off the entry, he had much to say of how our home was a great place to go dance the worries of the world away. I found this blog entry, off the Goodwill site, some years ago… you will enjoy it as much as I did, I am sure. http://www.goodwillnne.org/blogs/annettes-story/
Hey Cait, thanks for sharing this! I remember Gregg telling me a little about this a while ago. He thought our place and the building next door might have been connected back when it was the Goodwill House? Anyway I’m sure that part of the building’s history is one of the reasons it has such good vibes. I also found an old Boston Globe article mixed in with the online permit records for the building about some artists that lived in the building in the 60s. Apparently when they moved in the building had been abandoned for years. When I get a chance I’d like to get over to the library to see if I can find some old photos of the building.
Hi,
Just came across your blog for the first time after reading another renovation article in the Globe online and linking it to your blog. Your front entry way looks fantastic and I certainly appreciate all the time and effort a job well done takes. My wife and I (and my kids occasionally) have been renovating, remodeling and restoring our 1924 bungalow in Central Mass and it is a major effort. It is frustrating times, but rewarding when certain small projects are completed.
I have one basic question for you: Do you know why your entry door opens in an outward manner? Your pic seems to show door hinges visible on the left side of the door. If that is the case, then your door opens outward. That is very very unusual to the best of my knowledge. There may be a reason for that. Do you happen to know why that is?
Thanks and keep up the good work.
You’re right, the exterior door opens outward. There’s another door inside the vestibule that opens into the main stairwell, and it swings inward. At least in this case, I think that these doors open in the direction they do for practical reasons. The outer door needs to open outwards, otherwise it would hit the granite step behind it (see the first picture in this post). And if the inner door opened outward into the vestibule, which is a tight space, it would make it difficult to maneuver around the door to get into the building. In a more general sense, at least in commercial buildings, exterior doors usually open outward to make egress in an emergency safer and easier.